Difference between revisions of "Portal:New Genesis/Trainia Advance Quests"
| (35 intermediate revisions by 4 users not shown) | |||
| Line 16: | Line 16: | ||
|[[File:NGSCannonballRumble.png|center|200px]] | |[[File:NGSCannonballRumble.png|center|200px]] | ||
|[[File:NGSCannonballStrike.png|center|200px]] | |[[File:NGSCannonballStrike.png|center|200px]] | ||
| + | |[[File:NGSOrdinalTower.png|center|200px]] | ||
|- | |- | ||
|align="center"|'''Central Kvaris'''<br>''Cannonball Rumble'' | |align="center"|'''Central Kvaris'''<br>''Cannonball Rumble'' | ||
|align="center"|'''South Kvaris'''<br>''Cannonball Strike'' | |align="center"|'''South Kvaris'''<br>''Cannonball Strike'' | ||
| + | |align="center"|'''South Aelio'''<br>''Ordinal Tower'' | ||
|- | |- | ||
|} | |} | ||
| Line 45: | Line 47: | ||
! Party Limit !! Enemy Level !! Recommended Power !! Clear Condition !! Accept Condition !! Fail Condition | ! Party Limit !! Enemy Level !! Recommended Power !! Clear Condition !! Accept Condition !! Fail Condition | ||
|- | |- | ||
| − | | 4 || Lv. | + | | 4 || Lv.51 || 2,251 || Defeat the enemies and destroy the targets || None || None |
|} | |} | ||
| Line 72: | Line 74: | ||
* {{icons|NGS Unit}} [[Silver Primm Armor]] | * {{icons|NGS Unit}} [[Silver Primm Armor]] | ||
| | | | ||
| − | * {{ | + | * {{NGS Augs|Super Might I}} |
| − | * {{ | + | * {{NGS Augs|Super Precision I}} |
| − | * {{ | + | * {{NGS Augs|Super Technique I}} |
| − | * {{ | + | * {{NGS Augs|Super Spimel I}} |
| − | * {{ | + | * {{NGS Augs|Super Spira I}} |
| − | * {{ | + | * {{NGS Augs|Super Spitech I}} |
| − | * {{ | + | * {{NGS Augs|Super Stamel I}} |
| − | * {{ | + | * {{NGS Augs|Super Stara I}} |
| − | * {{ | + | * {{NGS Augs|Super Statech I}} |
| − | * {{ | + | * {{NGS AugsExt|Decold Standard|I|III}} |
|- | |- | ||
| align=center style="width:50%;" | {{icons|NGS Material}} Materials | | align=center style="width:50%;" | {{icons|NGS Material}} Materials | ||
| Line 100: | Line 102: | ||
* {{icons|NGS Tool}} [[Portal:New_Genesis/Materials|Strugment B]] | * {{icons|NGS Tool}} [[Portal:New_Genesis/Materials|Strugment B]] | ||
* {{icons|NGS Tool}} [[Portal:New_Genesis/Materials|Strugment C]] | * {{icons|NGS Tool}} [[Portal:New_Genesis/Materials|Strugment C]] | ||
| − | | | + | | |
| + | * {{icons|Weapon Camo}} [[Weapon_Camos|* Yasminokov 9000M]] | ||
|- | |- | ||
!colspan="4" | Additional Information | !colspan="4" | Additional Information | ||
| Line 109: | Line 112: | ||
== Cannonball Strike == | == Cannonball Strike == | ||
| + | |||
| + | ===Ranking Details=== | ||
| + | {| class="wikitable sortable table-bordered table-responsive-md" | ||
| + | !Rank | ||
| + | !Score Required | ||
| + | |- | ||
| + | |S Rank | ||
| + | | Reach Wave 3 & Score > 2,239 | ||
| + | |- | ||
| + | |A Rank | ||
| + | | Score > 1,493 | ||
| + | |- | ||
| + | |B Rank | ||
| + | | Score > 746 | ||
| + | |- | ||
| + | |} | ||
=== Quest Details === | === Quest Details === | ||
| Line 131: | Line 150: | ||
=== Challenge Settings === | === Challenge Settings === | ||
| − | |||
| − | |||
| − | |||
| − | |||
| − | |||
| − | |||
| − | |||
| − | |||
| − | |||
| − | |||
| − | |||
| − | |||
| − | |||
| − | |||
| − | |||
| − | |||
| − | |||
| − | |||
| − | |||
| − | |||
| − | |||
| − | |||
| − | |||
| − | |||
| − | |||
| − | |||
| − | |||
| − | |||
| − | |||
| − | |||
| − | |||
| − | |||
| − | |||
| − | |||
| − | |||
| − | |||
| − | |||
| − | |||
| − | |||
| − | |||
| − | |||
| − | |||
| − | |||
| − | |||
| − | |||
| − | |||
| − | |||
| − | |||
{| class="wikitable sortable table-bordered table-responsive-md" style="width: 80%;" | {| class="wikitable sortable table-bordered table-responsive-md" style="width: 80%;" | ||
! colspan="3" | {{icons|NGS Enemy ATK Boost}} Enemy Attack | ! colspan="3" | {{icons|NGS Enemy ATK Boost}} Enemy Attack | ||
| Line 293: | Line 264: | ||
* {{icons|NGS Unit}} [[Silver Primm Armor]] | * {{icons|NGS Unit}} [[Silver Primm Armor]] | ||
| | | | ||
| − | * {{ | + | * {{NGS Augs|Super Might I}} |
| − | * {{ | + | * {{NGS Augs|Super Precision I}} |
| − | * {{ | + | * {{NGS Augs|Super Technique I}} |
| − | * {{ | + | * {{NGS Augs|Super Spimel I}} |
| − | * {{ | + | * {{NGS Augs|Super Spira I}} |
| − | * {{ | + | * {{NGS Augs|Super Spitech I}} |
| − | * {{ | + | * {{NGS Augs|Super Stamel I}} |
| − | * {{ | + | * {{NGS Augs|Super Stara I}} |
| − | * {{ | + | * {{NGS Augs|Super Statech I}} |
| − | * {{ | + | * {{NGS AugsExt|Decold Standard|I|III}} |
|- | |- | ||
| align=center style="width:50%;" | {{icons|NGS Material}} Materials | | align=center style="width:50%;" | {{icons|NGS Material}} Materials | ||
| Line 328: | Line 299: | ||
* {{icons|NGS Ticket}} [[Portal:New_Genesis/Motions|MTN: Dash - Skate/B]] | * {{icons|NGS Ticket}} [[Portal:New_Genesis/Motions|MTN: Dash - Skate/B]] | ||
* {{icons|NGS Ticket}} [[Portal:New_Genesis/Motions|MTN: Idle - Yummy Ice Cream 3]] | * {{icons|NGS Ticket}} [[Portal:New_Genesis/Motions|MTN: Idle - Yummy Ice Cream 3]] | ||
| + | * {{icons|Weapon Camo}} [[Weapon_Camos|* Demonic Fork]] | ||
|- | |- | ||
!colspan="4" | Additional Information | !colspan="4" | Additional Information | ||
| Line 333: | Line 305: | ||
| colspan="4" | | | colspan="4" | | ||
* ⁽¹⁾ All Class N-EX-Cubes will drop regardless of what class and subclass is currently equipped. The rate and quantity at which Class N-EX-Cubes drop is affected by the final score of the completed quest. | * ⁽¹⁾ All Class N-EX-Cubes will drop regardless of what class and subclass is currently equipped. The rate and quantity at which Class N-EX-Cubes drop is affected by the final score of the completed quest. | ||
| + | |} | ||
| + | |||
| + | == Ordinal Tower == | ||
| + | {| class="wikitable table-bordered" style="float:right; border: none;" | ||
| + | |- | ||
| + | !colspan="2"|Ordinal Tower | ||
| + | |- | ||
| + | !colspan="2"|[[File:NGSOrdinalTowerQuest.png|400px]] | ||
| + | |- | ||
| + | ! Quest Type | ||
| + | | Trainia Advance Quests | ||
| + | |- | ||
| + | !colspan="2"|Battle Power Requirements | ||
| + | |- | ||
| + | ! Rank 1 | ||
| + | | 1063 | ||
| + | |- | ||
| + | ! Rank 2 | ||
| + | | 1243 | ||
| + | |- | ||
| + | ! Rank 3 | ||
| + | | 1633 | ||
| + | |- | ||
| + | ! Rank 4 | ||
| + | | 1759 | ||
| + | |- | ||
| + | ! Rank 5 | ||
| + | | 2416 | ||
| + | |- | ||
| + | ! Rank 6 | ||
| + | | 2647 | ||
| + | |- | ||
| + | ! Rank 7 | ||
| + | | 2878 | ||
| + | |- | ||
| + | !colspan="2"|Average Enemy Level | ||
| + | |- | ||
| + | ! Rank 1 | ||
| + | | Lv. 15 | ||
| + | |- | ||
| + | ! Rank 2 | ||
| + | | Lv. 20 | ||
| + | |- | ||
| + | ! Rank 3 | ||
| + | | Lv. 30 | ||
| + | |- | ||
| + | ! Rank 4 | ||
| + | | Lv. 35 | ||
| + | |- | ||
| + | ! Rank 5 | ||
| + | | Lv. 55 | ||
| + | |- | ||
| + | ! Rank 6 | ||
| + | | Lv. 60 | ||
| + | |- | ||
| + | ! Rank 7 | ||
| + | | Lv. 65 | ||
| + | |- | ||
| + | !colspan="2"|Quest Details | ||
| + | |- | ||
| + | ! Location | ||
| + | | South Aelio | ||
| + | |- | ||
| + | ! Single/Multi-Party | ||
| + | | {{icons|NGS Multi4}} Multi-Party Quests | ||
| + | |- | ||
| + | ! Party Invitation | ||
| + | | Allowed | ||
| + | |- | ||
| + | !colspan="2"|Restrictions | ||
| + | |- | ||
| + | ! Time Limit | ||
| + | | - | ||
| + | |- | ||
| + | ! Damage Limit | ||
| + | | None | ||
| + | |- | ||
| + | !colspan="2"|First Clear Rewards | ||
| + | |- | ||
| + | ! Rank 1 | ||
| + | | {{icons|NGS Tool}} [[Portal:New_Genesis/Materials#Enhancement_Materials|Arms Refiner]] x10<br>{{icons|NGS Tool}} [[Portal:New_Genesis/Materials#Enhancement_Materials|N-HU-EX-Cube]] x10<br>{{icons|NGS Tool}} [[Portal:New_Genesis/Materials#Enhancement_Materials|N-RA-EX-Cube]] x10<br>{{icons|NGS Tool}} [[Portal:New_Genesis/Materials#Enhancement_Materials|N-FO-EX-Cube]] x10 | ||
| + | |- | ||
| + | ! Rank 2 | ||
| + | | {{icons|NGS Unit}} [[Efitus Armor Arga|Efitus Armor: Arga]] x1<br>{{icons|NGS Tool}} [[Portal:New_Genesis/Materials#Enhancement_Materials|N-FI-EX-Cube]] x10<br>{{icons|NGS Tool}} [[Portal:New_Genesis/Materials#Enhancement_Materials|N-GU-EX-Cube]] x10<br>{{icons|NGS Tool}} [[Portal:New_Genesis/Materials#Enhancement_Materials|N-TE-EX-Cube]] x10 | ||
| + | |- | ||
| + | ! Rank 3 | ||
| + | | {{icons|NGS Mineral}} [[Portal:New_Genesis/Materials#Minerals|Photon Scale]] x200<br>{{icons|NGS Tool}} [[Portal:New_Genesis/Materials#Enhancement_Materials|N-BR-EX-Cube]] x10<br>{{icons|NGS Tool}} [[Portal:New_Genesis/Materials#Enhancement_Materials|N-BO-EX-Cube]] x10<br>{{icons|NGS Tool}} [[Portal:New_Genesis/Materials#Enhancement_Materials|N-WA-EX-Cube]] x10 | ||
| + | |- | ||
| + | ! Rank 4 | ||
| + | | {{icons|NGS Unit}} [[Efitus Armor Belta|Efitus Armor: Belta]] x1<br>{{icons|NGS Tool}} [[Portal:New_Genesis/Materials#Enhancement_Materials|N-HU-EX-Cube]] x10<br>{{icons|NGS Tool}} [[Portal:New_Genesis/Materials#Enhancement_Materials|N-RA-EX-Cube]] x10<br>{{icons|NGS Tool}} [[Portal:New_Genesis/Materials#Enhancement_Materials|N-FO-EX-Cube]] x10 | ||
| + | |- | ||
| + | ! Rank 5 | ||
| + | | {{icons|NGS Mineral}} [[Portal:New_Genesis/Materials#Minerals|Blizzardium]] x100<br>{{icons|NGS Tool}} [[Portal:New_Genesis/Materials#Enhancement_Materials|N-FI-EX-Cube]] x10<br>{{icons|NGS Tool}} [[Portal:New_Genesis/Materials#Enhancement_Materials|N-GU-EX-Cube]] x10<br>{{icons|NGS Tool}} [[Portal:New_Genesis/Materials#Enhancement_Materials|N-TE-EX-Cube]] x10 | ||
| + | |- | ||
| + | ! Rank 6 | ||
| + | | {{icons|NGS Unit}} [[Efitus Armor Sheza|Efitus Armor: Sheza]] x1<br>{{icons|NGS Tool}} [[Portal:New_Genesis/Materials#Enhancement_Materials|N-BR-EX-Cube]] x10<br>{{icons|NGS Tool}} [[Portal:New_Genesis/Materials#Enhancement_Materials|N-BO-EX-Cube]] x10<br>{{icons|NGS Tool}} [[Portal:New_Genesis/Materials#Enhancement_Materials|N-WA-EX-Cube]] x10 | ||
| + | |- | ||
| + | ! Rank 7 | ||
| + | | {{icons|NGS Ticket}} [[Portal:New_Genesis/Accessories|Shoulder Migratory Bird]] x2 | ||
| + | |- | ||
| + | |} | ||
| + | |||
| + | ===Overview=== | ||
| + | Ordinal Tower is a Trainia Advance quest that can be accessed at the Trainia Bunker in South Aelio. In Trainia Advance, players must defeat a series of bosses in each stage in order to complete the quest. Subsequent, newer ranks will unlock after successfully completing a rank. | ||
| + | |||
| + | Players can earn powerful items such as the {{rarityNGS|7}} [[Efitus Armor Arga|Eftius Armor Series]] as first time completion rewards for certain ranks. Additionally, players can earn multiple enhanced {{rarityNGS|7}} [[Obsidia Sword|Obsidia Series +40]] associated with the cleared class as [[Portal:New_Genesis/Quest_Titles#Trainia_Advance|Quest Title]] rewards. | ||
| + | |||
| + | === Waves === | ||
| + | {| class="wikitable style="text-align:center; margin-left:auto; margin-right:auto; width:65%" | ||
| + | ! Boss Enemy | ||
| + | |- | ||
| + | |<gallery mode="nolines"> | ||
| + | File:NGSUIEnemyCragBear.png|link=]|'''Crag Bear'''<br>Rank 1 | ||
| + | File:NGSUIEnemyNexAelio.png|link=]|'''Nex Aelio'''<br>Rank 2 | ||
| + | File:NGSUIEnemySvaulon.png|link=]|'''Svaulon'''<br>Rank 3 | ||
| + | File:NGSUIEnemySandNogleth.png|link=]|'''Sand Nogleth'''<br>Rank 4 | ||
| + | File:NGSUIEnemyRelyn.png|link=]|'''Relyn'''<br>Rank 5 | ||
| + | File:NGSUIEnemyCrocodylis.png|link=]|'''Crocodylis'''<br>Rank 6 | ||
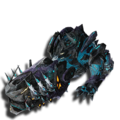
| + | File:NGSUIEnemyAmsKvaris.png|link=]|'''Elite Ams Kvaris'''<br>Rank 7 | ||
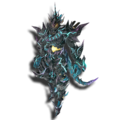
| + | File:NGSUIBujin.png|link=]|'''Elite Bujin'''<br>Rank 7 | ||
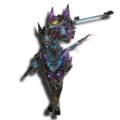
| + | File:NGSUIEnemyKelkundo.png|link=]|'''Elite Kelkundo'''<br>Rank 7 | ||
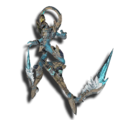
| + | File:NGSUIEnemyFrostylSword.png|link=]|'''Elite Frostyl Sword'''<br>Rank 7 (Hidden Enemy) | ||
| + | File:NGSUIEnemyVardias.png|link=]|'''Elite Vardias'''<br>Rank 7 (Hidden Enemy) | ||
| + | </gallery> | ||
| + | |} | ||
| + | |||
| + | === Rank 7 === | ||
| + | On Rank 7, the layout of the quest differs significantly from previous ranks. Players will now be ranked and scored according to clear time, and there will be 3 bosses available to fight as opposed to 1. Clearing any 3 bosses will successfully complete the quest. | ||
| + | |||
| + | Frostyl Sword or Vardias can be fought optionally as "hidden enemies" by defeating bosses in a specific order to unlock additional passages that are located in the map. Frostyl Sword can be accessed through a doorway marked with Red and Blue markings on the right side of the tower, and Vardias can be accessed through a doorway marked with Red and Yellow markings at the back of the tower. It should be noted that the quest will still clear after 3 bosses have been defeated, so should players desire to fight these bosses, they must ignore the boss associated with the undesired color. | ||
| + | |||
| + | Defeating Ams Kvaris will contribute to unlocking doors with Red markings on them, defeating Bujin will contribute to unlocking doors with Blue markings on them, and defeating Kelkundo will contribute to unlocking doors with Yellow markings on them. To fight Frostyl Sword, you must defeat Ams Kvaris and Bujin to unlock the doorway, and to fight Vardias, you must defeat Ams Kvaris and Kelkundo. | ||
| + | |||
| + | The paths to these bosses are also protected by additional barriers that are associated with Training Targets. These Training Targets can only be broken by Photon Bursts, and cannot be broken by any other means. There are two Training Targets protecting each passage, meaning you will need two Photon Bursts to gain access to the respective bosses. Three Blastasigne can be found on the map, which may assist in clearing these Training Targets. The Blastasigne are protected by barriers, but can be accessed by activating a pedestal hidden in a secret pathway located near the ceiling of the starting room. This pedestal will remove the barriers encasing the Blastasigne, which will allow you quick access to Photon Bursts. | ||
| + | |||
| + | {| class="wikitable style="text-align:center; margin-left:auto; margin-right:auto; width:65%" | ||
| + | ! Boss Enemy | ||
| + | |- | ||
| + | |<gallery mode="nolines"> | ||
| + | File:NGSUIEnemyAmsKvaris.png|link=]|'''Elite Ams Kvaris'''<br>(Red) | ||
| + | File:NGSUIBujin.png|link=]|'''Elite Bujin'''<br>(Blue) | ||
| + | File:NGSUIEnemyKelkundo.png|link=]|'''Elite Kelkundo'''<br>(Yellow) | ||
| + | </gallery> | ||
| + | |- | ||
| + | |<gallery mode="nolines"> | ||
| + | File:NGSUIEnemyFrostylSword.png|link=]|'''Elite Frostyl Sword'''<br>(Red + Blue Door) | ||
| + | File:NGSUIEnemyVardias.png|link=]|'''Elite Vardias'''<br>(Red + Yellow Door) | ||
| + | </gallery> | ||
| + | |} | ||
| + | |||
| + | === Notable Rewards === | ||
| + | {| class="wikitable table-responsive-md" style="max-width:56em; width:65%;" | ||
| + | !colspan="4"|{{#simple-tooltip:Notable Items|Certain items may be omitted from this list to reduce redundancy.}} | ||
| + | |- | ||
| + | | align=center style="width:50%;" | {{icons|NGS Sword}} Weapons / {{icons|NGS Unit}} Units | ||
| + | | align=center style="width:50%;" | {{icons|NGS Ability Capsule}} Augments | ||
| + | |- | ||
| + | | | ||
| + | * {{RarityNGS|7}} [[Rugged Sword|Rugged Series]] ⁽⁷⁾ | ||
| + | * {{RarityNGS|7}} [[Obsidia Sword|Obsidia Series]] ⁽⁷⁾ | ||
| + | * {{RarityNGS|6}} [[Rokz Roughewn Sword|Rokz Series]] ⁽⁷⁾ | ||
| + | * {{RarityNGS|6}} [[Codeck Sword|Codeck Series]] ⁽⁷⁾ | ||
| + | * {{RarityNGS|6}} [[Evolorbit Sword|Evolorbit Series]] ⁽⁷⁾ | ||
| + | * {{RarityNGS|6}} [[Obscura Spear|Obscura Series]] ⁽⁶⁾ | ||
| + | * {{rarityNGS|5}} [[Relik Endoif|Relik Series]] ⁽⁷⁾ | ||
| + | * {{rarityNGS|5}} [[Koukloziat Sword|Koukloziat Series]] ⁽⁷⁾ | ||
| + | * {{RarityNGS|5}} [[Lumiere Sword|Lumiere Series]] ⁽⁵⁾ | ||
| + | * {{RarityNGS|5}} [[Tempesta Sword|Tempesta Series]] ⁽⁴⁾ | ||
| + | * {{RarityNGS|4}} [[Flamel Spear|Flamel Series]] ⁽³⁾ | ||
| + | * {{RarityNGS|4}} [[Resurgir Sword|Resurgir Series]] | ||
| + | * {{RarityNGS|3}} [[Frostel Wire|Frostel Series]] ⁽²⁾ | ||
| + | * {{RarityNGS|3}} [[Glissen Sword|Glissen Series]] ⁽¹⁾ | ||
| + | | | ||
| + | * {{NGS AugsExt|Ams Soul|I|IV}} ⁽⁹⁾ | ||
| + | * {{NGS AugsExt|Crocys Soul|I|IV}} ⁽⁶⁾ | ||
| + | * {{NGS AugsExt|Dolz Soul|I|III}} | ||
| + | * {{NGS AugsExt|Frostyl Soul|I|IV}} ⁽⁹⁾ | ||
| + | * {{NGS AugsExt|Vardi Soul|I|IV}} ⁽⁹⁾ | ||
| + | * {{NGS Augs|Megas Fusia}} ⁽¹⁰⁾ | ||
| + | * {{NGS Augs|Sta Might}} ⁽¹⁰⁾ | ||
| + | * {{NGS Augs|Spi Might}} ⁽¹⁰⁾ | ||
| + | * {{NGS Augs|Deft Might}} ⁽¹⁰⁾ | ||
| + | * {{NGS Augs|Gua Might}} ⁽¹⁰⁾ | ||
| + | * {{NGS Augs|Sta Precision}} ⁽¹⁰⁾ | ||
| + | * {{NGS Augs|Spi Precision}} ⁽¹⁰⁾ | ||
| + | * {{NGS Augs|Deft Precision}} ⁽¹⁰⁾ | ||
| + | * {{NGS Augs|Gua Precision}} ⁽¹⁰⁾ | ||
| + | * {{NGS Augs|Sta Technique}} ⁽¹⁰⁾ | ||
| + | * {{NGS Augs|Spi Technique}} ⁽¹⁰⁾ | ||
| + | * {{NGS Augs|Deft Technique}} ⁽¹⁰⁾ | ||
| + | * {{NGS Augs|Gua Technique}} ⁽¹⁰⁾ | ||
| + | |- | ||
| + | | align=center style="width:50%;" | {{icons|NGS Material}} Materials | ||
| + | | align=center style="width:50%;" | {{icons|NGS Rare Drop}} Other | ||
| + | |- | ||
| + | | | ||
| + | * {{icons|NGS Tool}} [[Portal:New_Genesis/Materials|Arms Refiner]] ⁽¹⁰⁾ | ||
| + | * {{icons|NGS Mineral}} [[Portal:New_Genesis/Materials#Minerals|Monotite]] ⁽¹⁾ | ||
| + | * {{icons|NGS Mineral}} [[Portal:New_Genesis/Materials#Minerals|Dualomite]] ⁽²⁾ | ||
| + | * {{icons|NGS Mineral}} [[Portal:New_Genesis/Materials#Minerals|Trinite]] ⁽³⁾ | ||
| + | * {{icons|NGS Mineral}} [[Portal:New_Genesis/Materials#Minerals|Tetracite]] ⁽⁴⁾ | ||
| + | * {{icons|NGS Mineral}} [[Portal:New_Genesis/Materials#Minerals|Pentalite]] ⁽⁵⁾ | ||
| + | * {{icons|NGS Mineral}} [[Portal:New_Genesis/Materials#Minerals|Photon Quartz]] ⁽⁶⁾ | ||
| + | | | ||
| + | * {{icons|Weapon Camo}} [[Weapon_Camos|* Kalmeri Alice]] ⁽¹⁾ | ||
| + | * {{icons|Weapon Camo}} [[Weapon_Camos|* Summit Moon]] ⁽²⁾ | ||
| + | * {{icons|Weapon Camo}} [[Weapon_Camos|* Hitogata]] ⁽³⁾ | ||
| + | * {{icons|Weapon Camo}} [[Weapon_Camos|* Dragon Slayer]] ⁽⁴⁾ | ||
| + | * {{icons|Weapon Camo}} [[Weapon_Camos|* Frozen Shooter]] ⁽⁵⁾ | ||
| + | * {{icons|Weapon Camo}} [[Weapon_Camos|* Rabbit Wand]] ⁽⁶⁾ | ||
| + | * {{icons|Weapon Camo}} [[Weapon_Camos|* Tarnada]] ⁽⁷⁾ | ||
| + | * {{icons|Weapon Camo}} [[Weapon_Camos|* Precious Sword Balmung]] ⁽⁷⁾ | ||
| + | * {{icons|NGS Ticket}} [[Portal:New_Genesis/Motions|MTN: Dash - Wings Spread/B]] ⁽⁷⁾ | ||
| + | * {{icons|NGS Ticket}} [[Portal:New_Genesis/Motions|MTN: Glide - Wings Spread/B]] ⁽⁷⁾ | ||
| + | * {{icons|NGS Pass}} [[Portal:New_Genesis/Other|N-#★ Limit Break Substitute/Limit #]] ⁽⁸⁾ | ||
| + | * {{icons|NGS Pass}} [[Portal:New_Genesis/Other|N-#★ Potential Unlock Substitute/Lv. #]] ⁽⁸⁾ | ||
| + | |- | ||
| + | !colspan="4" | Additional Information | ||
| + | |- | ||
| + | | colspan="4" | | ||
| + | * ⁽¹⁾ Drops on Rank 1. | ||
| + | * ⁽²⁾ Drops on Rank 2. | ||
| + | * ⁽³⁾ Drops on Rank 3. | ||
| + | * ⁽⁴⁾ Drops on Rank 4. | ||
| + | * ⁽⁵⁾ Drops on Rank 5. | ||
| + | * ⁽⁶⁾ Drops on Rank 6. | ||
| + | * ⁽⁷⁾ Drops on Rank 7. | ||
| + | * ⁽⁸⁾ Drops differ respective to the difficulty cleared. For instance, N-6★ Potential Unlock Substitute/Lv. 3 will drop on Rank 6, while N-1★ Potential Unlock Substitute/Lv. 2 will drop on Rank 1. Rank 7 is exempt from these substitutes. | ||
| + | * ⁽⁹⁾ Chance to drop respectively from Ams Kvaris, Frostyl Sword, or Vardias on Rank 7. | ||
| + | * ⁽¹⁰⁾ Chance to drop from Megalotix enemies. | ||
|} | |} | ||
{{NGS Navbox}} | {{NGS Navbox}} | ||
Latest revision as of 15:56, 5 August 2023
Overview
Trainia Advance Quests are challenging quests that can be accessed through the Trainia Bunker (![]() ) located in Central Kvaris.
) located in Central Kvaris.
Bunker Type 1 is a type of training facility called Trainia Advance. The objective of the Cannonball Rumble and Cannonball Strike quests is to throw "cannonballs" at the target and destroy a specified number of targets within a time limit.
Cannonballs will appear when you defeat enemies. Throwing them at Standard Targets and Extra Targets will destory the targets, but they won't do much damage to enemies. There are two types of targets: Standard Targets, which will spawn more smaller enemies, and Extra Targets, which will spawn more larger enemies. Targets can only be destroyed with cannonballs.
In Cannonball Rumble, there are 3 waves with 3 unique scenarios. Each wave can be completed by destroying all the targets, defeating all the enemies, or by exceeding the time limit for each wave. The overall score of the quest is determined by defeating as many enemies as possible.
Trainia Advance Entrances
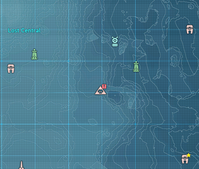
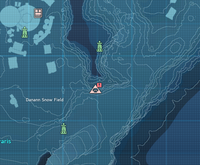
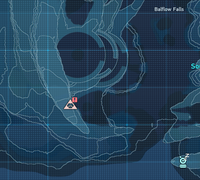
| Central Kvaris Cannonball Rumble |
South Kvaris Cannonball Strike |
South Aelio Ordinal Tower |
Cannonball Rumble
Ranking Details
| Rank | Score Required |
|---|---|
| S Rank | Score > 2,249 |
| A Rank | Score > 1,249 |
| B Rank | Score > 449 |
Quest Details
| Party Limit | Enemy Level | Recommended Power | Clear Condition | Accept Condition | Fail Condition |
|---|---|---|---|---|---|
| 4 | Lv.51 | 2,251 | Defeat the enemies and destroy the targets | None | None |
| Detail | Entry |
|---|---|
| Main Mission | Reach the final area |
| Description | This is Trainia Advance, an advanced training system meant to test an ARKS defender's overall level of skill. Use every ability available to you to defeat the enemies and destroy the targets. |
Notable Rewards
| Notable Items | |||
|---|---|---|---|
|
|||
| Additional Information | |||
| |||
Cannonball Strike
Ranking Details
| Rank | Score Required |
|---|---|
| S Rank | Reach Wave 3 & Score > 2,239 |
| A Rank | Score > 1,493 |
| B Rank | Score > 746 |
Quest Details
| Party Limit | Enemy Level | Recommended Power | Clear Condition | Accept Condition | Fail Condition |
|---|---|---|---|---|---|
| 4 | Lv.60 | 2,647 | Defeat the enemies and destroy the targets | None | None |
| Detail | Entry |
|---|---|
| Main Mission | Reach the final area |
| Description | This is Trainia Advance, an advanced training system meant to test an ARKS defender's overall level of skill. Use every ability available to you to defeat the enemies and destroy the targets. |
Challenge Settings
| Challenge | Description | Score Multiplier |
|---|---|---|
| Enemy Attack +25% | Increases Enemy Attack Power. | +5.0% |
| Enemy Attack +50% | Increases Enemy Attack Power. | +10.0% |
| Enemy Attack +75% | Increases Enemy Attack Power. | +15.0% |
| Enemy Attack +100% | Increases Enemy Attack Power. | +20.0% |
| Enemy Attack +125% | Increases Enemy Attack Power. | +25.0% |
| Enemy Attack +150% | Increases Enemy Attack Power. | +30.0% |
| Enemy Attack +175% | Increases Enemy Attack Power. | +35.0% |
| Enemy Attack +200% | Increases Enemy Attack Power. | +40.0% |
| Enemy Attack +250% | Increases Enemy Attack Power. | +50.0% |
| Enemy Attack +300% | Increases Enemy Attack Power. | +60.0% |
| Challenge | Description | Score Multiplier |
|---|---|---|
| Increase Restasigne Consumption: Lv. 1 | Restasigne consumption will increase by x2. | +25.0% |
| Increase Restasigne Consumption: Lv. 2 | Restasigne consumption will increase by x3. | +35.0% |
| Increase Restasigne Consumption: Lv. 3 | Restasigne consumption will increase by x4. | +45.0% |
| Increase Restasigne Consumption: Lv. 4 | Restasigne consumption will increase by x5. | +55.0% |
| Increase Restasigne Consumption: Lv. 5 | Restasigne consumption will increase by x6. | +65.0% |
| Challenge | Description | Score Multiplier |
|---|---|---|
| Decreased Max Carry Limit of Signe Items: Lv. 1 | The maximum carry limit of Restasigne and Reversasigne will decrease by 1. | +15.0% |
| Decreased Max Carry Limit of Signe Items: Lv. 2 | The maximum carry limit of Restasigne and Reversasigne will decrease by 2. | +20.0% |
| Decreased Max Carry Limit of Signe Items: Lv. 3 | The maximum carry limit of Restasigne and Reversasigne will decrease by 3. | +25.0% |
| Decreased Max Carry Limit of Signe Items: Lv. 4 | The maximum carry limit of Restasigne and Reversasigne will decrease by 4. | +30.0% |
Notable Rewards
| Notable Items | |||
|---|---|---|---|
|
|||
| Additional Information | |||
| |||
Ordinal Tower
| Ordinal Tower | |
|---|---|
| |
| Quest Type | Trainia Advance Quests |
| Battle Power Requirements | |
| Rank 1 | 1063 |
| Rank 2 | 1243 |
| Rank 3 | 1633 |
| Rank 4 | 1759 |
| Rank 5 | 2416 |
| Rank 6 | 2647 |
| Rank 7 | 2878 |
| Average Enemy Level | |
| Rank 1 | Lv. 15 |
| Rank 2 | Lv. 20 |
| Rank 3 | Lv. 30 |
| Rank 4 | Lv. 35 |
| Rank 5 | Lv. 55 |
| Rank 6 | Lv. 60 |
| Rank 7 | Lv. 65 |
| Quest Details | |
| Location | South Aelio |
| Single/Multi-Party | |
| Party Invitation | Allowed |
| Restrictions | |
| Time Limit | - |
| Damage Limit | None |
| First Clear Rewards | |
| Rank 1 | |
| Rank 2 | |
| Rank 3 | |
| Rank 4 | |
| Rank 5 | |
| Rank 6 | |
| Rank 7 | |
Overview
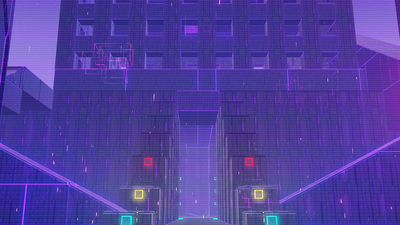
Ordinal Tower is a Trainia Advance quest that can be accessed at the Trainia Bunker in South Aelio. In Trainia Advance, players must defeat a series of bosses in each stage in order to complete the quest. Subsequent, newer ranks will unlock after successfully completing a rank.
Players can earn powerful items such as the ![]() Eftius Armor Series as first time completion rewards for certain ranks. Additionally, players can earn multiple enhanced
Eftius Armor Series as first time completion rewards for certain ranks. Additionally, players can earn multiple enhanced ![]() Obsidia Series +40 associated with the cleared class as Quest Title rewards.
Obsidia Series +40 associated with the cleared class as Quest Title rewards.
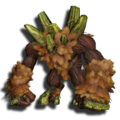
Waves
| Boss Enemy |
|---|
Rank 7
On Rank 7, the layout of the quest differs significantly from previous ranks. Players will now be ranked and scored according to clear time, and there will be 3 bosses available to fight as opposed to 1. Clearing any 3 bosses will successfully complete the quest.
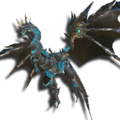
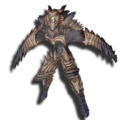
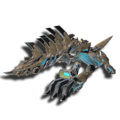
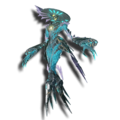
Frostyl Sword or Vardias can be fought optionally as "hidden enemies" by defeating bosses in a specific order to unlock additional passages that are located in the map. Frostyl Sword can be accessed through a doorway marked with Red and Blue markings on the right side of the tower, and Vardias can be accessed through a doorway marked with Red and Yellow markings at the back of the tower. It should be noted that the quest will still clear after 3 bosses have been defeated, so should players desire to fight these bosses, they must ignore the boss associated with the undesired color.
Defeating Ams Kvaris will contribute to unlocking doors with Red markings on them, defeating Bujin will contribute to unlocking doors with Blue markings on them, and defeating Kelkundo will contribute to unlocking doors with Yellow markings on them. To fight Frostyl Sword, you must defeat Ams Kvaris and Bujin to unlock the doorway, and to fight Vardias, you must defeat Ams Kvaris and Kelkundo.
The paths to these bosses are also protected by additional barriers that are associated with Training Targets. These Training Targets can only be broken by Photon Bursts, and cannot be broken by any other means. There are two Training Targets protecting each passage, meaning you will need two Photon Bursts to gain access to the respective bosses. Three Blastasigne can be found on the map, which may assist in clearing these Training Targets. The Blastasigne are protected by barriers, but can be accessed by activating a pedestal hidden in a secret pathway located near the ceiling of the starting room. This pedestal will remove the barriers encasing the Blastasigne, which will allow you quick access to Photon Bursts.
| Boss Enemy |
|---|
Notable Rewards
| Notable Items | |||
|---|---|---|---|
|
| ||
|
| ||
| Additional Information | |||
| |||
| |||||||||||||||||||||||||||||||||||||||||||||||
