Tainted Enemies
| Tainted Enemies | Falspawn | Draconians | Automata | Sylvants | Oceanids | Nightfallers | Phantasms | Supernaturals | Luminmechs | Special Enemies |
Tainted Falspawn
| Enemy | Area | Drop List | Breakpoints | Weakness | Notes |
|---|---|---|---|---|---|
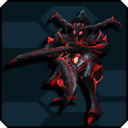
 Dagan Yuga |
Tainted Area | Element: • Weakspots: • Red Core |
Tainted version of Dagan. Sprays mist from its underbelly that siphons the target's PP. | ||
 Yugarl Dagan |
Tainted Area | Lv. 1+
|
Element: • Weakspots: • Red Core |
Rare variant of Dagan Yuga. | |
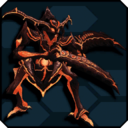
 Yugadicahdr |
Tainted Area | Element: • Weakspots: • Red Core |
Tainted version of Predicahdr. Displays heightened aggression compared to its normal counterpart. | ||
 Nelgadicahdr |
Tainted Area | Lv. 1+
|
Element: • Weakspots: • Red Core |
Rare variant of Yugadicahdr. | |
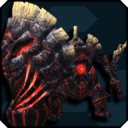
 Yuguldrahda |
Tainted Area | • Back Core | Element: • Weakspots: • Red Core |
Tainted version of Goldrahda. Faster and more aggressive than regular Goldrahdas. Destroy the core on its back to prevent it from detonating. | |
 Yurisgadrahda |
Tainted Area | Lv. 1+ * |
• Back Core | Element: • Weakspots: • Red Core |
Rare variant of Yuguldrahda. |
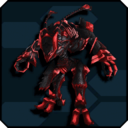
 Gawonda Yuga |
Tainted Area | Element: • Weakspots: • Back |
Tainted version of Gawonda. | ||
 Guwonda Yuga |
Tainted Area | Element: • Weakspots: • Back |
Tainted version of Guwonda. | ||
 Cuchronahda Yuga |
Tainted Area | • Waist Armor | Element: • Weakspots: • Red Core |
Tainted version of Cuchronahda. | |
 Cychronahda Yuga |
Tainted Area | • Waist Armor | Element: • Weakspots: • Red Core |
Tainted version of Cychronahda. | |
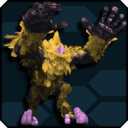
 Yggda Sorcerer |
Tainted Area | • Left Wing • Right Wing • Tail |
Element: • Weakspots: • Red Core |
Tainted version of Luda Sorcerer. | |
 Viel Hyunal |
Story Quest (EP.3 3-17) |
• Arm Cores | Element: • Weakspots: • Red Core • Body |
Matoi Viel's form upon fusing with Anga Phandaj. Destroy the cores on her arms to remove the barrier protecting her body. Performs her ultimate attack when low on health. | |
 Dio Hyunal |
Tainted Area Elite Training: Heaven & Earth (Stage 10) Endless Battle: Edge of Recollection (Stage 12 Week 1) A Broken World of Twisted Shadows |
Lv. 1+
Lv. 71+
|
• Arm Cores | Element: • Weakspots: • Red Core • Body |
The armored form of the Profound Darkness's host, Persona. Follows the same strategies as its counterpart, Viel Hyunal. |
 Anga Phandaj |
Tainted Area Elite Training: Heaven & Earth (Stage 10) Endless Battle: Edge of Recollection (Stage 12 Week 1) A Broken World of Twisted Shadows |
Lv. 1+
Lv. 71+
Lv.81+ |
• Bits | Element: • Weakspots: • Red Core |
A Photon Beast corrupted by immense F-Factor. Gains resistance to the three most damaging Weapons/Elements used against it, reducing the damage it takes from them by 80%. Destroy glowing bits to stun it and expose its core as a weakpoint. Revives once upon being defeated, becoming more aggressive and powerful. Stunned by the Panic status. |
Tainted Dark Falz
| Enemy | Area | Drop List | Breakpoints | Weakness | Notes |
|---|---|---|---|---|---|
 Omega Hyunal |
Omega | Lv. 1+
Lv. 71+ |
• Sword | Element: • Weakspots: • Red Core |
Omega variant of Falz Hyunal. Qualifies as a Tainted Falspawn. Primarily specializes in close-ranged combat. Deploys the Elder Pain Omega when his HP reaches a certain threshold, granting him high-speed, long-range attacks. Break the Elder Pain Omega to reduce its damage. |
 Omega Angel |
Omega | Lv. 1+
Lv. 71+ |
• Wings | Element: • Weakspots: • Purple Core |
Omega variant of Falz Angel. Qualifies as a Tainted Falspawn. Integrates Compound Techniques into his moveset when low on health. |
 Omega Appregina |
Omega | Lv. 1+
Lv. 71+ |
• Drones | Element: • Weakspots: • Red Core |
Omega variant of Falz Appregina (from PHANTASY STAR ONLINE 2 EPISODE 0). Qualifies as a Tainted Falspawn. Primarily focuses on close-ranged Dagger attacks. Her insect drones can support her by attacking and healing. Performs her ultimate attack when her HP drops below a certain value. |
 Omega Dranble |
Omega | Lv. 1+
Lv. 71+ |
• Arms | Element: • Weakspots: • Broken Arms |
Omega variant of Falz Dranble. Qualifies as a Tainted Falspawn. Break its enlarged arms to reveal the weakpoints underneath. |
 Dranble Krone |
Castrum Demonica: Madness | • Arms | Element: • Weakspots: • Broken Arms |
Smaller and weaker version of Omega Dranble. Qualifies as a Tainted Falspawn. | |
 Elga Masquerader |
Story Quest Episode 5 Chapter 6 | None | Element: • Weakspots: • Core |
Elmir at the height of his power. | |
Omega Masquerader |
Regional Survey: Remnants of a Parallel World Endless Battle: Eternal Rondo (Stage 30 only) |
Lv. 1+
Lv. 71+ (Eternal Rondo only)
Lv. 91+
|
Element: • Weakspots: • Core |
Ultimate Quest variation of Elga Masquerader. Becomes stronger every time it's defeated. Regional Survey: Remnants of a Parallel World for more information. Gains immunity to attacks that are used repeatedly. |
|
 Profound Darkness |
Barren Blossom: Corruptor of All Barren Blossom: Butcher of Light |
Lv. 1+
Lv. 71+
Lv. 96+
|
• Petals • Bits • Chest Core (Phase 3) |
Element: • Weakspots: • Core • Head (Phase 3) |
The ultimate incarnation of corruption that seeks to destroy the universe. Flower Form: On SH and below, break Body Petals to temporarily expose the Base Core. On XH, break Body Petals to release Floating Bits. Destroy all Floating Bits to expose the Base Core. At 60% HP, background will change, and PD will gain weakness to a weapon type on SH and below. At 40% HP, will transition into humanoid form. Humanoid Form: On SH and below, destroy all Floating Bits to temporarily immobilize PD. On XH, destroy all Floating Bits to reveal the Chest core. Destroy the chest core to temporarily immobilize PD. At low HP, will back off and teleport you into 1v1. If you fail to kill the 1v1 form in time the party will wipe. On SH and below, PD will be immobilized permanently afterwards. On XH, the Face Core will be revealed. Destroying the Face Core will immobilize PD permanently. |
 Omega Falz Luther |
Wisdom Incarnate Longing for Omniscience |
Lv. 1+
Lv. 55+ Lv. 71+ Lv. 76+ Lv. 96+
|
• Bracers • Shoulders • Clock • Beak • Headdress Gems |
Element: • Weakspots: • Clock (Broken) • Chin Core |
Omega variant of Dark Falz Luther. Qualifies as a Tainted Falspawn. Battle strategy is identical to XH Dark Falz Luther on all difficulties. Stunned by the Poison status effect. Will sometimes switch phases mid-attack. Uses two knife time stop during first HP threshold. At second HP threshold, summons three sets of knives; second set will rotate around the stage before dropping knives. |
 Omega Falz Apprentice |
Queen's Nightmare: Earth Depths Queen's Nightmare: Sand City |
Lv. 1+
Lv. 75+
Lv. 80+ |
• Wings • Pink Orbs • Arm Cores |
Element: • Weakspots: • Cores |
Omega variant of Dark Falz Apprentice (from PHANTASY STAR ONLINE 2 THE ANIMATION). Qualifies as a Tainted Falspawn. During the aerial battle, breaking all 6 wings or both pink orbs on either side of her head will immobilize her momentarily. Doing sufficient damage to her main core will cause her to keep it open during the rest of the aerial phase. Avoid the spinning laser trap by dodging towards the center, and again when giant laser asterisk is launched forward. After she falls to the ground, simply break all her arm cores then hit her main core to finish her off before she finishes charging the final laser attack. |
 Dark Falz Persona |
The Malevolent Void The Call of the Void |
Lv. 1+
Lv.71+
|
• Mask Cores |
Element: • |
An abomination created from Elmir's grudge, invoking a mocking image of Persona and the four initial Dark Falz. Wears different masks that change with every fight; two random masks would be selected from a pool of four different masks, each with a fighting style based on a previous Dark Falz. Each mask has two-stage breaking phases, similar to Dark Ragne's legs.
There's no gimmick to this additional phase, the raid party is to whittle the last of Persona's HP until it's completely depleted. |
The Primordial Darkness
| Enemy | Area | Drop List | Breakpoints | Weakness | Notes |
|---|---|---|---|---|---|
 Gomorus, Primordial Darkness |
|
Depends | Element: • Weakspots: • Eyes |
The physical manifestation of the original Profound Darkness. Gomorus's main body is immune to all damage - the only places where it can be damaged are the eyeball-like cores on its tentacles, the large central eye on its face, and its hands.
When Gomorus's HP is lowered sufficiently, it will destroy the 3 centermost platforms with its tentacles and expose two additional cores like the ones in Phase 1 placed on the far left and far right platforms. Breaking both these cores to proceed.
|
|
 Sodam, Primordial Darkness |
|
Depends | Elements: • None Weakspots: • Core |
The true form of the original Profound Darkness.
Has different weakness depending on which quest you're playing; in Urgent Quest or Story Quest, it gains random weapon weaknesses throughout the battle and in Divide Quest or Ultimate Quest, it has weakness to opposing elements it has. You can encounter both versions in Challenge Quest.
|
|
 Sodam, Primordial Darkness (Final Form) |
|
Depends | • Finger Armor | Element: • Weakspots: • Hand eyes • Core (final down) |
In a last-ditch effort, Sodam merges with the torso of Gomorus and stays stationary on the far side of the arena. It starts the fight by filling its half of the arena with Gomorus's white fluid, which badly damages anyone stepping on it. The only reliable and risk-free way to deal with it is by focusing damage while it's doing one of the following attacks:
During this phase, breaking the "rings" on Sodam's hands will cause it to flinch for a bit. Additionally, it will also trigger one of the three Heroine Buffs (see below) depending on the heroine that gets talked to the most during the Phase 2 preparations. The multi-party also needs to be cautious when Sodam does one of these attacks:
|
Tainted Sylvants
| Enemy | Area | Drop List | Breakpoints | Weakness | Notes |
|---|---|---|---|---|---|
 Geragodan |
Corrupted - Forest | Element: • Weakspots: • Head |
Tainted version of Udan. | ||
 Gibludan |
Corrupted - Forest | • Rock | Element: • Weakspots: • Head |
Tainted version of Za'udan. | |
 Zgraf |
Corrupted - Forest | Element: • Weakspots: • Head |
Tainted version of Grulf. | ||
 Zgraf Gu |
Corrupted - Forest | Lv. 1+
|
Element: • Weakspots: • Head |
Rare variant of Zgraf. | |
 Balgraf |
Corrupted - Forest | Element: • Weakspots: • Head |
Tainted version of Phongrulf. | ||
 Balgraf Gu |
Corrupted - Forest | Lv. 1+
|
Element: • Weakspots: • Head |
Rare variant of Balgraf. | |
 Folgnis |
Corrupted - Forest | Element: • Weakspots: • Head |
Tainted version of Agnis. | ||
 Grandilga |
Corrupted - Forest | Element: • Weakpots: • Belly |
Tainted version of Garongo. | ||
 Foehgo |
Corrupted - Forest | Element: • Weakpots: • Head • Rear |
Tainted version of Yedi. | ||
 Kaisfoehgo |
Corrupted - Forest | Element: • Weakspots: • Head • Rear |
Tainted version of King Yedi. | ||
 Jahmagrs |
Corrupted - Forest | Element: • Weakspots: • Hump |
Tainted version of Marmoth. | ||
 Bearabos |
Corrupted - Forest | Lv. 1+
|
Element: • Weakspots: • Head |
Tainted version of Rockbear. | |
 Bergaribosa |
Corrupted - Forest | Lv. 1+
|
Element: • Weakspots: • Head |
Rare variant of Bearabos. | |
 Plosiogrs |
Corrupted - Forest | Lv. 1+
|
• Hump • Left Horn • Right Horn |
Element: • Weakspots: • Face • Hump |
Tainted version of De Marmoth. |
 Ignisiogrs |
Corrupted - Forest | Lv. 1+
|
• Hump • Left Horn • Right Horn |
Element: • Weakspots: • Face • Hump |
Rare variant of Plosiogrs. |
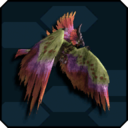
 Diaboigryphis |
Corrupted - Forest | Lv. 1+
|
• Horn • Left Wing • Right Wing • Tail |
Element: • Weakspots: • Horn • Head • Tail |
Tainted variant of Vol Dragon. |
 Vomosbrodyphis |
Corrupted - Forest | Lv. 1+
|
• Horn • Left Wing • Right Wing • Tail |
Element: • Weakspots: • Horn • Head • Tail |
Rare variant of Diaboigryphis |
Tainted Automata
| Enemy | Area | Drop List | Breakpoints | Weakness | Notes |
|---|---|---|---|---|---|
 Jagd Spardan |
Corrupted - Underground Shafts | Element: • Weakspots: • Blue Core |
Tainted version of Spardun A. Watch out for its rampage and sick breakdancing. | ||
 Sinow Rapidus |
Corrupted - Underground Shafts | Lv. 1+
|
Element: • Weakspots: • Blue Core |
Tainted version of Signo Beat. Attacks more rapidly than usual. | |
 Sinow Rosso |
Corrupted - Underground Shafts | Lv. 1+
|
Element: • Weakspots: • Blue Core |
Rare variant of Sinow Rapidus. | |
 Gunkaiser |
Corrupted - Underground Shafts | Element: • Weakspots: • Blue Core |
Tainted version of Signogun. | ||
 Kaiser Balger |
Corrupted - Underground Shafts | Element: • Weakspots: • Blue Core |
Tainted version of Vint Balger, Ganon Balger and Jagd Balger combined. Has moves equivalent to all 3 enemies. | ||
 Rapid Gillnas |
Corrupted - Underground Shafts | Element: • Weakspots: • Blue Core |
Tainted version of Gillnas. Does not separate upon death. | ||
 Bladingale |
Corrupted - Underground Shafts | Element: • Weakspots: • Blue Core |
Tainted version of Dingale. Dual-wields gunblades and can use attacks from both modes interchangeably. | ||
 Dingabruise |
Corrupted - Underground Shafts | Lv. 1+
|
Element: • Weakspots: • Blue Core |
Rare variant of Bladingale. | |
 Zeta Granz |
Corrupted - Underground Shafts | Lv. 1+
|
• Knees • Missile Pods |
Element: • Weakspots: • Blue Core |
Tainted version of Vardersoma. Breaking its knees exposes the weak point, breaking parts on it disables the some of its projectiles. Susceptible to Burn status. |
 Epsilon Granz |
Corrupted - Underground Shafts | Lv. 1+
|
• Knees • Missile Pods |
Element: • Weakspots: • Blue Core |
Rare variant of Zeta Granz. |
 Falke Leone |
Corrupted - Underground Shafts | Lv. 1+
|
• Head • Claws • Wings |
Element: • Weakspots: • Blue Core |
Tainted version of Fang Banshee. Features quick melee attacks and is very agile. Breaking its head exposes the weak point and breaking other parts interrupts its attacks. Susceptible to Burn status. |
 Leone Farozzo |
Corrupted - Underground Shafts | Lv. 1+
|
• Head • Claws • Wings |
Element: • Weakspots: • Blue Core |
Rare variant of Falke Leone. |
 Varima Leopod |
Corrupted - Underground Shafts | Lv. 1+
|
• Head • Claws • Wings |
Element: • Weakspots: • Blue Core |
Tainted version of Fang Banser. Fires a variety of different projectiles towards players, when enraged this amount significantly increases. Breaking its head exposes the weak point and breaking other parts interrupts its attacks. Susceptible to Burn status. |
 Leopod Vrozzo |
Corrupted - Underground Shafts | Lv. 1+
|
• Head • Claws • Wings |
Element: • Weakspots: • Blue Core |
Rare variant of Varima Leopod. |
Tainted Draconians
| Enemy | Area | Drop List | Breakpoints | Weakness | Notes |
|---|---|---|---|---|---|
 Valgahla |
Corrupted - Volcanic Caves | Element: • Weakspots: • |
|||
 Grobgahla |
Corrupted - Volcanic Caves | Element: • Weakspots: • |
|||
 G Chevalizan |
Corrupted - Volcanic Caves | Element: • Weakspots: • |
|||
 Z Chevalizan |
Corrupted - Volcanic Caves | Element: • Weakspots: • |
|||
 Chevalizan |
Corrupted - Volcanic Caves | Element: • Weakspots: • |
|||
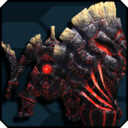
 Grudran |
Corrupted - Volcanic Caves | • Tail | Element: • Weakspots: • Broken Tail |
||
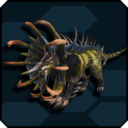
 Ventasaur |
Corrupted - Volcanic Caves | Element: • Weakspots: • |
|||
 Dephansaur |
Corrupted - Volcanic Caves | • Horn • Tail |
Element: • Weakspots: • |
||
 Z Schwarzus |
Corrupted - Volcanic Caves | Element: • Weakspots: • |
|||
 Boks Deubarz |
Corrupted - Volcanic Caves | Lv. 1+
Lv. 71+ |
• Back | Element: • Weakspots: • Mouth |
|
 Bugihl Deubarz |
Corrupted - Volcanic Caves | • Back | Element: • Weakspots: • Mouth |
||
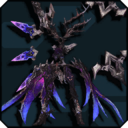
 Gryzorus Drago |
Corrupted - Volcanic Caves | Lv. 1+
Lv. 71+
|
• Wings • Hands • Face |
Element: • Weakspots: • Broken |
|
 Nilbareez Drago |
Corrupted - Volcanic Caves | • Wings • Hands • Face |
Element: • Weakspots: • Broken |
||
 Drago Deadlion |
Corrupted - Volcanic Caves | Lv. 1+
Lv. 71+
|
• Spear • Shield • Face |
Element: • Weakspots: • Broken Face |
|
 Valeon Drahl |
Corrupted - Volcanic Caves | • Spear • Shield • Face |
Element: • Weakspots: • Broken Face |
| |||||||||||||||||||||||||||||||||||||||||||||||