Difference between revisions of "Tainted Enemies"
m (→Tainted Dark Falz: Added Links) |
|||
| (29 intermediate revisions by 7 users not shown) | |||
| Line 3: | Line 3: | ||
==Tainted Falspawn== | ==Tainted Falspawn== | ||
{{EnemyHeader}} | {{EnemyHeader}} | ||
| − | {{EnemyRow| | + | {{EnemyRow|Dagan Yuga|UIEnemyDaganYuga.png|Dagan Yuga|Tainted Area|<!--DropList-->|<!--Breakpoints-->|Element:<br>• {{icons|Fire}}{{icons|Light}}<br>Weakspots:<br>• Red Core|Tainted version of Dagan. Sprays mist from its underbelly that siphons the target's PP. }} |
| − | {{EnemyRow| | + | {{EnemyRow|Yugarl Dagan|UIEnemyYugarlDagan.png|Yugarl Dagan|Tainted Area|Lv. 1+ <br> |
| − | *{{props|Stigma}}|<!--Breakpoints-->|Element:<br>• {{icons|Fire}}{{icons|Light}}<br>Weakspots:<br>• Red Core|Rare variant of Dagan Yuga.}} | + | *{{props|Stigma}}|<!--Breakpoints-->|Element:<br>• {{icons|Fire}}{{icons|Light}}<br>Weakspots:<br>• Red Core|Rare variant of Dagan Yuga. }} |
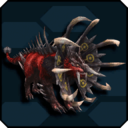
| − | {{EnemyRow| | + | {{EnemyRow|Yugadicahdr|UIEnemyYugadicahdr.png|Yugadicahdr|Tainted Area|<!--DropList-->|<!--Breakpoints-->|Element:<br>• {{icons|Fire}}{{icons|Light}}<br>Weakspots:<br>• Red Core|Tainted version of Predicahdr. Displays heightened aggression compared to its normal counterpart.}} |
| − | {{EnemyRow| | + | {{EnemyRow|Nelgadicahdr|UIEnemyNelgadicahdr.png|Nelgadicahdr|Tainted Area|Lv. 1+ <br> |
| − | *{{props|Stigma}}|<!--Breakpoints-->|Element:<br>• {{icons|Fire}}{{icons|Light}}<br>Weakspots:<br>• Red Core|Rare variant of Yugadicahdr.}} | + | *{{props|Stigma}}|<!--Breakpoints-->|Element:<br>• {{icons|Fire}}{{icons|Light}}<br>Weakspots:<br>• Red Core|Rare variant of Yugadicahdr. }} |
| − | {{EnemyRow| | + | {{EnemyRow|Yuguldrahda|UIEnemyYuguldrahda.png|Yuguldrahda|Tainted Area|<!--DropList-->|• Back Core|Element:<br>• {{icons|Fire}}{{icons|Light}}<br>Weakspots:<br>• Red Core|Tainted version of Goldrahda. Faster and more aggressive than regular Goldrahdas. Destroy the core on its back to prevent it from detonating. }} |
| − | {{EnemyRow| | + | {{EnemyRow|Yurisgadrahda|UIEnemyYurisgadrahda.png|Yurisgadrahda|Tainted Area|Lv. 1+ <br> |
| − | *{{props|Stigma}}|• Back Core|Element:<br>• {{icons|Fire}}{{icons|Light}}<br>Weakspots:<br>• Red Core|Rare variant of Yuguldrahda.}} | + | *{{props|Stigma}}|• Back Core|Element:<br>• {{icons|Fire}}{{icons|Light}}<br>Weakspots:<br>• Red Core|Rare variant of Yuguldrahda. }} |
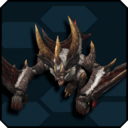
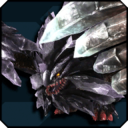
| − | {{EnemyRow| | + | {{EnemyRow|Gawonda Yuga|UIEnemyGawondaYuga.png|Gawonda Yuga|Tainted Area|<!--DropList-->|<!--Breakpoints-->|Element:<br>• {{icons|Lightning}}{{icons|Light}}<br>Weakspots:<br>• Back|Tainted version of Gawonda. }} |
| − | {{EnemyRow| | + | {{EnemyRow|Guwonda Yuga|UIEnemyGuwondaYuga.png|Guwonda Yuga|Tainted Area|<!--DropList-->|<!--Breakpoints-->|Element:<br>• {{icons|Lightning}}{{icons|Light}}<br>Weakspots:<br>• Back|Tainted version of Guwonda. }} |
| + | |||
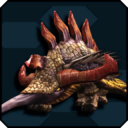
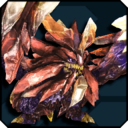
| + | {{EnemyRow|Cuchronahda Yuga|UIEnemyCuchronahdaYuga.png|Cuchronahda Yuga|Tainted Area|<!--DropList-->|• Waist Armor|Element:<br>• {{icons|Lightning}}{{icons|Light}}<br>Weakspots:<br>• Red Core|Tainted version of Cuchronahda. }} | ||
| + | |||
| + | {{EnemyRow|Cychronahda Yuga|UIEnemyCychronahdaYuga.png|Cychronahda Yuga|Tainted Area|<!--DropList-->|• Waist Armor|Element:<br>• {{icons|Lightning}}{{icons|Light}}<br>Weakspots:<br>• Red Core|Tainted version of Cychronahda. }} | ||
| + | |||
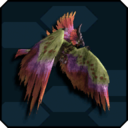
| + | {{EnemyRow|Yggda Sorcerer|UIEnemyYggdaSorcerer.png|Yggda Sorcerer|Tainted Area|<!--DropList-->|• Left Wing<br>• Right Wing<br>• Tail|Element:<br>• {{icons|Wind}}{{icons|Light}}<br>Weakspots:<br>• Red Core|Tainted version of Luda Sorcerer. }} | ||
| + | |||
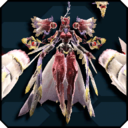
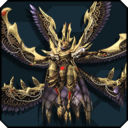
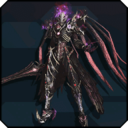
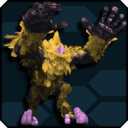
| + | {{EnemyRow|Viel Hyunal|UIEnemyVielHyunal.png|Viel Hyunal|Story Quest|<!--DropList-->|• Arm Cores|Element:<br>• {{icons|Light}}<br>Weakspots:<br>• Red Core<br>• Body|Matoi Viel's form upon fusing with Anga Phandaj. Destroy the cores on her arms to remove the barrier protecting her body. Performs her ultimate attack when low on health.}} | ||
| + | |||
| + | {{EnemyRow|Dio Hyunal|UIEnemyDioHyunal.png|Dio Hyunal|Tainted Area|Lv. 1+ | ||
*{{props|Soul of Darkness}} | *{{props|Soul of Darkness}} | ||
Lv. 71+ | Lv. 71+ | ||
| Line 26: | Line 36: | ||
*{{Rarity|7}} {{Icons|Order}} Caligula Shaftshard|• Arm Cores|Element:<br>•{{icons|Light}}<br>Weakspots:<br>• Red Core<br>• Body|The armored form of the Profound Darkness's host, Persona. Follows the same strategies as its counterpart, Viel Hyunal.}} | *{{Rarity|7}} {{Icons|Order}} Caligula Shaftshard|• Arm Cores|Element:<br>•{{icons|Light}}<br>Weakspots:<br>• Red Core<br>• Body|The armored form of the Profound Darkness's host, Persona. Follows the same strategies as its counterpart, Viel Hyunal.}} | ||
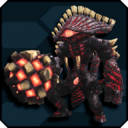
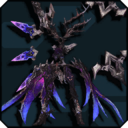
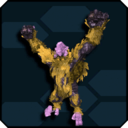
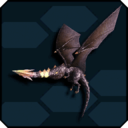
| − | {{EnemyRow| | + | {{EnemyRow|Anga Phandaj|UIEnemyAngaPhandaj.png|Anga Phandaj|Tainted Area|Lv. 1+ |
*{{props|Anga Soul}} | *{{props|Anga Soul}} | ||
Lv. 71+ | Lv. 71+ | ||
| Line 42: | Line 52: | ||
*{{rarity|12}} {{icons|Arm}} Circaray | *{{rarity|12}} {{icons|Arm}} Circaray | ||
*{{rarity|12}} {{icons|Leg}} Circuray | *{{rarity|12}} {{icons|Leg}} Circuray | ||
| − | *{{rarity|13}} [[Gix Weapon Series]] | + | *{{rarity|13}} [[Gix Zangulum|Gix Weapon Series]] |
Lv.81+ | Lv.81+ | ||
| − | *{{rarity|14}} [[Ares Weapon Series]]|• Bits|Element:<br>• {{icons|Light}}<br>Weakspots:<br>• Red Core|A Photon Beast corrupted by immense F-Factor. '''Gains resistance to the three most damaging Weapons/Elements used against it, reducing the damage it takes from them by 80%.''' Destroy glowing bits to stun it and expose its core as a weakpoint. Revives once upon being defeated, becoming more aggressive and powerful.<br>Stunned by the Panic status.}} | + | *{{rarity|14}} [[Ares Sword|Ares Weapon Series]]|• Bits|Element:<br>• {{icons|Light}}<br>Weakspots:<br>• Red Core|A Photon Beast corrupted by immense F-Factor. '''Gains resistance to the three most damaging Weapons/Elements used against it, reducing the damage it takes from them by 80%.''' Destroy glowing bits to stun it and expose its core as a weakpoint. Revives once upon being defeated, becoming more aggressive and powerful.<br>Stunned by the Panic status.}} |
| + | </table> | ||
| − | {{EnemyRow| | + | ==Tainted Dark Falz== |
| + | {{EnemyHeader}} | ||
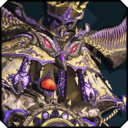
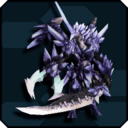
| + | {{EnemyRow|Omega Hyunal|UIEnemyOmegaHyunal.png|Omega Hyunal|Omega|Lv. 1+ | ||
*{{props|Elder Soul}} | *{{props|Elder Soul}} | ||
*{{props|Elder Reverie}} | *{{props|Elder Reverie}} | ||
| Line 57: | Line 70: | ||
*{{rarity|14}} {{icons|Sword}} [[Elder Pain Omega]]|• Sword|Element:<br>• {{icons|Lightning}}{{icons|Light}}<br>Weakspots:<br>• Red Core|Omega variant of Falz Hyunal. Qualifies as a Tainted Falspawn.<br>Primarily specializes in close-ranged combat. Deploys the Elder Pain Omega when his HP reaches a certain threshold, granting him high-speed, long-range attacks.<br>Break the Elder Pain Omega to reduce its damage.}} | *{{rarity|14}} {{icons|Sword}} [[Elder Pain Omega]]|• Sword|Element:<br>• {{icons|Lightning}}{{icons|Light}}<br>Weakspots:<br>• Red Core|Omega variant of Falz Hyunal. Qualifies as a Tainted Falspawn.<br>Primarily specializes in close-ranged combat. Deploys the Elder Pain Omega when his HP reaches a certain threshold, granting him high-speed, long-range attacks.<br>Break the Elder Pain Omega to reduce its damage.}} | ||
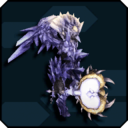
| − | {{EnemyRow| | + | {{EnemyRow|Omega Angel|UIEnemyOmegaAngel.png|Omega Angel|Omega|Lv. 1+ |
*{{props|Luther Soul}} | *{{props|Luther Soul}} | ||
*{{props|Luther Reverie}} | *{{props|Luther Reverie}} | ||
| Line 72: | Line 85: | ||
*{{rarity|14}} {{icons|Talis}} [[Motav's Forbidden Book]]|• Wings|Element:<br>• {{icons|Light}}{{icons|Dark}}<br>Weakspots:<br>• Purple Core|Omega variant of Falz Angel. Qualifies as a Tainted Falspawn.<br>Integrates Compound Techniques into his moveset when low on health.}} | *{{rarity|14}} {{icons|Talis}} [[Motav's Forbidden Book]]|• Wings|Element:<br>• {{icons|Light}}{{icons|Dark}}<br>Weakspots:<br>• Purple Core|Omega variant of Falz Angel. Qualifies as a Tainted Falspawn.<br>Integrates Compound Techniques into his moveset when low on health.}} | ||
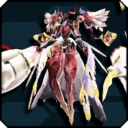
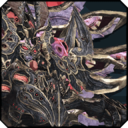
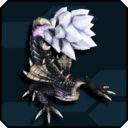
| − | {{EnemyRow| | + | {{EnemyRow|Omega Appregina|UIEnemyOmegaAppregina.png|Omega Appregina|Omega|Lv. 1+ |
*{{props|Apprentice Soul}} | *{{props|Apprentice Soul}} | ||
*{{props|Appregina Reverie}} | *{{props|Appregina Reverie}} | ||
| Line 80: | Line 93: | ||
*{{rarity|13}} {{icons|Gunblade}} [[Allure Lauv]] | *{{rarity|13}} {{icons|Gunblade}} [[Allure Lauv]] | ||
*{{rarity|13}} {{icons|Rifle}} [[Allure Cyros]] | *{{rarity|13}} {{icons|Rifle}} [[Allure Cyros]] | ||
| − | *{{rarity|13}} {{icons|Bow}} [[Allure | + | *{{rarity|13}} {{icons|Bow}} [[Allure Grens]] |
*{{rarity|13}} {{icons|Harmonizer}} [[Allure Venera]] | *{{rarity|13}} {{icons|Harmonizer}} [[Allure Venera]] | ||
*{{rarity|14}} {{icons|Daggers}} [[Apprentice's Grudge Omega]] | *{{rarity|14}} {{icons|Daggers}} [[Apprentice's Grudge Omega]] | ||
| Line 87: | Line 100: | ||
*{{rarity|14}} {{icons|Rifle}} [[Vante Weihen]]|• Drones|Element:<br>• {{icons|Fire}}{{icons|Light}}<br>Weakspots:<br>• Red Core|Omega variant of Falz Appregina (from ''PHANTASY STAR ONLINE 2 EPISODE 0''). Qualifies as a Tainted Falspawn.<br>Primarily focuses on close-ranged Dagger attacks. Her insect drones can support her by attacking and healing.<br>Performs her ultimate attack when her HP drops below a certain value.}} | *{{rarity|14}} {{icons|Rifle}} [[Vante Weihen]]|• Drones|Element:<br>• {{icons|Fire}}{{icons|Light}}<br>Weakspots:<br>• Red Core|Omega variant of Falz Appregina (from ''PHANTASY STAR ONLINE 2 EPISODE 0''). Qualifies as a Tainted Falspawn.<br>Primarily focuses on close-ranged Dagger attacks. Her insect drones can support her by attacking and healing.<br>Performs her ultimate attack when her HP drops below a certain value.}} | ||
| − | {{EnemyRow| | + | {{EnemyRow|Omega Dranble|UIEnemyOmegaDranble.png|Omega Dranble|Omega|Lv. 1+ |
*{{props|Gemini Soul}} | *{{props|Gemini Soul}} | ||
*{{props|Gemini Reverie}} | *{{props|Gemini Reverie}} | ||
| Line 94: | Line 107: | ||
*{{rarity|13}} {{icons|Wired Lance}} [[Xerraire Caprice]] | *{{rarity|13}} {{icons|Wired Lance}} [[Xerraire Caprice]] | ||
*{{rarity|13}} {{icons|Knuckles}} [[Xerraire Kersch]] | *{{rarity|13}} {{icons|Knuckles}} [[Xerraire Kersch]] | ||
| − | *{{rarity|13}} {{icons|Gunblade}} [[Xerraire | + | *{{rarity|13}} {{icons|Gunblade}} [[Xerraire Petila]] |
*{{rarity|13}} {{icons|Soaring Blades}} [[Xerraire Schulp]] | *{{rarity|13}} {{icons|Soaring Blades}} [[Xerraire Schulp]] | ||
*{{rarity|13}} {{icons|Twin Machineguns}} [[Xerraire Paxte]] | *{{rarity|13}} {{icons|Twin Machineguns}} [[Xerraire Paxte]] | ||
*{{rarity|13}} {{icons|Rod}} [[Xerraire Lupier]] | *{{rarity|13}} {{icons|Rod}} [[Xerraire Lupier]] | ||
| − | *{{rarity|14}} {{icons|Daggers}} [[ | + | *{{rarity|14}} {{icons|Daggers}} [[Dagger of Gabriel]] |
*{{rarity|14}} {{icons|Jet Boots}} [[Boots of Gabriel]]|• Arms|Element:<br>• {{icons|Ice}}{{icons|Light}}<br>Weakspots:<br>• Broken Arms|Omega variant of Falz Dranble. Qualifies as a Tainted Falspawn.<br>Break its enlarged arms to reveal the weakpoints underneath.}} | *{{rarity|14}} {{icons|Jet Boots}} [[Boots of Gabriel]]|• Arms|Element:<br>• {{icons|Ice}}{{icons|Light}}<br>Weakspots:<br>• Broken Arms|Omega variant of Falz Dranble. Qualifies as a Tainted Falspawn.<br>Break its enlarged arms to reveal the weakpoints underneath.}} | ||
| + | <!-- | ||
| + | {{EnemyRow|Omega Daril|UIEnemyOmegaDaril.png|Omega Daril}} | ||
| + | --> | ||
| + | {{EnemyRow|Dranble Krone|UIEnemyDranbleKrone.png|Dranble Krone|Castrum Demonica: Madness| |• Arms|Element:<br>• {{icons|Ice}}{{icons|Light}}<br>Weakspots:<br>• Broken Arms|Smaller and weaker version of Omega Dranble. Qualifies as a Tainted Falspawn.}} | ||
| − | {{EnemyRow| | + | {{EnemyRow|Elga Masquerader|UIEnemyElgaMasquerader.png|Elga Masquerader|Story Quest Episode 5 Chapter 6|None||Element:<br>• {{icons|Light}}<br>Weakspots:<br>• Core|Elmir at the height of his power.}} |
| − | {{EnemyRow| | + | {{EnemyRow|Omega Masquerader|UIEnemyElgaMasquerader.png|Omega Masquerader| Regional Survey: Remnants of a Parallel World<br>Endless Battle: |
| − | + | Eternal Rondo (Stage 30 only)| | |
| − | {{ | + | Lv. 1+ |
| + | *{{props|Persona Soul}} | ||
| + | *{{props|Persona Reverie}} | ||
| + | Lv. 71+ (Eternal Rondo only) | ||
| + | *{{rarity|13}} Profound Weapon Series | ||
| + | Lv. 91+ | ||
| + | *{{rarity|15}} {{icons|Sword}} [[Shaval Ueber]] | ||
| + | *{{rarity|15}} {{icons|Sword}} [[Shavalmelm]] | ||
| + | *{{rarity|12}} {{icons|Back}} Mask of Vane| |Element:<br>• {{icons|Light}}<br>Weakspots:<br>• Core | ||
| + | |Ultimate Quest variation of Elga Masquerader. Becomes stronger every time it's defeated. Regional Survey: Remnants of a Parallel World for more information.<br>{{rarity|15}}Weapon drops are only when outside of Regional Survey: Remnants of a Parallel World, where his AI is set to the Depth 500+ version, with the time stop attack disabled.<br>'''Gains immunity to attacks that are used repeatedly.'''}} | ||
| − | {{EnemyRow| | + | {{EnemyRow|Profound Darkness|UIEnemyProfoundDarkness.png|Profound Darkness|Barren Blossom: Corruptor of All<br>Barren Blossom: Butcher of Light|Lv. 1+ |
| − | |||
| − | |||
*{{props|Soul of Darkness}} | *{{props|Soul of Darkness}} | ||
Lv. 71+ | Lv. 71+ | ||
| − | *{{rarity| | + | *{{rarity|15}} [[Ophistia Calibur|Ophistia Weapon Series]] |
| + | *{{rarity|13}} [[Ray Sword|Ray Weapon Series]] | ||
| + | *{{rarity|13}} [[Union Sword|Union Weapon Series]] (Solo Version Only) | ||
*{{rarity|12}} {{icons|Back}} Ofzeterious | *{{rarity|12}} {{icons|Back}} Ofzeterious | ||
*{{rarity|12}} {{icons|Arm}} Ofzende | *{{rarity|12}} {{icons|Arm}} Ofzende | ||
*{{rarity|12}} {{icons|Leg}} Ofzetrogie | *{{rarity|12}} {{icons|Leg}} Ofzetrogie | ||
| − | *{{rarity|15}} [[ | + | *{{rarity|10}} {{icons|Tool}} Hero's Crest |
| + | Lv. 96+ | ||
| + | *{{rarity|15}} [[Novel Sword|Novel Weapon Series]] | ||
| + | *{{rarity|14}} [[Ares Sword|Ares Weapon Series]] | ||
| + | *{{rarity|13}} [[Raven Calibur|Raven Weapon Series]] | ||
| + | *{{rarity|13}} [[Nemesis Calibur|Nemesis Weapon Series]] | ||
| + | *{{rarity|13}} [[Invade Calibur|Invade Weapon Series]] | ||
| + | *{{rarity|13}} {{icons|Back}} Ofzehazala | ||
| + | *{{rarity|13}} {{icons|Arm}} Ofzeterico | ||
| + | *{{rarity|13}} {{icons|Leg}} Ofzereevle | ||
| + | |• Petals<br>• Bits<br>• Chest Core (Phase 3)|Element:<br>• {{icons|Light}}<br>Weakspots:<br>• Core<br>• Head (Phase 3)|The ultimate incarnation of corruption that seeks to destroy the universe.<br>'''Flower Form:''' <br> On SH and below, break Body Petals to temporarily expose the Base Core.<br>On XH, break Body Petals to release Floating Bits. Destroy all Floating Bits to expose the Base Core.<br><br>At 60% HP, background will change, and PD will gain weakness to a weapon type on SH and below. At 40% HP, will transition into humanoid form. | ||
| + | <br><br> '''Humanoid Form:''' <br> On SH and below, destroy all Floating Bits to temporarily immobilize PD.<br>On XH, destroy all Floating Bits to reveal the Chest core. Destroy the chest core to temporarily immobilize PD.<br><br>At low HP, will back off and teleport you into 1v1. If you fail to kill the 1v1 form in time the party will wipe. <br>On SH and below, PD will be immobilized permanently afterwards. <br>On XH, the Face Core will be revealed. Destroying the Face Core will immobilize PD permanently.}} | ||
| + | |||
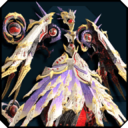
| + | {{EnemyRow|Omega Falz Luther|UIEnemyOmegaFalzLuther.png|Omega Falz Luther|Wisdom Incarnate<br>Longing for Omniscience|Lv. 1+ | ||
| + | *{{props|Luther Soul}} | ||
| + | *{{props|Luther Reverie}} | ||
| + | Lv. 55+ | ||
| + | *{{rarity|13}} [[Val Farder|Val Weapon Series]] | ||
| + | Lv. 71+ | ||
| + | *{{rarity|13}} [[Claudium Sarissa|Claudium Weapon Series]] | ||
| + | Lv. 76+ | ||
| + | *{{rarity|14}} {{icons|Daggers}} [[Blanc Absolut]] | ||
| + | *{{rarity|14}} {{icons|Soaring Blades}} [[Rivaga Lola]] | ||
| + | *{{rarity|14}} {{icons|Launcher}} [[Yasminokov 4000F]] | ||
| + | *{{rarity|14}} {{icons|Talis}} [[Motav's Forbidden Book]] | ||
| + | Lv. 96+ | ||
| + | *{{rarity|15}}{{icons|Order}} Chronos Eternistone | ||
| + | *{{rarity|15}}{{icons|Order}} Founder's Amphitrite | ||
| + | *{{rarity|15}}{{icons|Order}} Key Rivalate | ||
| + | *{{rarity|15}} [[Resonant Talmei|Resonant Weapon Series]] | ||
| + | *{{rarity|15}} [[Serpent Blazes|Serpent Weapon Series]] | ||
| + | *{{rarity|15}} [[Genon Ziva|Genon Weapon Series]] | ||
| + | *{{rarity|15}} [[Flotella Saber|Flotella Weapon Series]] | ||
| + | *{{rarity|15}} [[Dyne Hespelaro|Dyne Weapon Series]] | ||
| + | *{{rarity|15}} [[Pride of Seiryu|Pride Weapon Series]] | ||
| + | *{{rarity|15}} {{icons|Rifle}} [[Yasminokov 5000S]] | ||
| + | *{{rarity|15}} {{icons|Launcher}} [[Combat Cannon]] | ||
| + | *{{rarity|15}} {{icons|Bow}} [[Hard Cross Bullet]] | ||
| + | *{{rarity|15}} {{icons|Wand}} [[Clarte Dolce]] | ||
| + | *{{rarity|15}} {{icons|Jet Boots}} [[Neo Cabliss]] | ||
| + | *{{rarity|14}} {{icons|Egg}} Herbie | ||
| + | *{{rarity|13}} {{icons|Back}} Atlas Shemel | ||
| + | *{{rarity|13}} {{icons|Arm}} Atlas Chatten | ||
| + | *{{rarity|13}} {{icons|Leg}} Atlas Kvar | ||
| + | |• Bracers<br>• Shoulders<br>• Clock<br>• Beak<br>• Headdress Gems|Element:<br>• {{icons|Light}}{{icons|Dark}}<br>Weakspots:<br>• Clock (Broken)<br>• Chin Core|Omega variant of Dark Falz Luther. Qualifies as a Tainted Falspawn.<br>Battle strategy is identical to XH Dark Falz Luther on all difficulties.<br>Stunned by the Poison status effect.<br>Will sometimes switch phases mid-attack.<br>Uses two knife time stop during first HP threshold. At second HP threshold, summons three sets of knives; second set will rotate around the stage before dropping knives.}} | ||
| + | |||
| + | {{EnemyRow|Omega Falz Apprentice|UIEnemyOmegaFalzApprentice.png|Omega Falz Apprentice|Queen's Nightmare: Earth Depths<br>Queen's Nightmare: Sand City|Lv. 1+ | ||
| + | *{{props|Apprentice Soul}} | ||
| + | *{{props|Appregina Reverie}} | ||
| + | Lv. 75+ | ||
| + | *{{rarity|13}} [[Allure Angz|Allure Weapon Series]] | ||
| + | *{{rarity|13}} [[Ivlida Hander|Ivlida Weapon Series]] | ||
| + | *{{rarity|12}} {{icons|Back}} Phobos Coupe | ||
| + | *{{rarity|12}} {{icons|Arm}} Phobos Hedge | ||
| + | *{{rarity|12}} {{icons|Leg}} Phobos Need | ||
| + | Lv. 80+ | ||
| + | *{{rarity|14}} [[Phobos Espadio|Phobos Weapon Series]] | ||
| + | *{{rarity|14}} {{icons|Double Saber}} [[Luxa Lola]] | ||
| + | *{{rarity|14}} {{icons|Gunblade}} [[Bringer Rifle]] | ||
| + | *{{rarity|14}} {{icons|Katana}} [[Cursed Cutter Gaen]] | ||
| + | *{{rarity|14}} {{icons|Rifle}} [[Vante Weihen]] | ||
| + | |• Wings<br>• Pink Orbs<br>• Arm Cores|Element:<br>• {{icons|Fire}}{{icons|Light}}<br>Weakspots:<br>• Cores|Omega variant of Dark Falz Apprentice (from ''PHANTASY STAR ONLINE 2 THE ANIMATION''). Qualifies as a Tainted Falspawn.<br>During the aerial battle, breaking all 6 wings or both pink orbs on either side of her head will immobilize her momentarily. Doing sufficient damage to her main core will cause her to keep it open during the rest of the aerial phase. <br> Avoid the spinning laser trap by dodging towards the center, and again when giant laser asterisk is launched forward. <br>After she falls to the ground, simply break all her arm cores then hit her main core to finish her off before she finishes charging the final laser attack.}} | ||
| − | {{EnemyRow| | + | {{EnemyRow|Dark Falz Persona|UIEnemyDarkFalzPersona.png|Dark Falz Persona|The Malevolent Void<br>The Call of the Void|Lv. 1+ |
*{{props|Elder Soul}} | *{{props|Elder Soul}} | ||
*{{props|Luther Soul}} | *{{props|Luther Soul}} | ||
| Line 140: | Line 227: | ||
*{{rarity|12}} {{icons|Arm}} Starquake Mount Luxion | *{{rarity|12}} {{icons|Arm}} Starquake Mount Luxion | ||
*{{rarity|12}} {{icons|Leg}} Starquake Decor Dixion | *{{rarity|12}} {{icons|Leg}} Starquake Decor Dixion | ||
| − | *{{rarity|13}} [[Profound Weapon Series]] | + | *{{rarity|13}} [[Profound Sword Dimexion|Profound Weapon Series]] |
| − | *{{rarity|14}} [[Starquake Weapon Series]] | + | *{{rarity|14}} [[Starquake Sword Dimexion|Starquake Weapon Series]] |
| − | *{{rarity|15}} [[Ophistia Weapon Series]]| | + | *{{rarity|14}} [[Phobos Espadio|Phobus Weapon Series]] |
| − | + | *{{rarity|15}} [[Ophistia Calibur|Ophistia Weapon Series]]|• Mask Cores<br>|Element:<br> | |
| − | + | • {{icons|Lightning}} (Elder Mask)<br> | |
| − | + | • {{icons|Wind}} (Luther Mask)<br> | |
| − | + | • {{icons|Fire}} (Apprentice Mask)<br> | |
| − | + | • {{icons|Ice}} (Gemini Mask)<br> | |
| − | + | • {{icons|Light}} (Persona Mask)<br> | |
| − | + | <br>Weakspots:<br> • Mask Cores<br>• Inner Mask<br>• Chest (3rd Phase) | |
| − | + | |An abomination created from Elmir's grudge, invoking a mocking image of Persona and the four initial Dark Falz. Wears different masks that change with every fight; two random masks would be selected from a pool of four different masks, each with a fighting style based on a previous Dark Falz. Each mask has two-stage breaking phases, similar to Dark Ragne's legs.<br> | |
| + | <br> | ||
| + | Destroying the starting mask will cause the boss to switch to the second mask shortly after. Once both masks are destroyed, the "true" Persona mask would be worn until the end of the fight or when it's destroyed.<br> | ||
| + | <br> | ||
| + | '''Elder Mask:'''<br> | ||
| + | * At the beginning, will launch four giant arms that would join it after. | ||
| + | * The smashing ground attack can be dodged by jumping. | ||
| + | * Break the large cores at the back of the floating arms to stagger it. | ||
| + | <br> | ||
| + | '''Luther Mask:'''<br> | ||
| + | * Has a variation of Luther's time stop attack that is easier to escape from and deals lesser damage. | ||
| + | * Break the cores on both arm swords to stagger it. | ||
| + | <br> | ||
| + | '''Gemini Mask:'''<br> | ||
| + | * Will sometime teleport and fly around trying to hit the players. | ||
| + | * The pacman-like devourers move at a fixed pattern. | ||
| + | * Break the four floating cores to stagger it. | ||
| + | <br> | ||
| + | '''Apprentice Mask:'''<br> | ||
| + | * When it unleashes the laser pillars attack, simply slip through them or quickly move to the side. | ||
| + | * Break the wing cores to stagger it. | ||
| + | <br> | ||
| + | '''Final Phase:''' | ||
| + | * Uses a combination of all four Falz masks' fighting styles. | ||
| + | * Its chest can be broken twice at this phase to reveal a weak spot. | ||
| + | * At low HP, it will charge an energy attack that blows up for massive damage unless destroyed before it's finished charging. Successfully destroying it on the other hand, will cause the boss to be immobilized for a while. | ||
| + | * Near death, it will release a destructive energy burst that heavily damages its surroundings. After that, the boss will become immobilized. | ||
| + | <br> | ||
| + | '''Near Death (Ultra Hard):'''<br> | ||
| + | This phase would only happen in the Ultra Hard difficulty, after Persona released the supposedly-final energy burst. Instead of getting immobilized, the raid boss would instead draw a large sword and, after briefly showing a Masquerade mask, continue the fight with the following moves: | ||
| + | * Smashing the ground similar to its Elder Mask phase. | ||
| + | * Diving down into the arena floor, then lunges upward with its arm stretched out. | ||
| + | * Slashing its sword around. | ||
| + | * Slashing its sword around, and creates a short-lasting energy wave. | ||
| + | * Creating several black orbs that detonate almost immediately. | ||
| + | * Raining down projectiles from the arena ceiling (Continuous attack, can still happen while Persona is doing other moves) | ||
| + | There's no gimmick to this additional phase, the raid party is to whittle the last of Persona's HP until it's completely depleted. | ||
| + | }} | ||
| + | </table> | ||
| + | |||
| + | ==The Primordial Darkness== | ||
| + | {{EnemyHeader}} | ||
| + | {{EnemyRow|Gomorus, Primordial Darkness|UIEnemyGommorus.png|Gomorus, Primordial Darkness| | ||
| + | * Story Quest: Episode 6-6 Part 2 | ||
| + | * [[The_Face_of_The_Abyss|The Face of the Abyss]] | ||
| + | * [[Twisted_with_Hatred|Twisted with Hatred]] | ||
| + | |Depends||Element:<br>• {{icons|Light}}<br>Weakspots:<br>• Eyes|The physical manifestation of the original Profound Darkness. Gomorus's main body is immune to all damage - the only places where it can be damaged are the eyeball-like cores on its tentacles, the large central eye on its face, and its hands. | ||
| + | <br> | ||
| + | '''Phase 1:'''<br> | ||
| + | There are 3 platforms and 4 of Gomorus's cores are exposed - one on each side of the central platform, and one at the far end of each of the side ones. Break all four cores to proceed. The cores can do four different attacks: | ||
| + | * Emits a burst of fire that can inflict {{icons|Burn}} Burn. This attack has a hugging range, so melee-based Classes should be more wary. | ||
| + | * Fires three ice spikes that travel along the ground and can inflict {{icons|Freeze}} Freeze. The spikes' trajectory is visible before and during the attack, making it easier to dodge. | ||
| + | * Summons a small stationary tornado under each target that pulses 3 times and can inflict {{icons|Blind}} Blind. A visible tell that lasts for approximately 1 second appears before the attack. | ||
| + | * Drops a lightning bolt on each target that can inflict {{icons|Shock}} Shock. A visible tell that lasts for approximately 1 second appears before the attack. | ||
| + | <br> | ||
| + | '''Phase 2:'''<br> | ||
| + | There are 5 platforms arranged in a rough semicircle around Gomorus. Attack Gomorus's hands and large central eye when they are near the platform. Gomorus can do the following attacks during this phase: | ||
| + | * Inhales deeply, pulling players towards it, then emits a roar that inflicts the '''Bind''' status. | ||
| + | * Sweeping fluid breath attack that does heavy damage - either from left to right, or from right to left. Run to the far opposite side platform to avoid the attack. | ||
| + | * Targets a platform and smashes it with an arm, destroying the platform and killing anyone on it. | ||
| + | * Targets one or two platforms and crushes it with its body, destroying the platform(s) and killing anyone on them. | ||
| + | * Thrust with both its arms. | ||
| + | * Brings its face close to a platform and fires lasers from the smaller eyes surrounding its large central eye, before emitting a shockwave from its main eye. | ||
| + | When Gomorus's HP is lowered sufficiently, it will destroy the 3 centermost platforms with its tentacles and expose two additional cores like the ones in Phase 1 placed on the far left and far right platforms. Breaking both these cores to proceed. | ||
| + | <br> | ||
| + | '''Phase 3:'''<br> | ||
| + | Finish off a weakened Gomorus clinging to the bottommost platform. Gomorus's right hand and central eye are targetable for this portion, though the eye may sometimes be raised out of reach when it does certain attacks. Gomorus can do the following attacks during this phase: | ||
| + | * Lifts its head and spews fluid in front of it. Safe zone is by its right hand. | ||
| + | * Slams the platform with its left arm. Safe zone is in front of its eye. | ||
| + | * At low HP, Gomorus's central eye pulses as it charges up for one last powerful attack. This is a DPS check.}} | ||
| + | |||
| + | {{EnemyRow|Sodam, Primordial Darkness|UIEnemySodam.png|Sodam, Primordial Darkness| | ||
| + | * Story Quest: Episode 6-6 Part 2 | ||
| + | * [[The_Face_of_The_Abyss|The Face of the Abyss]] | ||
| + | * [[Trial: Photoner Assault]] (Steps 31-34) | ||
| + | * [[Final Battle: Space-Time Interstice]] | ||
| + | * [[MISSION:_Violent_Tremor|MISSION: Violent Tremor]] (Mission 5) | ||
| + | * [[Twisted_with_Hatred|Twisted with Hatred]] | ||
| + | |Depends||Elements:<br>• None<br>Weakspots:<br>• Core| | ||
| + | The true form of the original Profound Darkness. | ||
| + | Has different weakness depending on which quest you're playing; in Urgent Quest or Story Quest, it gains random weapon weaknesses throughout the battle and in Divide Quest or Ultimate Quest, it has weakness to opposing elements it has. You can encounter both versions in Challenge Quest.<br> | ||
| + | <br> | ||
| + | '''Phase 1:'''<br> | ||
| + | Attacks with a variety of projectile attacks as well as swiping attacks using its arms that emerge from the void spheres between its wings, along with elemental-based attacks based on its form:<br> | ||
| + | '''{{icons|Fire}} Fire Form:'''<br> | ||
| + | * Weak to {{icons|Ice}} in Divide or Ultimate. | ||
| + | * Throws several small fireballs. | ||
| + | * Creates a spiraling jets of fire like [[Falz Hunar]]'s ground smash attack. | ||
| + | <br> | ||
| + | '''{{icons|Ice}} Ice Form:'''<br> | ||
| + | * Weak to {{icons|Fire}} in Divide or Ultimate. | ||
| + | * Summons are large icicle which launches forward after a small delay. | ||
| + | * Fires a shotgun-like shower of ice shards. | ||
| + | * '''Blizzard''': Sodam teleports out of the arena. The entire arena is marked by a flowing pattern. After several seconds, a shockwave rolls over the arena causing {{icons|Freeze}} Freeze and dealing heavy damage. Cannot be guarded. Take cover behind the large ice pillars to avoid this attack. | ||
| + | <br> | ||
| + | '''{{icons|Lightning}} Lightning Form:'''<br> | ||
| + | * Weak to {{icons|Wind}} in Divide or Ultimate. | ||
| + | * Lightning will randomly fall around the arena. | ||
| + | * Summons 6 floating swords around the arena which then form a lightning cage. | ||
| + | <br> | ||
| + | '''{{icons|Wind}} Wind Form:'''<br> | ||
| + | * Weak to {{icons|Lightning}} in Divide or Ultimate. | ||
| + | * Causes a whirlwind that pulses 3 times, similar to the attack used by [[Deus Hunas]]. | ||
| + | * Summons a small tornado that circles the arena once counterclockwise. | ||
| + | * '''Earth Shatter''': Sodam teleports out of the arena. The entire arena is marked by cracking patterns along the ground. After several seconds, Sodam stabs the ground causing it to erupt with many spikes which deal massive damage. Cannot be guarded. Launch yourself into the air using the large tornado in the center of the arena to avoid the attack.<br> | ||
| + | <br> | ||
| + | '''Phase 2:'''<br> | ||
| + | When sufficiently damaged, Sodam will begin using two elements at once, combining their effects and gaining a new attack in addition to using attacks of both elements: | ||
| + | <br> | ||
| + | '''{{icons|Fire}}{{icons|Ice}} Fire & Ice Form:'''<br> | ||
| + | * Weak to {{icons|Fire}} and {{icons|Ice}} in Divide or Ultimate. | ||
| + | * '''Compound Attack''': Sodam floats at the center of the arena, causing a shower of fire and ice projectiles to rain down, followed by an expanding column of fire. Take cover behind the large ice pillars to avoid this attack. | ||
| + | <br> | ||
| + | '''{{icons|Lightning}}{{icons|Wind}} Lightning & Wind Form:'''<br> | ||
| + | * Weak to {{icons|Lightning}} and {{icons|Wind}} in Divide or Ultimate. | ||
| + | * '''Compound Attack''': Summons a small tornado that circles the arena once counterclockwise. The tornado causes any water pools it hits to turn into damage fields. Due to the presence of the large tornado in the center of the arena, the damage field covers most, if not all, of the arena.<br> | ||
| + | * During both Phase 1 and Phase 2, Sodam will also launch a forward-facing dark energy pulse that badly damages and launches anyone caught within its trajectory.}} | ||
| + | {{EnemyRow|Sodam, Primordial Darkness (Final Form)|UIEnemySodamPrimordialDarkness-2.png|Sodam, Primordial Darkness (Final Form)| | ||
| + | * [[The_Face_of_The_Abyss|The Face of the Abyss]] | ||
| + | * [[Final Battle: Space-Time Interstice]] (Starting from Depth 40, and then every depth with 0) | ||
| + | * [[MISSION:_Violent_Tremor|MISSION: Violent Tremor]] (Mission 5) | ||
| + | * [[Twisted_with_Hatred|Twisted with Hatred]] | ||
| + | |Depends|• Finger Armor|Element:<br>• {{icons|Light}}<br>Weakspots:<br>• Hand eyes<br>• Core (final down)| | ||
| + | In a last-ditch effort, Sodam merges with the torso of Gomorus and stays stationary on the far side of the arena.<br> | ||
| + | |||
| + | It starts the fight by filling its half of the arena with Gomorus's white fluid, which badly damages anyone stepping on it. The only reliable and risk-free way to deal with it is by focusing damage while it's doing one of the following attacks: | ||
| + | * Sweeping its left arm across the arena, with its fist stopping on the middle. | ||
| + | * Smashing the ground with its palm opened, which can either spew fireballs, launch ice spikes or rain rocks. | ||
| + | * Smashing the ground with its fist clenched, which can either cause thunder shock to rain down or rock spikes to perk up. | ||
| + | During this phase, breaking the "rings" on Sodam's hands will cause it to flinch for a bit. Additionally, it will also trigger one of the three Heroine Buffs (see below) depending on the heroine that gets talked to the most during the Phase 2 preparations. | ||
| + | The multi-party also needs to be cautious when Sodam does one of these attacks: | ||
| + | * Puking even more white fluids that floods more parts of the arena floor, giving less wiggle room to the players. The fluids will retreat back into the original position when the players cause Sodam to flinch. | ||
| + | * After a very short tell, launches a lethal burst of energy to the middle section of the arena. Can be avoided by reflexively dodging to the side of the arena; additionally, it's recommended to keep hugging the sides for the most of the duration of the phase. | ||
| + | <br> | ||
| + | '''Heroine Buffs:'''<br> | ||
| + | During the preparation phase of Phase 2, the players can talk to each of the three PSO2 heroines; Matoi, Hitsugi and Hariette. Depending on the heroine who gets talked to the most, the player will get different buffs that help them when they break the rings on Sodam's hands. If none of the heroines are talked to, or if the result is a tie, a random buff will be chosen: | ||
| + | * Matoi's Wish: Increases the maximum HP and PP, as well as the damage damage output, of everyone in the multi-party. | ||
| + | * Hitsugi's Zeal: Damages Sodam for ~1,600,000, Stuns Sodam for a approximately 10 seconds. This also impales both of its hands, making the central cores easier to damage. | ||
| + | * Hariette's Order: Inflicts 8,000,000 damage (9,999,999 upon critical hit) to Sodam.<br> | ||
| + | <br> | ||
| + | '''Finishing It Off:'''<br> | ||
| + | When Sodam's HP is near 0, it will flinch and the white fluid dissipates. The whole multi-party would need to approach it to whittle down its remaining HP and finish it off. However, take note that in the Ultra Hard difficulty, there will be a periodic DPS check from the dying Sodam that will instantly kill anyone it hits unless dodged, until either it dies or the multi-party is unable to proceed, so the multi-party is urged to finish it as quickly as possible.}} | ||
</table> | </table> | ||
==Tainted Sylvants== | ==Tainted Sylvants== | ||
{{EnemyHeader}} | {{EnemyHeader}} | ||
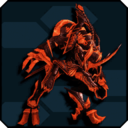
| − | {{EnemyRow| | + | {{EnemyRow|Geragodan|UIEnemyGeragodan.png|Geragodan|Corrupted - Forest|<!--DropList-->|<!--Breakpoints-->|Element:<br>• {{icons|Ice}}<br>Weakspots:<br>• Head|Tainted version of Udan.}} |
| − | {{EnemyRow| | + | {{EnemyRow|Gibludan|UIEnemyGibludan.png|Gibludan|Corrupted - Forest|<!--DropList-->|• Rock|Element:<br>• {{icons|Ice}}<br>Weakspots:<br>• Head|Tainted version of Za'udan.}} |
| − | {{EnemyRow| | + | {{EnemyRow|Zgraf|UIEnemyZgraf.png|Zgraf|Corrupted - Forest|<!--DropList-->|<!--Breakpoints-->|Element:<br>• {{icons|Ice}}<br>Weakspots:<br>• Head|Tainted version of Grulf.}} |
| − | {{EnemyRow| | + | {{EnemyRow|Zgraf Gu|UIEnemyZgrafGu.png|Zgraf Gu|Corrupted - Forest|Lv. 1+ |
| − | *{{props|Stigma}}|<!-Breakpoints-->|Element:<br>• {{icons|Ice}}<br>Weakspots:<br>• Head|Rare variant of Zgraf.}} | + | *{{props|Stigma}}|<!--Breakpoints-->|Element:<br>• {{icons|Ice}}<br>Weakspots:<br>• Head|Rare variant of Zgraf.}} |
| − | {{EnemyRow| | + | {{EnemyRow|Balgraf|UIEnemyBalgraf.png|Balgraf|Corrupted - Forest|<!--DropList-->|<!--Breakpoints-->|Element:<br>• {{icons|Ice}}<br>Weakspots:<br>• Head|Tainted version of Phongrulf.}} |
| − | {{EnemyRow| | + | {{EnemyRow|Balgraf Gu|UIEnemyBalgrafGu.png|Balgraf Gu|Corrupted - Forest|Lv. 1+ |
*{{props|Stigma}}|<!--Breakpoints-->|Element:<br>• {{icons|Ice}}<br>Weakspots:<br>• Head|Rare variant of Balgraf.}} | *{{props|Stigma}}|<!--Breakpoints-->|Element:<br>• {{icons|Ice}}<br>Weakspots:<br>• Head|Rare variant of Balgraf.}} | ||
| − | {{EnemyRow| | + | {{EnemyRow|Folgnis|UIEnemyFolgnis.png|Folgnis|Corrupted - Forest|<!--DropList-->|<!--Breakpoints-->|Element:<br>• {{icons|Ice}}<br>Weakspots:<br>• Head|Tainted version of Agnis.}} |
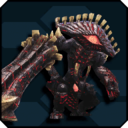
| − | {{EnemyRow| | + | {{EnemyRow|Grandilga|UIEnemyGrandilga.png|Grandilga|Corrupted - Forest|<!--DropList-->|<!--Breakpoints-->|Element:<br>• {{icons|Ice}}<br>Weakpots:<br>• Belly|Tainted version of Garongo.}} |
| − | {{EnemyRow| | + | {{EnemyRow|Foehgo|UIEnemyFoehgo.png|Foehgo|Corrupted - Forest|<!--DropList-->|<!--Breakpoints-->|Element:<br>• {{icons|Ice}}<br>Weakpots:<br>• Head<br>• Rear|Tainted version of Yedi.}} |
| − | {{EnemyRow| | + | {{EnemyRow|Kaisfoehgo|UIEnemyKaisfoehgo.png|Kaisfoehgo|Corrupted - Forest|<!--DropList-->|<!--Breakpoints-->|Element:<br>• {{icons|Ice}}<br>Weakspots:<br>• Head<br>• Rear|Tainted version of King Yedi.}} |
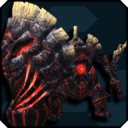
| − | {{EnemyRow| | + | {{EnemyRow|Jahmagrs|UIEnemyJahmagrs.png|Jahmagrs|Corrupted - Forest|<!--DropList-->|<!--Breakpoints-->|Element:<br>• {{icons|Ice}}<br>Weakspots:<br>• Hump|Tainted version of Marmoth.}} |
| − | {{EnemyRow| | + | {{EnemyRow|Bearabos|UIEnemyBearabos.png|Bearabos|Corrupted - Forest|Lv. 1+ |
*{{props|Beari Soul}}|<!--Breakpoints-->|Element:<br>• {{icons|Ice}}<br>Weakspots:<br>• Head|Tainted version of Rockbear.}} | *{{props|Beari Soul}}|<!--Breakpoints-->|Element:<br>• {{icons|Ice}}<br>Weakspots:<br>• Head|Tainted version of Rockbear.}} | ||
| − | {{EnemyRow| | + | {{EnemyRow|Bergaribosa|UIEnemyBergaribosa.png|Bergaribosa|Corrupted - Forest|Lv. 1+ |
*{{props|Stigma}}|<!--Breakpoints-->|Element:<br>• {{icons|Ice}}<br>Weakspots:<br>• Head|Rare variant of Bearabos.}} | *{{props|Stigma}}|<!--Breakpoints-->|Element:<br>• {{icons|Ice}}<br>Weakspots:<br>• Head|Rare variant of Bearabos.}} | ||
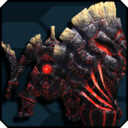
| − | {{EnemyRow| | + | {{EnemyRow|Plosiogrs|UIEnemyPlosiogrs.png|Plosiogrs|Corrupted - Forest|Lv. 1+ |
*{{props|Siogr Soul}}|• Hump<br>• Left Horn<br>• Right Horn|Element:<br>• {{icons|Ice}}<br>Weakspots:<br>• Face<br>• Hump|Tainted version of De Marmoth.}} | *{{props|Siogr Soul}}|• Hump<br>• Left Horn<br>• Right Horn|Element:<br>• {{icons|Ice}}<br>Weakspots:<br>• Face<br>• Hump|Tainted version of De Marmoth.}} | ||
| − | {{EnemyRow| | + | {{EnemyRow|Ignisiogrs|UIEnemyIgnisiogrs.png|Ignisiogrs|Corrupted - Forest|Lv. 1+ |
*{{props|Stigma}}|• Hump<br>• Left Horn<br>• Right Horn|Element:<br>• {{icons|Ice}}<br>Weakspots:<br>• Face<br>• Hump|Rare variant of Plosiogrs.}} | *{{props|Stigma}}|• Hump<br>• Left Horn<br>• Right Horn|Element:<br>• {{icons|Ice}}<br>Weakspots:<br>• Face<br>• Hump|Rare variant of Plosiogrs.}} | ||
| − | {{EnemyRow| | + | {{EnemyRow|Diaboigryphis|UIEnemyDiaboigryphis.png|Diaboigryphis|Corrupted - Forest|Lv. 1+ |
*{{props|Diabo Soul}}|• Horn<br>• Left Wing<br>• Right Wing<br>• Tail|Element:<br>• {{icons|Ice}}<br>Weakspots:<br>• Horn<br>• Head<br>• Tail|Tainted variant of Vol Dragon.}} | *{{props|Diabo Soul}}|• Horn<br>• Left Wing<br>• Right Wing<br>• Tail|Element:<br>• {{icons|Ice}}<br>Weakspots:<br>• Horn<br>• Head<br>• Tail|Tainted variant of Vol Dragon.}} | ||
| − | {{EnemyRow| | + | {{EnemyRow|Vomosbrodyphis|UIEnemyVomosbrodyphis.png|Vomosbrodyphis|Corrupted - Forest|Lv. 1+ |
*{{props|Stigma}}|• Horn<br>• Left Wing<br>• Right Wing<br>• Tail|Element:<br>• {{icons|Ice}}<br>Weakspots:<br>• Horn<br>• Head<br>• Tail|Rare variant of Diaboigryphis}} | *{{props|Stigma}}|• Horn<br>• Left Wing<br>• Right Wing<br>• Tail|Element:<br>• {{icons|Ice}}<br>Weakspots:<br>• Horn<br>• Head<br>• Tail|Rare variant of Diaboigryphis}} | ||
| Line 202: | Line 430: | ||
==Tainted Automata== | ==Tainted Automata== | ||
{{EnemyHeader}} | {{EnemyHeader}} | ||
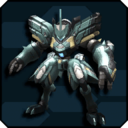
| − | {{EnemyRow| | + | {{EnemyRow|Jagd Spardan|UIEnemyJagdSpardan.png|Jagd Spardan|Corrupted - Underground Shafts|<!--DropList-->|<!--Breakpoints-->|Element:<br>• {{icons|Fire}}<br>Weakspots:<br>• Blue Core|Tainted version of Spardun A. Watch out for its rampage and sick breakdancing.}} |
| − | {{EnemyRow| | + | {{EnemyRow|Sinow Rapidus|UIEnemySinowRapidus.png|Sinow Rapidus|Corrupted - Underground Shafts|Lv. 1+ |
*{{props|Sinow Soul}}|<!--Breakpoints-->|Element:<br>• {{icons|Fire}}<br>Weakspots:<br>• Blue Core|Tainted version of Signo Beat. Attacks more rapidly than usual.}} | *{{props|Sinow Soul}}|<!--Breakpoints-->|Element:<br>• {{icons|Fire}}<br>Weakspots:<br>• Blue Core|Tainted version of Signo Beat. Attacks more rapidly than usual.}} | ||
| − | {{EnemyRow| | + | {{EnemyRow|Sinow Rosso|UIEnemySinowRosso.png|Sinow Rosso|Corrupted - Underground Shafts|Lv. 1+ |
*{{props|Stigma}}|<!--Breakpoints-->|Element:<br>• {{icons|Fire}}<br>Weakspots:<br>• Blue Core|Rare variant of Sinow Rapidus.}} | *{{props|Stigma}}|<!--Breakpoints-->|Element:<br>• {{icons|Fire}}<br>Weakspots:<br>• Blue Core|Rare variant of Sinow Rapidus.}} | ||
{{EnemyRow|Gunkaiser|UIEnemyGunkaiser.png|Gunkaiser|Corrupted - Underground Shafts|<!--DropList-->|<!--Breakpoints-->|Element:<br>• {{icons|Fire}}<br>Weakspots:<br>• Blue Core|Tainted version of Signogun.}} | {{EnemyRow|Gunkaiser|UIEnemyGunkaiser.png|Gunkaiser|Corrupted - Underground Shafts|<!--DropList-->|<!--Breakpoints-->|Element:<br>• {{icons|Fire}}<br>Weakspots:<br>• Blue Core|Tainted version of Signogun.}} | ||
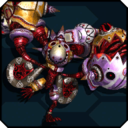
| − | {{EnemyRow| | + | {{EnemyRow|Kaiser Balger|UIEnemyKaiserBalger.png|Kaiser Balger|Corrupted - Underground Shafts|<!--DropList-->|<!--Breakpoints-->|Element:<br>• {{icons|Fire}}<br>Weakspots:<br>• Blue Core|Tainted version of Vint Balger, Ganon Balger and Jagd Balger combined. Has moves equivalent to all 3 enemies.}} |
| − | {{EnemyRow| | + | {{EnemyRow|Rapid Gillnas|UIEnemyRapidGillnas.png|Rapid Gillnas|Corrupted - Underground Shafts|<!--DropList-->|<!--Breakpoints-->|Element:<br>• {{icons|Fire}}<br>Weakspots:<br>• Blue Core|Tainted version of Gillnas. Does not separate upon death.}} |
| − | {{EnemyRow| | + | {{EnemyRow|Bladingale|UIEnemyBladingale.png|Bladingale|Corrupted - Underground Shafts|<!--DropList-->|<!--Breakpoints-->|Element:<br>• {{icons|Fire}}<br>Weakspots:<br>• Blue Core|Tainted version of Dingale. Dual-wields gunblades and can use attacks from both modes interchangeably.}} |
| − | {{EnemyRow| | + | {{EnemyRow|Dingabruise|UIEnemyDingabruise.png|Dingabruise|Corrupted - Underground Shafts|Lv. 1+ |
*{{props|Stigma}}|<!--Breakpoints-->|Element:<br>• {{icons|Fire}}<br>Weakspots:<br>• Blue Core|Rare variant of Bladingale.}} | *{{props|Stigma}}|<!--Breakpoints-->|Element:<br>• {{icons|Fire}}<br>Weakspots:<br>• Blue Core|Rare variant of Bladingale.}} | ||
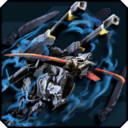
| − | {{EnemyRow| | + | {{EnemyRow|Zeta Granz|UIEnemyZetaGranz.png|Zeta Granz|Corrupted - Underground Shafts|Lv. 1+ |
| − | *{{props|Granz Soul}}|• Knees<br>• | + | *{{props|Granz Soul}}|• Knees<br>• Missile Pods|Element:<br>• {{icons|Fire}}<br>Weakspots:<br>• Blue Core|Tainted version of Vardersoma. Breaking its knees exposes the weak point, breaking parts on it disables the some of its projectiles. Susceptible to Burn status.}} |
| − | {{EnemyRow| | + | {{EnemyRow|Epsilon Granz|UIEnemyEpsilonGranz.png|Epsilon Granz|Corrupted - Underground Shafts|Lv. 1+ |
| − | *{{props|Stigma}}|• Knees<br>• | + | *{{props|Stigma}}|• Knees<br>• Missile Pods|Element:<br>• {{icons|Fire}}<br>Weakspots:<br>• Blue Core|Rare variant of Zeta Granz.}} |
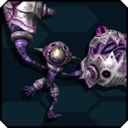
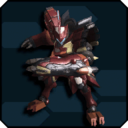
| − | {{EnemyRow| | + | {{EnemyRow|Falke Leone|UIEnemyFalkeLeone.png|Falke Leone|Corrupted - Underground Shafts|Lv. 1+ |
*{{props|Leone Soul}}|• Head<br>• Claws<br>• Wings|Element:<br>• {{icons|Fire}}<br>Weakspots:<br>• Blue Core|Tainted version of Fang Banshee. Features quick melee attacks and is very agile. Breaking its head exposes the weak point and breaking other parts interrupts its attacks. Susceptible to Burn status.}} | *{{props|Leone Soul}}|• Head<br>• Claws<br>• Wings|Element:<br>• {{icons|Fire}}<br>Weakspots:<br>• Blue Core|Tainted version of Fang Banshee. Features quick melee attacks and is very agile. Breaking its head exposes the weak point and breaking other parts interrupts its attacks. Susceptible to Burn status.}} | ||
| − | {{EnemyRow| | + | {{EnemyRow|Leone Farozzo|UIEnemyLeoneFarozzo.png|Leone Farozzo|Corrupted - Underground Shafts|Lv. 1+ |
*{{props|Stigma}}|• Head<br>• Claws<br>• Wings|Element:<br>• {{icons|Fire}}<br>Weakspots:<br>• Blue Core|Rare variant of Falke Leone.}} | *{{props|Stigma}}|• Head<br>• Claws<br>• Wings|Element:<br>• {{icons|Fire}}<br>Weakspots:<br>• Blue Core|Rare variant of Falke Leone.}} | ||
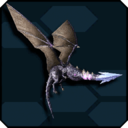
| − | {{EnemyRow| | + | {{EnemyRow|Varima Leopod|UIEnemyVarimaLeopod.png|Varima Leopod|Corrupted - Underground Shafts|Lv. 1+ |
*{{props|Leopod Soul}}|• Head<br>• Claws<br>• Wings|Element:<br>• {{icons|Fire}}<br>Weakspots:<br>• Blue Core|Tainted version of Fang Banser. Fires a variety of different projectiles towards players, when enraged this amount significantly increases. Breaking its head exposes the weak point and breaking other parts interrupts its attacks. Susceptible to Burn status.}} | *{{props|Leopod Soul}}|• Head<br>• Claws<br>• Wings|Element:<br>• {{icons|Fire}}<br>Weakspots:<br>• Blue Core|Tainted version of Fang Banser. Fires a variety of different projectiles towards players, when enraged this amount significantly increases. Breaking its head exposes the weak point and breaking other parts interrupts its attacks. Susceptible to Burn status.}} | ||
| − | {{EnemyRow| | + | {{EnemyRow|Leopod Vrozzo|UIEnemyLeopodVrozzo.png|Leopod Vrozzo|Corrupted - Underground Shafts|Lv. 1+ |
*{{props|Stigma}}|• Head<br>• Claws<br>• Wings|Element:<br>• {{icons|Fire}}<br>Weakspots:<br>• Blue Core|Rare variant of Varima Leopod.}} | *{{props|Stigma}}|• Head<br>• Claws<br>• Wings|Element:<br>• {{icons|Fire}}<br>Weakspots:<br>• Blue Core|Rare variant of Varima Leopod.}} | ||
| Line 243: | Line 471: | ||
==Tainted Draconians== | ==Tainted Draconians== | ||
{{EnemyHeader}} | {{EnemyHeader}} | ||
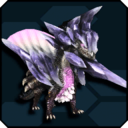
| − | {{EnemyRow| | + | {{EnemyRow|Valgahla|UIEnemyValgahla.png|Valgahla|Corrupted - Volcanic Caves| |<!--Breakpoints-->|Element:<br>• {{icons|Lightning}}<br>Weakspots:<br>• | }} |
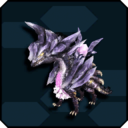
| − | {{EnemyRow| | + | {{EnemyRow|Grobgahla|UIEnemyGrobgahla.png|Grobgahla|Corrupted - Volcanic Caves| |<!--Breakpoints-->|Element:<br>• {{icons|Lightning}}<br>Weakspots:<br>• | }} |
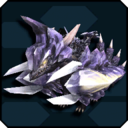
| − | {{EnemyRow| | + | {{EnemyRow|G Chevalizan|UIEnemyZChevalizan.png|G Chevalizan|Corrupted - Volcanic Caves| |<!--Breakpoints-->|Element:<br>• {{icons|Lightning}}<br>Weakspots:<br>• | }} |
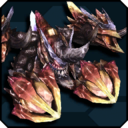
| − | {{EnemyRow| | + | {{EnemyRow|Z Chevalizan|UIEnemyGChevalizan.png|Z Chevalizan|Corrupted - Volcanic Caves| |<!--Breakpoints-->|Element:<br>• {{icons|Lightning}}<br>Weakspots:<br>• | }} |
| − | {{EnemyRow| | + | {{EnemyRow|Chevalizan|UIEnemyChevalizan.png|Chevalizan|Corrupted - Volcanic Caves| |<!--Breakpoints-->|Element:<br>• {{icons|Lightning}}<br>Weakspots:<br>•| }} |
| − | {{EnemyRow| | + | {{EnemyRow|Grudran|UIEnemyGrudran.png|Grudran|Corrupted - Volcanic Caves| |• Tail|Element:<br>• {{icons|Lightning}}<br>Weakspots:<br>• Broken Tail| }} |
| − | {{EnemyRow| | + | {{EnemyRow|Ventasaur|UIEnemyVentasaur.png|Ventasaur|Corrupted - Volcanic Caves| |<!--Breakpoints-->|Element:<br>• {{icons|Lightning}}<br>Weakspots:<br>• | }} |
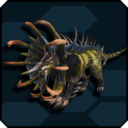
| − | {{EnemyRow| | + | {{EnemyRow|Dephansaur|UIEnemyDephansaur.png|Dephansaur|Corrupted - Volcanic Caves| |• Horn<br>• Tail|Element:<br>• {{icons|Lightning}}<br>Weakspots:<br>• | }} |
| − | {{EnemyRow| | + | {{EnemyRow|Z Schwarzus|UIEnemyZSchwarzus.png|Z Schwarzus|Corrupted - Volcanic Caves| |<!--Breakpoints-->|Element:<br>• {{icons|Lightning}}<br>Weakspots:<br>• | }} |
| − | {{EnemyRow| | + | {{EnemyRow|Boks Deubarz|UIEnemyBoksDeubarz.png|Boks Deubarz|Corrupted - Volcanic Caves|Lv. 1+ |
*{{props|Deubarz Soul}} | *{{props|Deubarz Soul}} | ||
Lv. 71+ | Lv. 71+ | ||
| Line 267: | Line 495: | ||
*{{rarity|13}} {{icons|Knuckles}} [[Voxed Baleos]]|• Back|Element:<br>• {{icons|Lightning}}<br>Weakspots:<br>• Mouth| }} | *{{rarity|13}} {{icons|Knuckles}} [[Voxed Baleos]]|• Back|Element:<br>• {{icons|Lightning}}<br>Weakspots:<br>• Mouth| }} | ||
| − | {{EnemyRow| | + | {{EnemyRow|Bugihl Deubarz|UIEnemyBugihlDeubarz.png|Bugihl Deubarz|Corrupted - Volcanic Caves| |• Back|Element:<br>• {{icons|Lightning}}<br>Weakspots:<br>• Mouth| }} |
| − | {{EnemyRow| | + | {{EnemyRow|Gryzorus Drago|UIEnemyGryzorusDrago.png|Gryzorus Drago|Corrupted - Volcanic Caves|Lv. 1+ |
*{{props|Gryzorus Soul}} | *{{props|Gryzorus Soul}} | ||
Lv. 71+ | Lv. 71+ | ||
| Line 275: | Line 503: | ||
*{{rarity|13}} {{icons|Jet Boots}} [[Gryzo Shosul]]|• Wings<br>• Hands<br>• Face|Element:<br>• {{icons|Lightning}}<br>Weakspots:<br>• Broken | }} | *{{rarity|13}} {{icons|Jet Boots}} [[Gryzo Shosul]]|• Wings<br>• Hands<br>• Face|Element:<br>• {{icons|Lightning}}<br>Weakspots:<br>• Broken | }} | ||
| − | {{EnemyRow| | + | {{EnemyRow|Nilbareez Drago|UIEnemyNilbareezDrago.png|Nilbareez Drago|Corrupted - Volcanic Caves| |• Wings<br>• Hands<br>• Face|Element:<br>• {{icons|Lightning}}<br>Weakspots:<br>• Broken | }} |
| − | {{EnemyRow| | + | {{EnemyRow|Drago Deadlion|UIEnemyDragoDeadlion.png|Drago Deadlion|Corrupted - Volcanic Caves|Lv. 1+ |
*{{props|Deadlion Soul}} | *{{props|Deadlion Soul}} | ||
Lv. 71+ | Lv. 71+ | ||
| Line 283: | Line 511: | ||
*{{rarity|13}} {{icons|Wand}} [[Deadlio Gridder]]|• Spear<br>• Shield<br>• Face|Element:<br>• {{icons|Lightning}}<br>Weakspots:<br>• Broken Face | }} | *{{rarity|13}} {{icons|Wand}} [[Deadlio Gridder]]|• Spear<br>• Shield<br>• Face|Element:<br>• {{icons|Lightning}}<br>Weakspots:<br>• Broken Face | }} | ||
| − | {{EnemyRow| | + | {{EnemyRow|Valeon Drahl|UIEnemyValeonDrahl.png|Valeon Drahl|Corrupted - Volcanic Caves| |• Spear<br>• Shield<br>• Face|Element:<br>• {{icons|Lightning}}<br>Weakspots:<br>• Broken Face | }} |
</table> | </table> | ||
| + | {{PSO2 Navbox}} | ||
Latest revision as of 18:09, 12 September 2023
| Tainted Enemies | Falspawn | Draconians | Automata | Sylvants | Oceanids | Nightfallers | Phantasms | Supernaturals | Luminmechs | Special Enemies |
Tainted Falspawn
| Enemy | Area | Drop List | Breakpoints | Weakness | Notes |
|---|---|---|---|---|---|
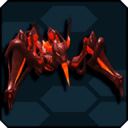
 Dagan Yuga |
Tainted Area | Element: • Weakspots: • Red Core |
Tainted version of Dagan. Sprays mist from its underbelly that siphons the target's PP. | ||
 Yugarl Dagan |
Tainted Area | Lv. 1+
|
Element: • Weakspots: • Red Core |
Rare variant of Dagan Yuga. | |
 Yugadicahdr |
Tainted Area | Element: • Weakspots: • Red Core |
Tainted version of Predicahdr. Displays heightened aggression compared to its normal counterpart. | ||
 Nelgadicahdr |
Tainted Area | Lv. 1+
|
Element: • Weakspots: • Red Core |
Rare variant of Yugadicahdr. | |
 Yuguldrahda |
Tainted Area | • Back Core | Element: • Weakspots: • Red Core |
Tainted version of Goldrahda. Faster and more aggressive than regular Goldrahdas. Destroy the core on its back to prevent it from detonating. | |
 Yurisgadrahda |
Tainted Area | Lv. 1+ * |
• Back Core | Element: • Weakspots: • Red Core |
Rare variant of Yuguldrahda. |
 Gawonda Yuga |
Tainted Area | Element: • Weakspots: • Back |
Tainted version of Gawonda. | ||
 Guwonda Yuga |
Tainted Area | Element: • Weakspots: • Back |
Tainted version of Guwonda. | ||
 Cuchronahda Yuga |
Tainted Area | • Waist Armor | Element: • Weakspots: • Red Core |
Tainted version of Cuchronahda. | |
 Cychronahda Yuga |
Tainted Area | • Waist Armor | Element: • Weakspots: • Red Core |
Tainted version of Cychronahda. | |
 Yggda Sorcerer |
Tainted Area | • Left Wing • Right Wing • Tail |
Element: • Weakspots: • Red Core |
Tainted version of Luda Sorcerer. | |
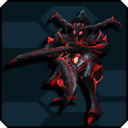
 Viel Hyunal |
Story Quest | • Arm Cores | Element: • Weakspots: • Red Core • Body |
Matoi Viel's form upon fusing with Anga Phandaj. Destroy the cores on her arms to remove the barrier protecting her body. Performs her ultimate attack when low on health. | |
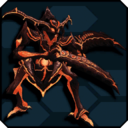
 Dio Hyunal |
Tainted Area | Lv. 1+
Lv. 71+
|
• Arm Cores | Element: • Weakspots: • Red Core • Body |
The armored form of the Profound Darkness's host, Persona. Follows the same strategies as its counterpart, Viel Hyunal. |
 Anga Phandaj |
Tainted Area | Lv. 1+
Lv. 71+
Lv.81+ |
• Bits | Element: • Weakspots: • Red Core |
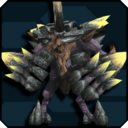
A Photon Beast corrupted by immense F-Factor. Gains resistance to the three most damaging Weapons/Elements used against it, reducing the damage it takes from them by 80%. Destroy glowing bits to stun it and expose its core as a weakpoint. Revives once upon being defeated, becoming more aggressive and powerful. Stunned by the Panic status. |
Tainted Dark Falz
| Enemy | Area | Drop List | Breakpoints | Weakness | Notes |
|---|---|---|---|---|---|
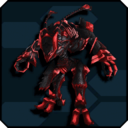
 Omega Hyunal |
Omega | Lv. 1+
Lv. 71+ |
• Sword | Element: • Weakspots: • Red Core |
Omega variant of Falz Hyunal. Qualifies as a Tainted Falspawn. Primarily specializes in close-ranged combat. Deploys the Elder Pain Omega when his HP reaches a certain threshold, granting him high-speed, long-range attacks. Break the Elder Pain Omega to reduce its damage. |
 Omega Angel |
Omega | Lv. 1+
Lv. 71+ |
• Wings | Element: • Weakspots: • Purple Core |
Omega variant of Falz Angel. Qualifies as a Tainted Falspawn. Integrates Compound Techniques into his moveset when low on health. |
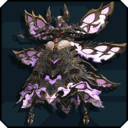 Omega Appregina |
Omega | Lv. 1+
Lv. 71+ |
• Drones | Element: • Weakspots: • Red Core |
Omega variant of Falz Appregina (from PHANTASY STAR ONLINE 2 EPISODE 0). Qualifies as a Tainted Falspawn. Primarily focuses on close-ranged Dagger attacks. Her insect drones can support her by attacking and healing. Performs her ultimate attack when her HP drops below a certain value. |
 Omega Dranble |
Omega | Lv. 1+
Lv. 71+ |
• Arms | Element: • Weakspots: • Broken Arms |
Omega variant of Falz Dranble. Qualifies as a Tainted Falspawn. Break its enlarged arms to reveal the weakpoints underneath. |
 Dranble Krone |
Castrum Demonica: Madness | • Arms | Element: • Weakspots: • Broken Arms |
Smaller and weaker version of Omega Dranble. Qualifies as a Tainted Falspawn. | |
 Elga Masquerader |
Story Quest Episode 5 Chapter 6 | None | Element: • Weakspots: • Core |
Elmir at the height of his power. | |
Omega Masquerader |
Regional Survey: Remnants of a Parallel World Endless Battle: Eternal Rondo (Stage 30 only) |
Lv. 1+
Lv. 71+ (Eternal Rondo only)
Lv. 91+
|
Element: • Weakspots: • Core |
Ultimate Quest variation of Elga Masquerader. Becomes stronger every time it's defeated. Regional Survey: Remnants of a Parallel World for more information. Gains immunity to attacks that are used repeatedly. |
|
 Profound Darkness |
Barren Blossom: Corruptor of All Barren Blossom: Butcher of Light |
Lv. 1+
Lv. 71+
Lv. 96+
|
• Petals • Bits • Chest Core (Phase 3) |
Element: • Weakspots: • Core • Head (Phase 3) |
The ultimate incarnation of corruption that seeks to destroy the universe. Flower Form: On SH and below, break Body Petals to temporarily expose the Base Core. On XH, break Body Petals to release Floating Bits. Destroy all Floating Bits to expose the Base Core. At 60% HP, background will change, and PD will gain weakness to a weapon type on SH and below. At 40% HP, will transition into humanoid form. Humanoid Form: On SH and below, destroy all Floating Bits to temporarily immobilize PD. On XH, destroy all Floating Bits to reveal the Chest core. Destroy the chest core to temporarily immobilize PD. At low HP, will back off and teleport you into 1v1. If you fail to kill the 1v1 form in time the party will wipe. On SH and below, PD will be immobilized permanently afterwards. On XH, the Face Core will be revealed. Destroying the Face Core will immobilize PD permanently. |
 Omega Falz Luther |
Wisdom Incarnate Longing for Omniscience |
Lv. 1+
Lv. 55+ Lv. 71+ Lv. 76+ Lv. 96+
|
• Bracers • Shoulders • Clock • Beak • Headdress Gems |
Element: • Weakspots: • Clock (Broken) • Chin Core |
Omega variant of Dark Falz Luther. Qualifies as a Tainted Falspawn. Battle strategy is identical to XH Dark Falz Luther on all difficulties. Stunned by the Poison status effect. Will sometimes switch phases mid-attack. Uses two knife time stop during first HP threshold. At second HP threshold, summons three sets of knives; second set will rotate around the stage before dropping knives. |
 Omega Falz Apprentice |
Queen's Nightmare: Earth Depths Queen's Nightmare: Sand City |
Lv. 1+
Lv. 75+
Lv. 80+ |
• Wings • Pink Orbs • Arm Cores |
Element: • Weakspots: • Cores |
Omega variant of Dark Falz Apprentice (from PHANTASY STAR ONLINE 2 THE ANIMATION). Qualifies as a Tainted Falspawn. During the aerial battle, breaking all 6 wings or both pink orbs on either side of her head will immobilize her momentarily. Doing sufficient damage to her main core will cause her to keep it open during the rest of the aerial phase. Avoid the spinning laser trap by dodging towards the center, and again when giant laser asterisk is launched forward. After she falls to the ground, simply break all her arm cores then hit her main core to finish her off before she finishes charging the final laser attack. |
 Dark Falz Persona |
The Malevolent Void The Call of the Void |
Lv. 1+
Lv.71+
|
• Mask Cores |
Element: • |
An abomination created from Elmir's grudge, invoking a mocking image of Persona and the four initial Dark Falz. Wears different masks that change with every fight; two random masks would be selected from a pool of four different masks, each with a fighting style based on a previous Dark Falz. Each mask has two-stage breaking phases, similar to Dark Ragne's legs.
There's no gimmick to this additional phase, the raid party is to whittle the last of Persona's HP until it's completely depleted. |
The Primordial Darkness
| Enemy | Area | Drop List | Breakpoints | Weakness | Notes |
|---|---|---|---|---|---|
 Gomorus, Primordial Darkness |
|
Depends | Element: • Weakspots: • Eyes |
The physical manifestation of the original Profound Darkness. Gomorus's main body is immune to all damage - the only places where it can be damaged are the eyeball-like cores on its tentacles, the large central eye on its face, and its hands.
When Gomorus's HP is lowered sufficiently, it will destroy the 3 centermost platforms with its tentacles and expose two additional cores like the ones in Phase 1 placed on the far left and far right platforms. Breaking both these cores to proceed.
|
|
 Sodam, Primordial Darkness |
|
Depends | Elements: • None Weakspots: • Core |
The true form of the original Profound Darkness.
Has different weakness depending on which quest you're playing; in Urgent Quest or Story Quest, it gains random weapon weaknesses throughout the battle and in Divide Quest or Ultimate Quest, it has weakness to opposing elements it has. You can encounter both versions in Challenge Quest.
|
|
 Sodam, Primordial Darkness (Final Form) |
|
Depends | • Finger Armor | Element: • Weakspots: • Hand eyes • Core (final down) |
In a last-ditch effort, Sodam merges with the torso of Gomorus and stays stationary on the far side of the arena. It starts the fight by filling its half of the arena with Gomorus's white fluid, which badly damages anyone stepping on it. The only reliable and risk-free way to deal with it is by focusing damage while it's doing one of the following attacks:
During this phase, breaking the "rings" on Sodam's hands will cause it to flinch for a bit. Additionally, it will also trigger one of the three Heroine Buffs (see below) depending on the heroine that gets talked to the most during the Phase 2 preparations. The multi-party also needs to be cautious when Sodam does one of these attacks:
|
Tainted Sylvants
| Enemy | Area | Drop List | Breakpoints | Weakness | Notes |
|---|---|---|---|---|---|
 Geragodan |
Corrupted - Forest | Element: • Weakspots: • Head |
Tainted version of Udan. | ||
 Gibludan |
Corrupted - Forest | • Rock | Element: • Weakspots: • Head |
Tainted version of Za'udan. | |
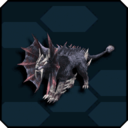 Zgraf |
Corrupted - Forest | Element: • Weakspots: • Head |
Tainted version of Grulf. | ||
 Zgraf Gu |
Corrupted - Forest | Lv. 1+
|
Element: • Weakspots: • Head |
Rare variant of Zgraf. | |
 Balgraf |
Corrupted - Forest | Element: • Weakspots: • Head |
Tainted version of Phongrulf. | ||
 Balgraf Gu |
Corrupted - Forest | Lv. 1+
|
Element: • Weakspots: • Head |
Rare variant of Balgraf. | |
 Folgnis |
Corrupted - Forest | Element: • Weakspots: • Head |
Tainted version of Agnis. | ||
 Grandilga |
Corrupted - Forest | Element: • Weakpots: • Belly |
Tainted version of Garongo. | ||
 Foehgo |
Corrupted - Forest | Element: • Weakpots: • Head • Rear |
Tainted version of Yedi. | ||
 Kaisfoehgo |
Corrupted - Forest | Element: • Weakspots: • Head • Rear |
Tainted version of King Yedi. | ||
 Jahmagrs |
Corrupted - Forest | Element: • Weakspots: • Hump |
Tainted version of Marmoth. | ||
 Bearabos |
Corrupted - Forest | Lv. 1+
|
Element: • Weakspots: • Head |
Tainted version of Rockbear. | |
 Bergaribosa |
Corrupted - Forest | Lv. 1+
|
Element: • Weakspots: • Head |
Rare variant of Bearabos. | |
 Plosiogrs |
Corrupted - Forest | Lv. 1+
|
• Hump • Left Horn • Right Horn |
Element: • Weakspots: • Face • Hump |
Tainted version of De Marmoth. |
 Ignisiogrs |
Corrupted - Forest | Lv. 1+
|
• Hump • Left Horn • Right Horn |
Element: • Weakspots: • Face • Hump |
Rare variant of Plosiogrs. |
 Diaboigryphis |
Corrupted - Forest | Lv. 1+
|
• Horn • Left Wing • Right Wing • Tail |
Element: • Weakspots: • Horn • Head • Tail |
Tainted variant of Vol Dragon. |
 Vomosbrodyphis |
Corrupted - Forest | Lv. 1+
|
• Horn • Left Wing • Right Wing • Tail |
Element: • Weakspots: • Horn • Head • Tail |
Rare variant of Diaboigryphis |
Tainted Automata
| Enemy | Area | Drop List | Breakpoints | Weakness | Notes |
|---|---|---|---|---|---|
 Jagd Spardan |
Corrupted - Underground Shafts | Element: • Weakspots: • Blue Core |
Tainted version of Spardun A. Watch out for its rampage and sick breakdancing. | ||
 Sinow Rapidus |
Corrupted - Underground Shafts | Lv. 1+
|
Element: • Weakspots: • Blue Core |
Tainted version of Signo Beat. Attacks more rapidly than usual. | |
 Sinow Rosso |
Corrupted - Underground Shafts | Lv. 1+
|
Element: • Weakspots: • Blue Core |
Rare variant of Sinow Rapidus. | |
 Gunkaiser |
Corrupted - Underground Shafts | Element: • Weakspots: • Blue Core |
Tainted version of Signogun. | ||
 Kaiser Balger |
Corrupted - Underground Shafts | Element: • Weakspots: • Blue Core |
Tainted version of Vint Balger, Ganon Balger and Jagd Balger combined. Has moves equivalent to all 3 enemies. | ||
 Rapid Gillnas |
Corrupted - Underground Shafts | Element: • Weakspots: • Blue Core |
Tainted version of Gillnas. Does not separate upon death. | ||
 Bladingale |
Corrupted - Underground Shafts | Element: • Weakspots: • Blue Core |
Tainted version of Dingale. Dual-wields gunblades and can use attacks from both modes interchangeably. | ||
 Dingabruise |
Corrupted - Underground Shafts | Lv. 1+
|
Element: • Weakspots: • Blue Core |
Rare variant of Bladingale. | |
 Zeta Granz |
Corrupted - Underground Shafts | Lv. 1+
|
• Knees • Missile Pods |
Element: • Weakspots: • Blue Core |
Tainted version of Vardersoma. Breaking its knees exposes the weak point, breaking parts on it disables the some of its projectiles. Susceptible to Burn status. |
 Epsilon Granz |
Corrupted - Underground Shafts | Lv. 1+
|
• Knees • Missile Pods |
Element: • Weakspots: • Blue Core |
Rare variant of Zeta Granz. |
 Falke Leone |
Corrupted - Underground Shafts | Lv. 1+
|
• Head • Claws • Wings |
Element: • Weakspots: • Blue Core |
Tainted version of Fang Banshee. Features quick melee attacks and is very agile. Breaking its head exposes the weak point and breaking other parts interrupts its attacks. Susceptible to Burn status. |
 Leone Farozzo |
Corrupted - Underground Shafts | Lv. 1+
|
• Head • Claws • Wings |
Element: • Weakspots: • Blue Core |
Rare variant of Falke Leone. |
 Varima Leopod |
Corrupted - Underground Shafts | Lv. 1+
|
• Head • Claws • Wings |
Element: • Weakspots: • Blue Core |
Tainted version of Fang Banser. Fires a variety of different projectiles towards players, when enraged this amount significantly increases. Breaking its head exposes the weak point and breaking other parts interrupts its attacks. Susceptible to Burn status. |
 Leopod Vrozzo |
Corrupted - Underground Shafts | Lv. 1+
|
• Head • Claws • Wings |
Element: • Weakspots: • Blue Core |
Rare variant of Varima Leopod. |
Tainted Draconians
| Enemy | Area | Drop List | Breakpoints | Weakness | Notes |
|---|---|---|---|---|---|
 Valgahla |
Corrupted - Volcanic Caves | Element: • Weakspots: • |
|||
 Grobgahla |
Corrupted - Volcanic Caves | Element: • Weakspots: • |
|||
 G Chevalizan |
Corrupted - Volcanic Caves | Element: • Weakspots: • |
|||
 Z Chevalizan |
Corrupted - Volcanic Caves | Element: • Weakspots: • |
|||
 Chevalizan |
Corrupted - Volcanic Caves | Element: • Weakspots: • |
|||
 Grudran |
Corrupted - Volcanic Caves | • Tail | Element: • Weakspots: • Broken Tail |
||
 Ventasaur |
Corrupted - Volcanic Caves | Element: • Weakspots: • |
|||
 Dephansaur |
Corrupted - Volcanic Caves | • Horn • Tail |
Element: • Weakspots: • |
||
 Z Schwarzus |
Corrupted - Volcanic Caves | Element: • Weakspots: • |
|||
 Boks Deubarz |
Corrupted - Volcanic Caves | Lv. 1+
Lv. 71+ |
• Back | Element: • Weakspots: • Mouth |
|
 Bugihl Deubarz |
Corrupted - Volcanic Caves | • Back | Element: • Weakspots: • Mouth |
||
 Gryzorus Drago |
Corrupted - Volcanic Caves | Lv. 1+
Lv. 71+
|
• Wings • Hands • Face |
Element: • Weakspots: • Broken |
|
 Nilbareez Drago |
Corrupted - Volcanic Caves | • Wings • Hands • Face |
Element: • Weakspots: • Broken |
||
 Drago Deadlion |
Corrupted - Volcanic Caves | Lv. 1+
Lv. 71+
|
• Spear • Shield • Face |
Element: • Weakspots: • Broken Face |
|
 Valeon Drahl |
Corrupted - Volcanic Caves | • Spear • Shield • Face |
Element: • Weakspots: • Broken Face |
| |||||||||||||||||||||||||||||||||||||||||||||||