New Genesis: Mining Rig Defense: Retem
| Mining Rig Defense: Retem | |
|---|---|

| |
| Quest Type | Urgent Quests |
| Battle Power Requirements | |
| Rank 1 | 2049 |
| Rank 2 | 2878 |
| Rank 3 | 3649 |
| Average Enemy Level | |
| Rank 1 | Lv. 45 |
| Rank 2 | Lv. 65 |
| Rank 3 | Lv. 80 |
| Quest Details | |
| Location | South Retem |
| Single/Multi-Party | |
| Party Invitation | Allowed |
| Restrictions | |
| Time Limit | 00:30:00 |
| Damage Limit | None |
| First Clear Rewards | |
| 5,000 | |
| EXP | 0 |
| Rank Rewards | |
| S Rank | |
| A Rank | |
| B Rank | |
| C Rank | |
| Rewards | |
| Rank 1 | |
| Rank 2 | |
| Rank 3 | |
Urgent Quest Notices
"Emergency Announcement: We are preparing for a defensive operation against a large number of DOLLS appearing in the Retem region. All ARKS defenders, please prepare for deployment. (For players with 2049 Battle Power and higher)."
—Initial Announcement Notice
"Attention ARKS defenders: We are beginning a defensive operation against multiple DOLLS in the Retem region. We request the participation of all ARKS defenders. (For players with 2049 Battle Power and higher)."
—Announcement Notice
Quest Objective
Defeat the target enemy
Quest Description
We've received an emergency support request from our active mining unit in Aldimond Desert. Numerous enemy readings in the area suggest a major assault is likely. We need all ARKS defenders to hurry to the site and defend the Mining Rig.
Overview
Mining Rig Defense: Retem is an Urgent Quest set to be released on May 25th, 2022, in which you defend a resource mining rig from enemy attack.
The enemy attacks come in successive Waves. Your goal is to work with other players to successfully defend the rig until the end of the final Wave. The structural damage will affect the rank you receive when completing the quest, however, it will not affect the reward items you receive.
A trigger version of this quest titled Practice Drill: Mining Rig Defense: Retem can be played with the use of ![]() 5 Q-Trigger/Mining Rig Defense: Retem.
5 Q-Trigger/Mining Rig Defense: Retem.
Mining Rig Features
Accessing the Mining Rig will allow you to spend varying amounts of Earned Points for Support Modules such as Recover Structural Integrity and Barrier Shield. Mobile Cannons are powerful special equipment that you can call in via Delivery Devices.
| Support Module | Collectasigne Needed |
|---|---|
| Barrier Shield | 500 pt |
| Special Equipment | 1,000 pt |
| Recover Structural Integrity | 2,000 pt |
| Barrier Shield | 3,500 pt |
| Recover Structural Integrity | 5,000 pt |
| Barrier Shield | 8,000 pt |
| Recover Structural Integrity | 9,500 pt |
| Special Equipment | 12,000 pt |
| Recover Structural Integrity | 14,500 pt |
Ranking Details
| Rank | Remaining Durability |
|---|---|
| S Rank | 80% - 100% |
| A Rank | 40% - 79% |
| B Rank | 1% - 39% |
| C Rank | 0% (All Rigs Destroyed) |
Minimap Details
| Icon | Enemy | Notes |
|---|---|---|
| Backhack | Appears as a red outline around bases. | |
| Meldrum | Can spawn in groups of up to 3. | |
| Barrigale | Appears in groups of 3, forming a wall. | |
| Small Enemy | Represents small enemies. | |
| Medium Enemy | Represents medium boss enemies (Bujin, Varas, Eldi Scythe, etc.). | |
| Large Enemy | Represents large boss enemies (Destragras [Second Form], Daityl Sword, Nex Aelio). |
Wave Details
The following information is based on preliminary observation, and as a result may be incorrect or may not accurately reflect the values seen in-game. Time values may also not fully represent values seen in-game due to server latency. The time values (displayed in x:xx format) represent the time that remains in the wave (visible on the left menu in-game).
| Mining Rig Defense: Aelio Wave Details | |||||
|---|---|---|---|---|---|
| Wave | Enemies | Special Enemies | Wave Length | Wave Notes | Collectasigne Value |
| Wave 1 | - | 1:30 | This icon hasn't been defined. It can be defined here: [[1]] Spawns 2 enemy groups of Sand Rorons and Sand Tinos on the map at 1:28, which respawns in small waves afterwards. This icon hasn't been defined. It can be defined here: [[2]] Spawns 1 enemy group of Boms Gun and Boms Sword on the left or right at 1:28. |
10 pt | |
| Wave 2 | 1:30 | This icon hasn't been defined. It can be defined here: [[3]] Spawns 2 enemy groups of Kerogeros or Roufinbears at the center of the map at 1:28. This icon hasn't been defined. It can be defined here: [[4]] Spawns 2 enemy groups of Kerogeros or Roufinbears at the top left and right of the map at 1:26. |
10 pt | ||
| Wave 3 | 3:00 | This icon hasn't been defined. It can be defined here: [[8]] Spawns 2 enemy groups of Sand Korons or Savinehogs at the bottom left or right of the map at 2:58. Along with these enemies will be an Equalizing Variant Brancle on either side. After these enemy groups are defeated, 1 enemy group of Bomks Sword will spawn on the side without the Equalizing Brancle spawn, and 1 enemy group of Bomks Sword and another Equalizing Brancle will spawn on the side where the Equalizing Brancle was defeated. This icon hasn't been defined. It can be defined here: [[9]] Two Meldrums or Two Backhacks will appear at 2:54. |
20 pt | ||
| Wave 4 | 3:00 | This icon hasn't been defined. It can be defined here: [[14]] Spawns 3 enemy groups of Roufinbears at the center of the map at 2:58. After defeating all Roufinbears, one Elite Variant of Fortos Laser or Lizentos will spawn on the left of the map, along with a group of Sand Roroxes. One enemy group of Bomks Guns, Bomks Sword, and Sand Dotts will spawn shortly after the boss has been spawned. This icon hasn't been defined. It can be defined here: [[15]] Spawns 2 enemy groups of Sand Tinos at the top left and right of the map at 2:53. |
20 pt | ||
| Wave 5 | 3:00 | This icon hasn't been defined. It can be defined here: [[19]] Spawns 1 large enemy group of Elite Variant Sand Tinos near the center of the map at 2:59. After defeating all Elite Sand Tinos, another enemy group of Sand Tinos and Sand Rorons will near the top center of the map, with a chance of the Sand Tinos being Elite Variants. After this second group of enemies of Sand Tinos and Sand Rorons have been defeated, 2 enemy groups of Bomks Gun and Bomks Sword will spawn on the top or bottom of the map, with a chance of the enemies being Elite Variants.
This icon hasn't been defined. It can be defined here: [[20]] Spawns 1 boss group of Kelkundo or Sand Nogleth at the center of the map at 2:55. |
30 pt | ||
| Wave 6 | 3:00 | This icon hasn't been defined. It can be defined here: [[28]] Destragras will spawn directly at the center of the map at 3:59. This icon hasn't been defined. It can be defined here: [[29]] Two Meldrums will appear at 3:54. |
30 pt | ||
Delivery Devices

Delivery Devices are special teleporters found throughout the field during Defense Quests. Depending on how many Collectasigne points you've earned, you can make use of Mobile Cannons.
DOLLS Weapons

During Defense Quests, "DOLLS Weapons" will show up to cause problems.
- Backhack: Adheres to the rig and inflicts direct damage.
- Meldrum: Fires at the rig from a distance.
- Barrigale: Impedes player movement.
Destroy these enemy weapons as soon as possible.
Collectasigne

Photon crystals known as "Collectasigne" will appear on the field as you do battle with enemies. When you collect them, they are stored as "Earned Points" that you can use at the Mining Rig and Delivery Device support modules. Points earned are shared by all players and everyone may make use of them.
Emergency Alerts
Emergency Alerts are sudden incidents in which multiple dangerous enemies such as DOLLS Weapons and Enhanced Enemies appear. It's important to check your radar map to assess the enemy's strength, find your allies, and calmly formulate a response.
Mobile Cannons

Mobile Cannons are powerful special equipment that you can call in via Delivery Devices. While equipped, you are unable to use your normal weapons, and your player character's actions are restricted.
The Mobile Cannon can make the following actions:
- Rapid Fire: Rapid-fire normal attack.
- Charged Blast: Powerful charged shot with limited uses.
- Boosted Glide: High-speed movement that uses PP.
- Sidestep Bash: Strike an attack while dodging.
The Mobile Cannon has a time limit on its use, and when time is up, it is automatically unequipped. Selecting "Unequip" from the Sub-Palette or becoming incapacitated will also cause it to be unequipped.
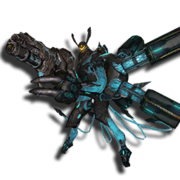
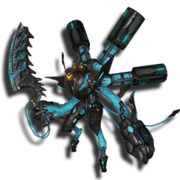
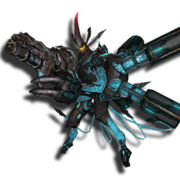
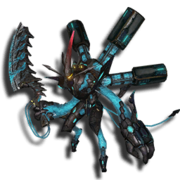
Unique Enemies
Notable Rewards
| Notable Items | |||
|---|---|---|---|
|
|||
| Additional Information | |||
| |||
| ||||||||||||||||||||||||||||||||||||||||||||||||||