Difference between revisions of "Expeditions"
Theta Zero (talk | contribs) m |
m |
||
| Line 10: | Line 10: | ||
Upon player entry within a new area of the map, either a group of enemies will spawn, or an [[Emergencies|emergency trial]] will begin. If an area of the map has had no event for a while, re-entry of a player into the unoccupied area will trigger another event to occur. | Upon player entry within a new area of the map, either a group of enemies will spawn, or an [[Emergencies|emergency trial]] will begin. If an area of the map has had no event for a while, re-entry of a player into the unoccupied area will trigger another event to occur. | ||
| − | + | == Nightfall Province == | |
Nightfall Province Exploration functions as a standard expedition without a direct path to the boss. Instead, players obtain Quest Points by eliminating foes. After reaching 500 points, a quest Telepipe appears for the party, giving them the option to enter the second area with the boss or to return to the Gateway Ship. Eliminating the boss will complete the quest. Alternatively, if the party collects 1000 points, then the quest will be completed: in this case, the boss will not appear if the party enters the second area. | Nightfall Province Exploration functions as a standard expedition without a direct path to the boss. Instead, players obtain Quest Points by eliminating foes. After reaching 500 points, a quest Telepipe appears for the party, giving them the option to enter the second area with the boss or to return to the Gateway Ship. Eliminating the boss will complete the quest. Alternatively, if the party collects 1000 points, then the quest will be completed: in this case, the boss will not appear if the party enters the second area. | ||
| − | + | == Earth == | |
On Tokyo Exploration and Las Vegas Exploration, groups of enemies and emergency quests are only activated near a beacon of light when at least one player gets close to it, although certain emergency quests can be activated immediately after suppressing all foes near the beacon of light regardless of player positioning (Unidentified Creatures in Las Vegas, Tokyo Joyriders). | On Tokyo Exploration and Las Vegas Exploration, groups of enemies and emergency quests are only activated near a beacon of light when at least one player gets close to it, although certain emergency quests can be activated immediately after suppressing all foes near the beacon of light regardless of player positioning (Unidentified Creatures in Las Vegas, Tokyo Joyriders). | ||
| Line 19: | Line 19: | ||
If all parties currently in the field have obtained their required Quest Points, then no further beacons of light will spawn until a new party (which has not obtained the required amount of points) enters the same instance. | If all parties currently in the field have obtained their required Quest Points, then no further beacons of light will spawn until a new party (which has not obtained the required amount of points) enters the same instance. | ||
| − | == | + | == Unlocking Expeditions == |
| − | {| class="wikitable table-responsive- | + | More Expedition Quests can be unlocked by completing the required Quests.<br> |
| − | ! | | + | {| class="wikitable table-responsive-sm" style="text-align:center;" |
| − | + | ! Forest Exploration | |
| − | + | | colspan="2" rowspan="2"| | |
| − | + | | colspan="2" rowspan="4"| | |
| + | | colspan="2" rowspan="6"| | ||
| + | | colspan="2" rowspan="8"| | ||
|- | |- | ||
| − | | | + | | style="background: gray; color:#000000;"| ↓ |
| − | |||
| − | |||
| − | | | ||
|- | |- | ||
| − | + | ! colspan="3" | Volcanic Caves Exploration | |
| − | | | ||
| − | |||
| − | |||
|- | |- | ||
| − | | | + | | style="background: gray; color:#000000;"| ↓ |
| − | | | + | | rowspan="6"| |
| − | | | + | | style="background: gray; color:#000000;"| ↓ |
| − | | | ||
|- | |- | ||
| − | + | ! Desert Exploration | |
| − | + | ! colspan="3"| Coast Exploration | |
| − | | | ||
| − | |||
|- | |- | ||
| − | | | + | | style="background: gray; color:#000000;"| ↓ |
| − | | | + | | style="background: gray; color:#000000;"| ↓ |
| − | | | + | | rowspan="6"| |
| − | | | + | | style="background: gray; color:#000000;"| ↓ |
|- | |- | ||
| − | + | ! Tundra Exploration | |
| − | + | ! Abandoned Mine Exploration | |
| − | | | + | ! colspan="3"| Daybreak Province Exploration |
| − | |||
|- | |- | ||
| − | | | + | | style="background: gray; color:#000000;"| ↓ |
| − | | | + | | style="background: gray; color:#000000;"| ↓ |
| − | | | + | | style="background: gray; color:#000000;"| ↓ |
| − | | | + | | rowspan="4"| |
| + | | style="background: gray; color:#000000;"| ↓ | ||
|- | |- | ||
| − | + | ! Underground Shafts Exploration | |
| − | + | ! Seabed Exploration | |
| − | + | ! Floating Facility Exploration | |
| − | | | + | ! colspan="3"| Tokyo Exploration |
|- | |- | ||
| − | | | + | | style="background: gray; color:#000000;"| ↓ |
| − | | | + | | colspan="2"| |
| − | | | + | | style="background: gray; color:#000000;"| ↓ |
| − | | | + | | style="background: gray; color:#000000;"| ↓ |
| + | | rowspan="2"| | ||
| + | | style="background: gray; color:#000000;"| ↓ | ||
|- | |- | ||
| − | | | + | ! colspan="3"| Floating Continent Exploration |
| − | + | ! Nightfall Province Exploration | |
| − | + | ! Las Vegas Exploration | |
| − | + | ! Bewitched Woods Exploration | |
|- | |- | ||
| − | | | + | | style="background: gray; color:#000000;"| ↓ |
| − | | | + | | rowspan="2"| |
| − | | | + | | style="background: gray; color:#000000;"| ↓ |
| − | | | + | | colspan="6" rowspan="2"| |
|- | |- | ||
| − | | [[ | + | ! Ruins Exploration |
| − | + | ! Dragon Altar Exploration | |
| − | + | |} | |
| − | | | + | * Floating Facility Exploration can alternatively be unlocked by viewing the EP2-6 Event Quest, "Afin and Euclyta". |
| + | * Tokyo Exploration can alternatively be unlocked by viewing the EP4-1 Event Quest, "The "Phantasm" Database". | ||
| + | * Bewitched Woods Exploration can alternatively by unlocked by completing [[Castrum Demonica Battle]], [[Castrum Demonica: Hostility]], or [[Castrum Demonica: Madness]]. | ||
| + | |||
| + | {| class="wikitable table-responsive-sm" style="text-align:center; margin-left:auto; margin-right:auto; width:100%" | ||
| + | |- | ||
| + | ! colspan="4" | Expedition Quests | ||
|- | |- | ||
| − | | [[File: | + | | [[File:UIMapForest.png|link=Forest Exploration]]<br>[[Forest Exploration]] |
| − | | [[ | + | | [[File:UIMapVolcanic.png|link=Volcanic Caves Exploration]]<br>[[Volcanic Caves Exploration]] |
| − | | | + | | [[File:UIMapDesert.png|link=Desert Exploration]]<br>[[Desert Exploration]] |
| − | | | + | | [[File:UIMapTundra.png|link=Tundra Exploration]]<br>[[Tundra Exploration]] |
|- | |- | ||
| − | | [[File: | + | | [[File:UIMapTunnels.png|link=Underground Shafts Exploration]]<br>[[Underground Shafts Exploration]] |
| − | | [[ | + | | [[File:UIMapFloating.png|link=Floating Continent Exploration]]<br>[[Floating Continent Exploration]] |
| − | | | + | | [[File:UIMapRuins.png|link=Ruins Exploration]]<br>[[Ruins Exploration]] |
| − | | | + | | [[File:UIMapDragon.png|link=Dragon Atlar Exploration]]<br>[[Dragon Atlar Exploration]] |
|- | |- | ||
| − | | [[File: | + | | [[File:UIMapCoast.png|link=Coast Exploration]]<br>[[Coast Exploration]] |
| − | | [[ | + | | [[File:UIMapMine.png|link=Abandoned Mine Exploration]]<br>[[Abandoned Mine Exploration]] |
| − | | | + | | [[File:UIMapSeabed.png|link=Seabed Exploration]]<br>[[Seabed Exploration]] |
| − | + | | [[File:UIMapDaybreak.png|link=Daybreak Province Exploration]]<br>[[Daybreak Province Exploration]] | |
|- | |- | ||
| − | | [[File: | + | | [[File:UIMapFacility.png|link=Floating Facility Exploration]]<br>[[Floating Facility Exploration]] |
| − | | [[ | + | | [[File:UIMapNightfall.png|link=Nightfall Province Exploration]]<br>[[Nightfall Province Exploration]] |
| − | | | + | | [[File:UIMapTokyo.png|link=Tokyo Exploration]]<br>[[Tokyo Exploration]] |
| − | | | + | | [[File:UIMapVegas.png|link=Las Vegas Exploration]]<br>[[Las Vegas Exploration]] |
|- | |- | ||
| + | | [[File:UIMapBewitchedWoods.png|link=Bewitched Woods Exploration]]<br>[[Bewitched Woods Exploration]] | ||
| + | | | ||
| + | | | ||
| + | | | ||
|} | |} | ||
| + | = Risk Exploration = | ||
| + | Unlike regular explorations, Risk Exploration Quests have a limited selection of availability every day, rotating between a set of Quests, and can only be accepted on UH difficulty, requiring a {{icons|Main Class}} Main Class and {{icons|Sub Class}} Sub Class level of 85 or higher.<br> | ||
| + | * Risk Exploration Quests consist of only one main area and one boss area. | ||
| + | * Enemy stats are increased dramatically. | ||
| + | ** They additionally have a 1.7x Attack Multiplier to their attacks. | ||
| + | * Solo play is generally not recommended due to the added effects of healing mitgation and UH difficulty. | ||
| + | * Recovery effects on the player is always -50%. | ||
| + | ** Megiverse is subjected to a -95% reduction, resulting in a 0.5% effective recovery. | ||
| + | * All enemies gain resistance to suction effects, increased knockback resistance and damage resistance. | ||
| + | * Some enemies gain new attack patterns exclusive to UH difficulty. | ||
| + | * In the case of infected cores on enemies, they are now changed to a Photoner Infected Core, coming in two types, a Black Core and a White Core. | ||
| + | ** They are not considered weak points and cannot be destroyed. | ||
| + | ** With the two types, a White Core will fire projectiles twice at regular intervals, and a Black Core will coordinate attacks in addition to the projectiles. | ||
| + | *** Defeating enemies with a White Core can drop weapons with the Divine Will Augment, and enemies with a Black Core can drop weapons with the Divine Order Augment. | ||
| + | * Some enemies can appear with a special shield in E-Trials. | ||
| + | ** The shield has an effect of reducing damage by 50% (0.5x), however, hitting the assigned weak point will increase the damage by 20% (1.2x). | ||
| + | *** The weak point information is shown underneath the enemy's name in the top left corner of the screen. | ||
| + | ** There are five types of possible weak points that can be on the shield: Short Range Attacks, Long Range Attacks, Attacking in the Air, Attacking from the Front, and Attacking from Behind. | ||
| + | ** The Augment Crack I can appear on equipment dropped by the enemy who has the shield. | ||
| + | <br> | ||
| + | Combination of Risk Exploration Quests | ||
| + | {| class="wikitable table-responsive-sm" style="text-align:center;" | ||
| + | ! | ||
| + | ! 1 !! 2 !! 3 | ||
| + | |- | ||
| + | | Planet<br>Lillipa | ||
| + | | Desert | ||
| + | | Underground<br>Shafts | ||
| + | | Abandoned<br>Mines | ||
| + | |- | ||
| + | | Planet<br>Naverius | ||
| + | | Ruins | ||
| + | | Forest | ||
| + | | Tundra | ||
| + | |- | ||
| + | | Planet<br>Wopal | ||
| + | | Coast | ||
| + | | Seabed | ||
| + | | Floating<br>Facility | ||
| + | |- | ||
| + | | Planet<br>Harukotan | ||
| + | | Daybreak<br>Province | ||
| + | | Nightfall<br>Province | ||
| + | | - | ||
| + | |} | ||
| + | * Amduskia, Earth, and Omega are not implemented. | ||
| + | {| class="wikitable table-responsive-sm" style="text-align:center; margin-left:auto; margin-right:auto; width:100%" | ||
| + | |- | ||
| + | ! colspan="4" | Risk Exploration Quests | ||
| + | |- | ||
| + | | [[File:UIMapForest.png|link=Risk Exploration: Forest]]<br>[[Risk Exploration: Forest]] | ||
| + | | [[File:UIMapTundra.png|link=Risk Exploration: Tundra]]<br>[[Risk Exploration: Tundra]] | ||
| + | | [[File:UIMapRuins.png|link=Risk Exploration: Ruins]]<br>[[Risk Exploration: Ruins]] | ||
| + | | [[File:UIMapDesert.png|link=Risk Exploration: Desert]]<br>[[Risk Exploration: Desert]] | ||
| + | |- | ||
| + | | [[File:UIMapTunnels.png|link=Risk Exploration: Underground Shafts]]<br>[[Risk Exploration: Underground Shafts]] | ||
| + | | [[File:UIMapMine.png|link=Risk Exploration: Abandoned Mine]]<br>[[Risk Exploration: Abandoned Mine]] | ||
| + | | [[File:UIMapCoast.png|link=Risk Exploration: Coast]]<br>[[Risk Exploration: Coast]] | ||
| + | | [[File:UIMapSeabed.png|link=Risk Exploration: Seabed]]<br>[[Risk Exploration: Seabed]] | ||
| + | |- | ||
| + | | [[File:UIMapFacility.png|link=Risk Exploration: Floating Facility]]<br>[[Risk Exploration: Floating Facility]] | ||
| + | | [[File:UIMapDaybreak.png|link=Risk Exploration: Daybreak Province]]<br>[[Risk Exploration: Daybreak Province]] | ||
| + | | [[File:UIMapNightfall.png|link=Risk Exploration: Nightfall Province]]<br>[[Risk Exploration: Nightfall Province]] | ||
| + | | | ||
| + | |} | ||
{{Quest_NavBar}} | {{Quest_NavBar}} | ||
Revision as of 04:05, 1 February 2021
Expeditions are the standard, free roaming type of quest of PSO2.
Overview
Expeditions are Multi-Party Quests with a randomly generated map layout, often with the goal to defeat the boss (Suppression Target) at the end of the area. On certain Expeditions, the quest can be completed by collecting Quest Points which are awarded by enemy eliminations.
Gathering Points only spawn within Expeditions. Mining and fishing points are indicated by green and blue icons on the minimap, revealed as the party makes progress on the map.
Enemy Triggers can be used within these quests, spawning an Emergency Code: Variant. Using a trigger will force the host to create a new Expedition lobby within their current block. The location of the trigger is indicated on the minimap by a red enemy symbol, even if the area it is in has not been explored by the party yet. The emergency quest activates when one of the party's players enters the area of the trigger.
Upon player entry within a new area of the map, either a group of enemies will spawn, or an emergency trial will begin. If an area of the map has had no event for a while, re-entry of a player into the unoccupied area will trigger another event to occur.
Nightfall Province
Nightfall Province Exploration functions as a standard expedition without a direct path to the boss. Instead, players obtain Quest Points by eliminating foes. After reaching 500 points, a quest Telepipe appears for the party, giving them the option to enter the second area with the boss or to return to the Gateway Ship. Eliminating the boss will complete the quest. Alternatively, if the party collects 1000 points, then the quest will be completed: in this case, the boss will not appear if the party enters the second area.
Earth
On Tokyo Exploration and Las Vegas Exploration, groups of enemies and emergency quests are only activated near a beacon of light when at least one player gets close to it, although certain emergency quests can be activated immediately after suppressing all foes near the beacon of light regardless of player positioning (Unidentified Creatures in Las Vegas, Tokyo Joyriders).
If all parties currently in the field have obtained their required Quest Points, then no further beacons of light will spawn until a new party (which has not obtained the required amount of points) enters the same instance.
Unlocking Expeditions
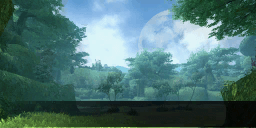
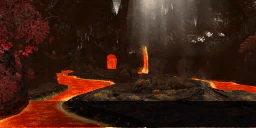
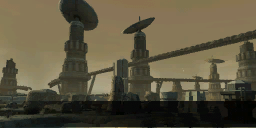
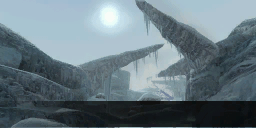
More Expedition Quests can be unlocked by completing the required Quests.
| Forest Exploration | ||||||||
|---|---|---|---|---|---|---|---|---|
| ↓ | ||||||||
| Volcanic Caves Exploration | ||||||||
| ↓ | ↓ | |||||||
| Desert Exploration | Coast Exploration | |||||||
| ↓ | ↓ | ↓ | ||||||
| Tundra Exploration | Abandoned Mine Exploration | Daybreak Province Exploration | ||||||
| ↓ | ↓ | ↓ | ↓ | |||||
| Underground Shafts Exploration | Seabed Exploration | Floating Facility Exploration | Tokyo Exploration | |||||
| ↓ | ↓ | ↓ | ↓ | |||||
| Floating Continent Exploration | Nightfall Province Exploration | Las Vegas Exploration | Bewitched Woods Exploration | |||||
| ↓ | ↓ | |||||||
| Ruins Exploration | Dragon Altar Exploration | |||||||
- Floating Facility Exploration can alternatively be unlocked by viewing the EP2-6 Event Quest, "Afin and Euclyta".
- Tokyo Exploration can alternatively be unlocked by viewing the EP4-1 Event Quest, "The "Phantasm" Database".
- Bewitched Woods Exploration can alternatively by unlocked by completing Castrum Demonica Battle, Castrum Demonica: Hostility, or Castrum Demonica: Madness.
Risk Exploration
Unlike regular explorations, Risk Exploration Quests have a limited selection of availability every day, rotating between a set of Quests, and can only be accepted on UH difficulty, requiring a ![]() Main Class and
Main Class and ![]() Sub Class level of 85 or higher.
Sub Class level of 85 or higher.
- Risk Exploration Quests consist of only one main area and one boss area.
- Enemy stats are increased dramatically.
- They additionally have a 1.7x Attack Multiplier to their attacks.
- Solo play is generally not recommended due to the added effects of healing mitgation and UH difficulty.
- Recovery effects on the player is always -50%.
- Megiverse is subjected to a -95% reduction, resulting in a 0.5% effective recovery.
- All enemies gain resistance to suction effects, increased knockback resistance and damage resistance.
- Some enemies gain new attack patterns exclusive to UH difficulty.
- In the case of infected cores on enemies, they are now changed to a Photoner Infected Core, coming in two types, a Black Core and a White Core.
- They are not considered weak points and cannot be destroyed.
- With the two types, a White Core will fire projectiles twice at regular intervals, and a Black Core will coordinate attacks in addition to the projectiles.
- Defeating enemies with a White Core can drop weapons with the Divine Will Augment, and enemies with a Black Core can drop weapons with the Divine Order Augment.
- Some enemies can appear with a special shield in E-Trials.
- The shield has an effect of reducing damage by 50% (0.5x), however, hitting the assigned weak point will increase the damage by 20% (1.2x).
- The weak point information is shown underneath the enemy's name in the top left corner of the screen.
- There are five types of possible weak points that can be on the shield: Short Range Attacks, Long Range Attacks, Attacking in the Air, Attacking from the Front, and Attacking from Behind.
- The Augment Crack I can appear on equipment dropped by the enemy who has the shield.
- The shield has an effect of reducing damage by 50% (0.5x), however, hitting the assigned weak point will increase the damage by 20% (1.2x).
Combination of Risk Exploration Quests
| 1 | 2 | 3 | |
|---|---|---|---|
| Planet Lillipa |
Desert | Underground Shafts |
Abandoned Mines |
| Planet Naverius |
Ruins | Forest | Tundra |
| Planet Wopal |
Coast | Seabed | Floating Facility |
| Planet Harukotan |
Daybreak Province |
Nightfall Province |
- |
- Amduskia, Earth, and Omega are not implemented.
| Quests | ||
| Main Quests | Expeditions | Urgent Quests | Recommended Quests | Bonus Quests | Limited Time Quests | |
| Sub Quests | ARKS Quests | Time Attack Quests | Buster Quests | Endless Quests | Ridroid Quests Divide Quests | Advance Quests | Extreme Quests | Ultimate Quests | Challenge Quests | |
| Story Quests | EPISODE 1 | EPISODE 2 | EPISODE 3 | EPISODE 4 | EPISODE 5 | EPISODE 6 | | |
