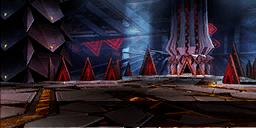
| Trial: Photoner Assault | |
|---|---|

| |
| Quest Type | Divide Quests |
| Difficulty | |
| Ultra Hard | Level 91 and up |
| Quest Details | |
| Location | ARKS Ship |
| Single/Multi-Party | |
| Party Invitation | Allowed |
| Ally Assistance | Not Allowed |
| Conditions For Acceptance | |
| Ultra Hard | Possess a Super Hard Difficulty Permit |
| Restrictions | |
| Time Limit | None |
| Damage Limit | None |
| Ability Adjust | None |
Divide Quest is a Quest type that becomes available at 85/85 for non-Scion classes and 85 for Scion classes. Divide Quest is unique in that it comes with its own weekly point rewards that can be earned individually by each character. The step that is reached resets every week on Wednesday (Pacific Time).
Divide Quest is also unique in that each step is treated as a separate Arks mission even though drink effects will persist through all the steps. Due to this property, built up Focus gauges and normally one time a mission usage active and passive skills such as Dark Blast and Hero Will are reset and reusable with each step.
Contents
Trial: Photoner Assault
Steps
The quest consists of 35 steps, grouped into seven tiers of five steps each. The first four steps of each tier allow the party leader to choose from one of two routes - a points route which awards additional Divide Points on clearing, and a life route which awards additional lives on clearing. The eight available options in the first four steps of each tier are drawn randomly from a pool comprising of two of each of the four basic stage types - that is, two of each of Eradication Ops, Suppression Ops, Covert Ops, and Resupply Ops. The order of the first four steps is randomized each time the quest is accepted, and their pool is refreshed every 20 minutes (XX:00, XX:20, XX:40). The fifth step of each tier is always a Last Battle: The Final Objective.
Route
The party leader can choose between one of two routes. The Life Route awards 2 additional lives. The Points Route awards additional Divide Points based on the following table:
| Step Set | Points Route Bonus |
|---|---|
| 1~5 | 7,500 pts |
| 6~10 | 9,750 pts |
| 11~15 | 15,750 pts |
| 16~20 | 18,750 pts |
| 21~25 | 30,000 pts |
| 26~30 | 37,500 pts |
| 31~35 | 48,750 pts |
- If you fail to achieve S-rank, the additional lives or points awarded will be reduced.
- If you only achieve A-rank, you will only receive 1 life from life route, and 66.66% of the bonus points from points route
- If you only achieve B-rank, you will only receive 1 life from life route, and 33.33% of the bonus points from points route
- If you only achieve C-rank, you will not receive any bonuses from route.
Lives
- The party begins with a set number of player lives to clear five steps, the amount depending on the tier (see step tiers table below for more information).
- Each time a party member is incapacitated, a life will be deducted from the total.
- If the number of lives reaches 0, the quest will immediately end in failure and all party members will be returned to the Gateway Ship.
- Additional lives can be gained by clearing steps in the Life Route, and as a bonus reward from deactivating a virtual device in Search & Destroy stages.
Step Tiers
Each subsequent tier of five stages is more difficult, but offers greater rewards.
| Step Set | Enemy Attack Modifier | Enemy Damage Reduction | Enemy Bonus HP | Enemy Level | Divide Points Awarded | Rare Drop Bonus | Initial Player Lives |
|---|---|---|---|---|---|---|---|
| 1~5 | -- | -- | -- | +0% | +50% | 10 | |
| 6~10 | +5% | -- | +15% | -- | +30% | +100% | 10 |
| 11~15 | +20% | -- | +65% | -- | +110% | +150% | 5 |
| 16~20 | +25% | -- | +80% | -- | +150% | +200% | 5 |
| 21~25 | +50% | +20% | +130% | -- | +300% | +250% | 3 |
| 26~30 | +65% | +30% | +145% | -- | +400% | +300% | 1 |
| 31~35 | +65% | +35% | +160% | +9 | +550% | +350% | 1 |
Step Progression
In order to unlock the next tier of steps, you must achieve an overall S-rank on the final evaluation upon completing five steps. In order to meet this requirement, you must achieve at least three S-ranks and two A-ranks, or four S-ranks and one B-rank or better on individual steps. For example, SSSAA or SSSSB will allow you to proceed to the next tier, but SSSAB will not.
- Step Progress is per character
- Step Progress will not reset weekly.
Divide Points
The amount of divide points earned depends on the tier. After completing the Last Battle: The Final Objective, the party will receive a bonus reward box for every 25,000 points earned, up to a maximum of 20.
The follow table shows the maximum divide point gain per tier assuming picking only one type of route and achieving the maximum score on each stage.
| Step Set | All Life Route Points | All Points Route Points |
|---|---|---|
| 1~5 | 50,000 pts | 80,000 pts |
| 6~10 | 65,000 pts | 104,000 pts |
| 11~15 | 105,000 pts | 168,000 pts |
| 16~20 | 125,000 pts | 200,000 pts |
| 21~25 | 200,000 pts | 320,000 pts |
| 26~30 | 250,000 pts | 400,000 pts |
| 31~35 | 325,000 pts | 520,000 pts |
Weekly Divide Point Rewards
Each week, you can acquire certain rewards by earning a certain amount of divide points on a character. These rewards can be earned by each character on an account, and resets along with the divide quest progress every week.
| Point Milestone | Reward |
|---|---|
| 50,000 pts | |
| 150,000 pts | |
| 250,000 pts | |
| 350,000 pts | |
| 450,000 pts | |
| 550,000 pts | |
| 750,000 pts | |
| 1,000,000 pts | |
Stages
There are five different types of stages in Divide Quest, detailed in the sections below. Each stage can further have up to three random effect modifiers that can be either positive or negative:
- Positive Effects
- Life Damage Disabled (becoming incapacitated does not result in loss of Lives)
- Player Max HP +30%
- Player Healing +30%
- Player Movement Speed +60%
- Player Max PP +60
- Player PP Cost -20%
- Enemy HP -20%
- Enemy Attack -20% (Step 6+)
- Invulnerable for 30s at the start of the stage
- Dark Blast Gauge Rate Up (Step 6+)
- Compound Technique Gauge Rate Up
- Buildup Gauge Rate Up
- Negative Effects
- Player Max HP -20%
- Player Healing -50% (Step 6+)
- Player Attack -20%
- Player Max PP -20
- Player PP Cost +20%
- Enemy HP +10% (Step 6+)
- Enemy Attack +10% (Step 6+)
- Dark Blast Gauge Rate Down (Step 6+)
- Buildup Gauge Rate Down (Step 6+)
Suppression Ops
- Objective: Defeat all bosses in time!
- In this stage mode, the goal is to defeat boss enemy(s) using the power of enhanced attack PSE from slaying mobs that begin to spawn in.
- Ranking is determined by how much damage you to do the boss enemy(s) within the time limit. You must deplete at least 75% of the boss enemy HP for S-rank.
- There is a time limit of 4 minutes for this stage. Defeating the boss enemy(s) will immediately end the stage and cause the loot crystal to appear.
- The first mob will spawn when there is 3:40 remaining.
- The second set of mobs will spawn in exactly 65 seconds after the first mob dies. For example, if the first mob spawns with 3:40 remaining and it is killed with 3:20 left, the second set will spawn at 2:15 remaining.
- After the second set of mobs spawn, an additional mob will spawn shortly after each mob is defeated (up to a maximum of 7).
| Area | Target Boss(es) | Target Mobs |
|---|---|---|
 Naverius (Tundra) |
Vangabear x2 or Blizzard Banser & Blizzard Banshee or Gorshraider |
Dizolsaber |
 Lillipa (Desert) |
Deos Gryphon or Lafaga Ringahda or Shutolmizer x2 |
Goldrahda |
 Amduskia (Volcanic Caves) |
Descant Drahl or Evilion Dragon or Ignisimo Dragon |
El Arda |
 Wopal (Coast) |
Gazar Casadohra & Anfeduraad or Brigantbran x2 or Gratsi Meduna |
Luda Sorcerer |
 Harukotan (Nightfall Province) |
Broll Brengam or Viliga Zignind or Oduna Zordata |
Hyudo Azure |
 Earth (Tokyo) |
Rixes Gidor | Snakeheli |
 Earth (World Tree) |
Deus Anges | Es Santrus |
 Omega (Cuento Plains) |
Omega Hyunal or Omega Angel or Omega Appregina or Omega Dranble |
Omega Salamander |
 Corrupted Mothership |
Apos Dorios | AIS Exoda |
 ???? (Remnants of a Parallel World) |
Omega Masquerader | Grants Sorcerer |
- Steps 31-35 have the following additional options possible for Conquest. These differ in that there are no additional mobs or PSE bonus.
| Area | Target Boss |
|---|---|
 Amduskia (Tainted Area) |
Varuna |
 Battleship (Interior) |
Grave Exegul or Gildina Exegul |
 Mothership Shiva (Space-Time Interstice) |
Sodam, Primordial Darkness |
Eradication Ops
- Objective: Defeat all enemies in time!
- In this stage mode, the goal is to defeat 100 enemies with the aid of destroying enemies that have reduced HP and bombs attached to them.
- Ranking is determined by the number of enemies defeated. Defeating 75 or more enemies achieves S-rank.
- There is a time limit of 4 minutes for this stage.
- Defeating all 100 enemies immediately ends the stage regardless of any time remaining. The loot crystal will then appear.
- Bomb enemies with reduced HP will be surrounded by a ring. The ring will turn red when the enemy is on low HP.
- Enemies with White rings are standard bomb enemies and will have their movement speed reduced for a short time after spawning (though teleporting is unaffected)
- Enemies with Blue rings will inflict the
 Freeze status when they detonate, along with doing damage.
 - Enemies with Yellow rings will inflict Stun when they detonate, along with doing damage.
- Bombs only affect enemies, players are immune to the explosions.
- Each stage is split into two segments : the first 50 enemies, and the last 50 enemies. Each segment can be one of two variations for each given area - having a mix Luminmechs and either Falspawn or a enemies particular to the planet.
| Area | Enemy Type A | Enemy Type B |
|---|---|---|
| Naverius (Tundra) |
Sylvants | Aquatic Falspawn |
 Lillipa (Underground Shafts) |
Automata | Insectoid Falspawn |
 Amduskia (Floating Continent) |
Draconians | Falspawn |
| Wopal (Coast) |
Oceanids | Winged Falspawn |
 Harukotan (Daybreak Province) |
Nightfallers | Toy Falspawn |
 Omega (Es-Ars) |
Supernaturals | Falspawn |
- The various enemies are generally grouped into two types of spawns - mixed enemies, and bomb chains.
- Mixed enemies include bomb enemies and enemies without bombs. The goal is to group the enemies together and kill the ones with a bomb to explode the ones that lack bombs
- Bomb chains consist of a series of enemies with bombs that spawn one after the other. The goal is to kill the initial enemies while they are in the correct position to cause a cascading chain reaction of explosions.
- Chains may behave inconsistently due to ping and/or server conditions - be ready to help the chain along by being in position to kill enemies later on down the chain as they appear.
Covert Ops
- Objective: Halt Virtual Devices and escape!
- In this stage mode, the goal is to obtain points from crystals and defeating enemies and halt Virtual Devices, escaping via the designated exit Telepipe before the acid rain reaches a critical second level which deals 100 damage per tick that cannot be healed from other than with Dark Blast: Elder's Bloody Heal. Unique to Divide Quest, the crystals can also be collected by hitting them with any attack as well.
- Ranking is determined by how many points you acquire. The maximum points that can be acquired is 10,000pts. S-rank is achieved at 7,500pts.
- At the start of each quest, there will be a notification indicating what will award bonus points for the stage. Three types of enemies, or two types of enemies and crystals can be boosted. The enemy types and the points awarded for killing them are as follows:
| Area | Points (regular/boosted) | |||
|---|---|---|---|---|
| Small (75/375 pts) | Medium (100/500 pts) | Large (125/625 pts) | Boss (1250/2500 pts) | |
 Naverius (Forest) |
Nav Rappy Udan Grulf Agnis |
Za'udan Dicahdr |
Garongo El Arda |
Rockbear |
 Amduskia (Dragon Altar) |
Sol Deegahla Dagan |
Sil Sadeenian Pendran |
Dirandahl Sol Dirandahl Predicahdr |
Catredransa |
 Lillipa (Abandoned Mine) |
Kindidd Custom Tyraluda |
Jagd Balger Batragun Starkgun Broondarl |
Dingale Luda Sorcerer |
Dekor Maryuda |
 Wopal (Seabed) |
Tarobekko Valadinan Druahda |
Sevanian Falcabone Dwe Solda |
Vid Giros Lanz Valehda |
Orgbran |
| Harukotan (Daybreak Province) |
Pajigeeri Prata Picohda |
Izaogal Adaogal Anshizagri Bichda Rabitta Mudr Toykatta |
Rerangam | Kodotta Idihta |
 Omega (Bewitched Woods) |
Omega Goblin Goblin Bomber |
Omega Wolf Skull Soldier |
Wolffoie Omega Orc Orc Cavalier Foi Sorcerer |
Flame Diamos |
- Five Virtual Devices appear every 2,500 points earned. There is a maximum of 20 Virtual Devices.
- The first 5 Virtual Devices will appear when you reach 2,500 pts (B-rank)
- 5 more Virtual Devices (10 total) will appear when you reach 5,000 pts (A-rank)
- 5 more Virtual Devices (15 total) will appear when you reach 7,5000 pts (S-rank)
- The remaining 5 Virtual Devices will appear when you reach max score (10,000 pts)
- Halting a Virtual Device will provide the party with stackable buffs.
- The buffs include Attack Up, Max HP Up, Max PP Up, PP Regeneration Up, or an extra life
- Out of the 20 devices, 6 will give Attack Up, 5 will give Max HP Up, 4 will give Max PP Up, 4 will give PP regen, and 1 will give an extra life.
- There is no time limit for the stage. However, there are increasing penalties the longer you stay:
- After 3 minutes, it starts raining, doing 60 damage per tick and reducing all healing by 50%
- After 4 minutes, the rain intensifies, doing 100 damage per tick and all healing is reduced to 1 HP restored, except for Dark Blast: Elder's Bloody Heal.
- The stage ends when the party leader accesses the Telepipe at an exit tile, which causes the party to become invulnerable for approximately 10 seconds before the party is transported to the loot area.
- At the loot area, aside from the loot crystal, there will be a number of boxes corresponding to the number of Virtual Devices halted (up to 20). The boxes may contain the following:

 Divide Medal
 Luminfragment Emel
 Lambda Grinder
- Pure Photon
- Diard
 Ultimate Booster
Resupply Ops
- Objective: Collect crystals and refill pods!
- In this stage mode, the goal is to collect crystal points while defending towers that are attacked in waves. On solo, one can solely collect crystals once the solo boost kicks in as the mobs deal minimal damage while under the boost (however, minibosses are still able to do some damage to the tower on solo). Unique to divide quest, the crystals can also be collected by hitting them with any attack as well.
- Dash panels are placed all over the map to assist players in moving around quickly.
- There is a time limit of approximately 3:10 for this stage.
- Ranking is determined by how many crystal points the party can collect within this time limit. Enemies attacking and damaging the towers/pods will reduce your crystal points.
- Enemies will attack in 3 waves:
- The first wave will spawn when there are 3 minutes remaining.
- The second wave will spawn when there are 2 minutes remaining.
- The final wave, including a miniboss, will spawn when there is 1 minute remaining. The amount of crystals appearing will also drastically increase.
- The stage will immediately end once the maximum crystal points are achieved regardless of time remaining. All remaining enemies will despawn, the loot crystal will appear, and the party will be teleported to the loot crystal.
- The available areas for supply stages are as follows:
| Area | Notes |
|---|---|
 Naverius (Ruins) |
Terrain features tend to obstruct enemies from reaching the towers. Miniboss is a Rockbear, which is rather harmless to the towers. |
| Lillipa (Desert) |
Signoguns can do high damage to towers. |
| Amduskia (Floating Continent) |
The crystals tend to blend in with the floor/background. Terrain may obstruct enemies from reaching the towers. |
 Wopal (Floating Facility) |
|
| Harukotan (Nightfall Province) |
Very large open map. Bonta Beaddas do high damage to towers. More crystals appear im the narrower, forested segments. |
 Omega (Es-Ars) |
Relatively small map. |
- Habalsa can spawn in all areas, and can quickly do considerable damage to towers. Prioritize this enemy.
Last Battle: The Final Objective
- Objective: Defeat the final target!
- In this final stage mode, the goal is to deal damage to a randomly chosen boss(es) or designated boss(es) for the specific stage. This stage always appears at steps which are a multiple of 5, and are always considered Normal Route (neither Points nor Life Route).
- Ranking is determined by how much damage you to do the boss(es) within the time limit. You must deplete at least 75% of the boss enemy HP for S-rank.
- There is a time limit of 4 minutes for this stage. Defeating the boss(es) will immediately end the stage and transport you to the final loot area.
- The boss for steps 5 and 10 is always Grave Exegul
- The boss for step 15 is usually Grave Exegul but can rarely be its Ultralized variant Gildina Exegul or Varuna
- The boss for step 20 is usually Gildina Exegul, but can rarely be Varuna or Shiva (Mitra Ver.)
- The boss for step 25 is either Gildina Exegul, Varuna, or Shiva (Mitra Ver.)
- The bosses for step 30 is always Varuna and Shiva (Mitra Ver.) together as a pair
- The boss for step 35 is always Shiva, Goddess of Demise
Drop Info
| Category | Item Name | Notes | ||||||||||||||||||||||||||||
|---|---|---|---|---|---|---|---|---|---|---|---|---|---|---|---|---|---|---|---|---|---|---|---|---|---|---|---|---|---|---|
| Weapons | ||||||||||||||||||||||||||||||
|
Covert Ops: Omega | |||||||||||||||||||||||||||||
|
Eradication Ops: Omega | |||||||||||||||||||||||||||||
|
Resupply Ops: Omega | |||||||||||||||||||||||||||||
|
Suppression Ops: Omega | |||||||||||||||||||||||||||||
|
Eradication Ops: Omega | |||||||||||||||||||||||||||||
|
Steps 31-35 Area Drop | |||||||||||||||||||||||||||||
|
Omega Masquerader (Suppression Ops) | |||||||||||||||||||||||||||||
|
Luminmechs Lv. 91+ | |||||||||||||||||||||||||||||
|
Grave Exegul | |||||||||||||||||||||||||||||
|
Grave Exegul (Steps 31-35) | |||||||||||||||||||||||||||||
|
Varuna | |||||||||||||||||||||||||||||
|
|
Varuna (Steps 31-35) | |||||||||||||||||||||||||||||
|
Shiva (Mitra Version) | |||||||||||||||||||||||||||||
| |
Shiva, Goddess of Demise (Step 35) | |||||||||||||||||||||||||||||
|
|
Sodam, Primordial Darkness (Steps 31-34) | |||||||||||||||||||||||||||||
| Units |
| |||||||||||||||||||||||||||||
| Weapon Camos | |
Last Battle: The Final Objective Bonus Container | ||||||||||||||||||||||||||||
|
| ||||||||||||||||||||||||||||||
| | ||||||||||||||||||||||||||||||
| | ||||||||||||||||||||||||||||||
| |
No Step Required Tokyo and World Tree Area | |||||||||||||||||||||||||||||
| Other | |
Steps 1-10: Accumulated Containers Steps 1-20: Covert Ops Bonus Containers | ||||||||||||||||||||||||||||
| |
Steps 11-35: General Drop | |||||||||||||||||||||||||||||
| |
Steps 31-35 Limited Drop | |||||||||||||||||||||||||||||
|
|
Drops from the corresponding bosses when defeated Will not drop if they are not defeated. | |||||||||||||||||||||||||||||
|
|
Covert Ops Virtual Device Disabled Count Bonus Container
| |||||||||||||||||||||||||||||
|
|
Last Battle: The Final Objective Ranking Bonus All Party Members will receive the same drops | |||||||||||||||||||||||||||||
| | ||||||||||||||||||||||||||||||
|
| ||||||||||||||||||||||||||||||
| Augments |
|
|||||||||||||||||||||||||||||
| |
Drop in Alternate Dimension: Omega Area | |||||||||||||||||||||||||||||
| S-Grade Augment (Weapons) |
Drops in Steps 1-30 | |||||||||||||||||||||||||||||
| |
Eradication Ops Drop | |||||||||||||||||||||||||||||
| |
Resupply Ops Drop | |||||||||||||||||||||||||||||
| |
Suppression Ops Drop | |||||||||||||||||||||||||||||
| |
Last Battle: The Final Objective Drop | |||||||||||||||||||||||||||||
| |
Unknown Drop Location | |||||||||||||||||||||||||||||
| Drops in Steps 31-35 | ||||||||||||||||||||||||||||||
| |
Resupply Ops Drop | |||||||||||||||||||||||||||||
|
|
Suppression Ops Drop | |||||||||||||||||||||||||||||
| |
Last Battle: The Final Objective Drop | |||||||||||||||||||||||||||||
| S-Grade Augment (Units) |
Drops in Steps 1-30 | |||||||||||||||||||||||||||||
|
|
May be granted to dropped units in Resupply Ops | |||||||||||||||||||||||||||||
| Drops in Steps 31-35 | ||||||||||||||||||||||||||||||
| |
Suppression Ops Drop | |||||||||||||||||||||||||||||
|
|
Last Battle: The Final Objective Drop | |||||||||||||||||||||||||||||
| |
May be granted to dropped units in Resupply Ops | |||||||||||||||||||||||||||||
| |
May be granted to dropped units in Suppression Ops | |||||||||||||||||||||||||||||
| |
May be granted to dropped units in Last Battle: The Final Objective | |||||||||||||||||||||||||||||
| Quests | ||
| Main Quests | Expeditions | Urgent Quests | Recommended Quests | Bonus Quests | Limited Time Quests | |
| Sub Quests | ARKS Quests | Time Attack Quests | Buster Quests | Endless Quests | Ridroid Quests Divide Quests | Advance Quests | Extreme Quests | Ultimate Quests | Challenge Quests | |
| Story Quests | EPISODE 1 | EPISODE 2 | EPISODE 3 | EPISODE 4 | EPISODE 5 | EPISODE 6 | | |
| |||||||||||||||||||||||||||||||||||||||||||||||
