Difference between revisions of "Nightfallers"
Jump to navigation
Jump to search
| Line 8: | Line 8: | ||
==Daybreak Province== | ==Daybreak Province== | ||
{{EnemyHeader}} | {{EnemyHeader}} | ||
| − | {{EnemyRow|pajigeeri|UIEnemyPajigeeri.png|[[Pajigeeri]]|Daybreak Province|||{{icons|Dark}}|}} | + | {{EnemyRow|pajigeeri|UIEnemyPajigeeri.png|[[Pajigeeri]]|Daybreak Province|||Element:<br>• {{icons|Dark}}<br>Weakspots:<br>• Face|Basic Nightfaller. Attacks by throwing itself at the player. Jumps up into the air and slams down at the player's current location.}} |
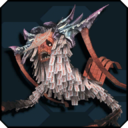
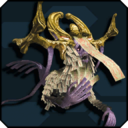
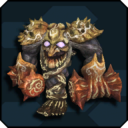
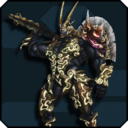
| − | {{EnemyRow|izaogal|UIEnemyIzaogal.png|[[Izaogal]]|Daybreak Province||Horns|{{icons|Dark}}<br>Head|}} | + | {{EnemyRow|izaogal|UIEnemyIzaogal.png|[[Izaogal]]|Daybreak Province||• Horns|Element:<br>• {{icons|Dark}}<br>Weakspots:<br>• Head|Strong Nightfaller. Charges at the player and tries to smack them with the log they wield.}} |
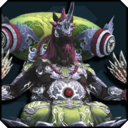
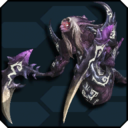
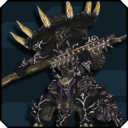
| − | {{EnemyRow|adaogal|UIEnemyAdaogal.png|[[Adaogal]]|Daybreak Province||Horns|{{icons|Dark}}<br>Head|}} | + | {{EnemyRow|adaogal|UIEnemyAdaogal.png|[[Adaogal]]|Daybreak Province||• Horns|Element:<br>• {{icons|Dark}}<br>Weakspots:<br>• Head|Strong Nightfaller. Attacks from a range by using its cannon. Will use its legs to kick players if they get to close.}} |
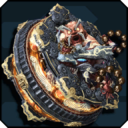
| − | {{EnemyRow|gannagam|UIEnemyGannagam.png|[[Gannagam]]|Daybreak Province||Bottom|{{icons|Dark}}<br>Belly Button|}} | + | {{EnemyRow|gannagam|UIEnemyGannagam.png|[[Gannagam]]|Daybreak Province||• Bottom|Element:<br>• {{icons|Dark}}<br>Weakspots:<br>• Belly Button|Strong Nightfaller. Attacks by sending out lighting from itself out, causing the lightning to attack the player's current location. If a player gets under it, it will shock them. If it bottom is broken, it will move around by hopping.}} |
| − | {{EnemyRow|gimungamuy|UIEnemyGimungamuy.png|[[Gimungamuy]]|Daybreak Province||Bottom|{{icons|Dark}}<br>Belly Button|}} | + | {{EnemyRow|gimungamuy|UIEnemyGimungamuy.png|[[Gimungamuy]]|Daybreak Province||• Bottom|Element:<br>• {{icons|Dark}}<br>Weakspots:<br>• Belly Button|Rare Variant of Gannagam.}} |
| − | {{EnemyRow|rerangam|UIEnemyRerangam.png|[[Rerangam]]|Daybreak Province||Bottom|{{icons|Dark}}<br>Belly Button|}} | + | {{EnemyRow|rerangam|UIEnemyRerangam.png|[[Rerangam]]|Daybreak Province||• Bottom|Element:<br>• {{icons|Dark}}<br>Weakspots:<br>• Belly Button|Strong Nightfaller. Works the same as Gannagam, but uses Wind instead.}} |
| − | {{EnemyRow|olnagamuy|UIEnemyOlnagamuy.png|[[Olnagamuy]]|Daybreak Province||Bottom|{{icons|Dark}}<br>Belly Button|}} | + | {{EnemyRow|olnagamuy|UIEnemyOlnagamuy.png|[[Olnagamuy]]|Daybreak Province||• Bottom|Element:<br>• {{icons|Dark}}<br>Weakspots:<br>• Belly Button|Rare variant of Rerangam.}} |
| − | {{EnemyRow|anshizagri|UIEnemyAnshizagri.png|[[Anshizagri]]|Daybreak Province||Face Talismans|{{icons|Dark}}<br>Face|}} | + | {{EnemyRow|anshizagri|UIEnemyAnshizagri.png|[[Anshizagri]]|Daybreak Province||• Face Talismans|Element:<br>• {{icons|Dark}}<br>Weakspots:<br>• Face|Basic Nightfaller. Attacks the player by throwing cards.}} |
| − | {{EnemyRow|yomnazagri|UIEnemyYomnazagri.png|[[Yomnazagri]]|Daybreak Province||Face Talismans|{{icons|Dark}}<br>Face|}} | + | {{EnemyRow|yomnazagri|UIEnemyYomnazagri.png|[[Yomnazagri]]|Daybreak Province||• Face Talismans|Element:<br>• {{icons|Dark}}<br>Weakspots:<br>• Face|Rare variant of Anshizagri.}} |
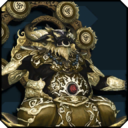
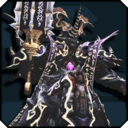
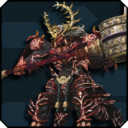
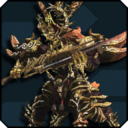
| − | {{EnemyRow|anjadeurili|UIEnemyAnjadeurili.png|[[Anjadeurili]]|Daybreak Province||Prayer Beads|{{icons|Dark}}<br>Head|}} | + | {{EnemyRow|anjadeurili|UIEnemyAnjadeurili.png|[[Anjadeurili]]|Daybreak Province||• Prayer Beads|Element:<br>• {{icons|Dark}}<br>Weakspots:<br>• Head|Boss-type Nightfaller. Attacks by charging at the player, throwing fireballs towards the player and doing a spin if the player gets too close. The boss can fall out of the ring, which leaves it stunned for a couple of seconds, then it jumps back into the ring. When its at low HP, it goes into a rage, increasing the speed of its attacks.}} |
| − | {{EnemyRow|yogjadeurili|UIEnemyYogjadeurili.png|[[Yogjadeurili]]|Daybreak Province||Prayer Beads|{{icons|Dark}}<br>Head|}} | + | {{EnemyRow|yogjadeurili|UIEnemyYogjadeurili.png|[[Yogjadeurili]]|Daybreak Province||• Prayer |
| + | Beads|Element:<br>• {{icons|Dark}}<br>Weakspots:<br>• Head|Rare variant of Anjadeurili.}} | ||
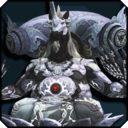
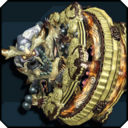
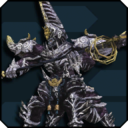
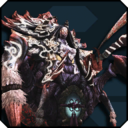
| − | {{EnemyRow|gigurgunnegam|UIEnemyGigurGunnegam.png|[[Gigur Gunnegam]]|Daybreak Province||Horn<br>Feet<br>Belly Gem|{{icons|Dark}}<br>Head|}} | + | {{EnemyRow|gigurgunnegam|UIEnemyGigurGunnegam.png|[[Gigur Gunnegam]]|Daybreak Province||• Horn<br>• Feet<br>• Belly Gem|Element:<br>• {{icons|Dark}}<br>Weakspots:<br>• Head|Attacks at a range by summoning an ice block, then breaking it. It also has shards that it summons that fly towards the player. It has a spin slash that freezes, letting the players climb the ice and attack its head. It can slam its sword straight down into the ground, creating an ice block from where it slammed the sword that players can climb to attack its head. If the player is under it then it will stomp the ground, stunning the player if struck. If the center crystal is broken, the shards will stop spawning.}} |
| − | {{EnemyRow|gunneginnegam|UIEnemyGunneGinnegam.png|[[Gunne Ginnegam]]|Daybreak Province||Horn<br>Feet<br>Belly Gem|{{icons|Dark}}<br>Head|}} | + | {{EnemyRow|gunneginnegam|UIEnemyGunneGinnegam.png|[[Gunne Ginnegam]]|Daybreak Province||• Horn<br>• Feet<br>• Belly Gem|Element:<br>• {{icons|Dark}}<br>Weakspots:<br>• Head|Rare variant of Gigur Gunnegam.}} |
</table> | </table> | ||
| Line 39: | Line 40: | ||
{{EnemyHeader}} | {{EnemyHeader}} | ||
| − | {{EnemyRow|pajigwan|UIEnemyPajigwan.png|[[Pajigwan]]|Nightfall Province|||{{icons|Dark}}|}} | + | {{EnemyRow|pajigwan|UIEnemyPajigwan.png|[[Pajigwan]]|Nightfall Province|||Element:<br>• {{icons|Dark}}|}} |
| − | {{EnemyRow|kodoniagari|UIEnemyKodoniagari.png|[[Kodoniagari]]|Nightfall Province||Lantern|{{icons|Dark}}<br>Lantern|}} | + | {{EnemyRow|kodoniagari|UIEnemyKodoniagari.png|[[Kodoniagari]]|Nightfall Province||• Lantern|Element:<br>• {{icons|Dark}}<br>Weakspots:<br>• Lantern|}} |
| − | {{EnemyRow|itagizakri|UIEnemyItagizakri.png|[[Itagizakri]]|Nightfall Province|||{{icons|Dark}}|}} | + | {{EnemyRow|itagizakri|UIEnemyItagizakri.png|[[Itagizakri]]|Nightfall Province|||Element:<br>• {{icons|Dark}}|}} |
| − | {{EnemyRow|orogrel|UIEnemyOrogrel.png|[[Orogrel]]|Nightfall Province||Horns|{{icons|Dark}}<br>Head|}} | + | {{EnemyRow|orogrel|UIEnemyOrogrel.png|[[Orogrel]]|Nightfall Province||• Horns|Element:<br>• {{icons|Dark}}<br>Weakspots:<br>• Head|}} |
| − | {{EnemyRow|banogakibar|UIEnemyBanOgakibar.png|[[Ban Ogakibar]]|Nightfall Province||Weapon|{{icons|Dark}}|}} | + | {{EnemyRow|banogakibar|UIEnemyBanOgakibar.png|[[Ban Ogakibar]]|Nightfall Province||• Weapon|Element:<br>• {{icons|Dark}}|}} |
| − | {{EnemyRow|borogakibar|UIEnemyBorOgakibar.png|[[Bor Ogakibar]]|Nightfall Province||Weapon|{{icons|Dark}}|}} | + | {{EnemyRow|borogakibar|UIEnemyBorOgakibar.png|[[Bor Ogakibar]]|Nightfall Province||• Weapon|Element:<br>• {{icons|Dark}}|}} |
| − | {{EnemyRow|gauogakibar|UIEnemyGauOgakibar.png|[[Gau Ogakibar]]|Nightfall Province||Weapon|{{icons|Dark}}|}} | + | {{EnemyRow|gauogakibar|UIEnemyGauOgakibar.png|[[Gau Ogakibar]]|Nightfall Province||• Weapon|Element:<br>• {{icons|Dark}}|}} |
| − | {{EnemyRow|gologabar|UIEnemyGolOgabar.png|[[Gol Ogabar]]|Nightfall Province||Weapon|{{icons|Dark}}|}} | + | {{EnemyRow|gologabar|UIEnemyGolOgabar.png|[[Gol Ogabar]]|Nightfall Province||• Weapon|Element:<br>• {{icons|Dark}}|}} |
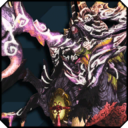
| − | {{EnemyRow|gwahljigmolde|UIEnemyGwahlJigmolde.png|[[Gwahl Jigmolde]]|Nightfall Province||Mirror<br>Tails<br>Glowing Thorax|{{icons|Dark}}<br>Broken Mirror<br>Glowing Thorax|}} | + | {{EnemyRow|gwahljigmolde|UIEnemyGwahlJigmolde.png|[[Gwahl Jigmolde]]|Nightfall Province||• Mirror<br>• Tails<br>• Glowing Thorax|Element:<br>• {{icons|Dark}}<br>Weakspots:<br>• Broken Mirror<br>• Glowing Thorax|}} |
| − | {{EnemyRow|agatajigmolinde|UIEnemyAgataJigmolinde.png|[[Agata Jigmolinde]]|Nightfall Province||Mirror<br>Tails<br>Glowing Thorax|{{icons|Dark}}<br>Broken Mirror<br>Glowing Thorax|}} | + | {{EnemyRow|agatajigmolinde|UIEnemyAgataJigmolinde.png|[[Agata Jigmolinde]]|Nightfall Province||• Mirror<br>• Tails<br>• Glowing Thorax|Element:<br>• {{icons|Dark}}<br>Weakspots:<br>• Broken Mirror<br>• Glowing Thorax|}} |
</table> | </table> | ||
| Line 63: | Line 64: | ||
==Magatsu== | ==Magatsu== | ||
{{EnemyHeader}} | {{EnemyHeader}} | ||
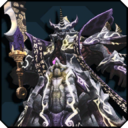
| − | {{EnemyRow|magatsu|UIEnemyMagatsu.png|[[Magatsu]]|Story Quest<br>Urgent Quest||Faces|{{icons|Light}}<br>Broken Faces|The Sealed Titan. Defeat it before it reaches the final gate.<br>Break the large faces on its head, arms, and torso to unveil platforms and open weak points. Faces will no longer be weak points when broken a second time.<br>Break the kneecaps to incapacitate Magatsu for a period of time.}} | + | {{EnemyRow|magatsu|UIEnemyMagatsu.png|[[Magatsu]]|• Story Quest<br>• Urgent Quest||• Faces|Element:<br>• {{icons|Light}}<br>Weakspots:<br>• Broken Faces|The Sealed Titan. Defeat it before it reaches the final gate.<br>Break the large faces on its head, arms, and torso to unveil platforms and open weak points. Faces will no longer be weak points when broken a second time.<br>Break the kneecaps to incapacitate Magatsu for a period of time.}} |
</table> | </table> | ||
[[Category:Enemies]] | [[Category:Enemies]] | ||
Revision as of 12:21, 27 May 2020
| Tainted Enemies | Falspawn | Draconians | Automata | Sylvants | Oceanids | Nightfallers | Special Enemies |
Daybreak Province
| Enemy | Area | Drop List | Breakpoints | Weakness | Notes |
|---|---|---|---|---|---|
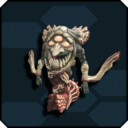 |
Daybreak Province | Element: • Weakspots: • Face |
Basic Nightfaller. Attacks by throwing itself at the player. Jumps up into the air and slams down at the player's current location. | ||
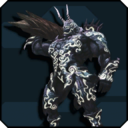 |
Daybreak Province | • Horns | Element: • Weakspots: • Head |
Strong Nightfaller. Charges at the player and tries to smack them with the log they wield. | |
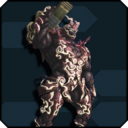 |
Daybreak Province | • Horns | Element: • Weakspots: • Head |
Strong Nightfaller. Attacks from a range by using its cannon. Will use its legs to kick players if they get to close. | |
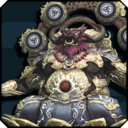 |
Daybreak Province | • Bottom | Element: • Weakspots: • Belly Button |
Strong Nightfaller. Attacks by sending out lighting from itself out, causing the lightning to attack the player's current location. If a player gets under it, it will shock them. If it bottom is broken, it will move around by hopping. | |
 |
Daybreak Province | • Bottom | Element: • Weakspots: • Belly Button |
Rare Variant of Gannagam. | |
 |
Daybreak Province | • Bottom | Element: • Weakspots: • Belly Button |
Strong Nightfaller. Works the same as Gannagam, but uses Wind instead. | |
 |
Daybreak Province | • Bottom | Element: • Weakspots: • Belly Button |
Rare variant of Rerangam. | |
 |
Daybreak Province | • Face Talismans | Element: • Weakspots: • Face |
Basic Nightfaller. Attacks the player by throwing cards. | |
 |
Daybreak Province | • Face Talismans | Element: • Weakspots: • Face |
Rare variant of Anshizagri. | |
 |
Daybreak Province | • Prayer Beads | Element: • Weakspots: • Head |
Boss-type Nightfaller. Attacks by charging at the player, throwing fireballs towards the player and doing a spin if the player gets too close. The boss can fall out of the ring, which leaves it stunned for a couple of seconds, then it jumps back into the ring. When its at low HP, it goes into a rage, increasing the speed of its attacks. | |
 |
Daybreak Province | • Prayer Beads | Element: • Weakspots: • Head |
Rare variant of Anjadeurili. | |
 |
Daybreak Province | • Horn • Feet • Belly Gem |
Element: • Weakspots: • Head |
Attacks at a range by summoning an ice block, then breaking it. It also has shards that it summons that fly towards the player. It has a spin slash that freezes, letting the players climb the ice and attack its head. It can slam its sword straight down into the ground, creating an ice block from where it slammed the sword that players can climb to attack its head. If the player is under it then it will stomp the ground, stunning the player if struck. If the center crystal is broken, the shards will stop spawning. | |
 |
Daybreak Province | • Horn • Feet • Belly Gem |
Element: • Weakspots: • Head |
Rare variant of Gigur Gunnegam. |
Nightfall Province
| Enemy | Area | Drop List | Breakpoints | Weakness | Notes |
|---|---|---|---|---|---|
 |
Nightfall Province | Element: • |
|||
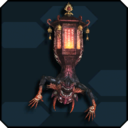 |
Nightfall Province | • Lantern | Element: • Weakspots: • Lantern |
||
 |
Nightfall Province | Element: • |
|||
 |
Nightfall Province | • Horns | Element: • Weakspots: • Head |
||
 |
Nightfall Province | • Weapon | Element: • |
||
 |
Nightfall Province | • Weapon | Element: • |
||
 |
Nightfall Province | • Weapon | Element: • |
||
 |
Nightfall Province | • Weapon | Element: • |
||
 |
Nightfall Province | • Mirror • Tails • Glowing Thorax |
Element: • Weakspots: • Broken Mirror • Glowing Thorax |
||
 |
Nightfall Province | • Mirror • Tails • Glowing Thorax |
Element: • Weakspots: • Broken Mirror • Glowing Thorax |
Magatsu
| Enemy | Area | Drop List | Breakpoints | Weakness | Notes |
|---|---|---|---|---|---|
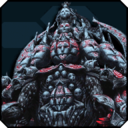 |
• Story Quest • Urgent Quest |
• Faces | Element: • Weakspots: • Broken Faces |
The Sealed Titan. Defeat it before it reaches the final gate. Break the large faces on its head, arms, and torso to unveil platforms and open weak points. Faces will no longer be weak points when broken a second time. Break the kneecaps to incapacitate Magatsu for a period of time. |