| Line 6: | Line 6: | ||
==Insectoid Falspawn== | ==Insectoid Falspawn== | ||
{{EnemyHeader}} | {{EnemyHeader}} | ||
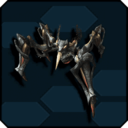
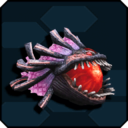
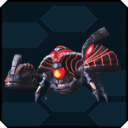
| − | {{EnemyRow|dagan|UIEnemyDagan.png|Dagan|Numerous locations|<!--DropList-->|<!--Breakpoints-->|Element: | + | {{EnemyRow|dagan|UIEnemyDagan.png|[[Dagan]]|Numerous locations|<!--DropList-->|<!--Breakpoints-->|Element: |
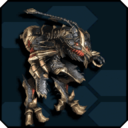
<br>• {{icons|Fire}}{{icons|Light}}<br>Weakspots: <br> • Red Core|Insectoid Falspawn. Weak on its own, but strong in numbers. Target the core under its belly.}} | <br>• {{icons|Fire}}{{icons|Light}}<br>Weakspots: <br> • Red Core|Insectoid Falspawn. Weak on its own, but strong in numbers. Target the core under its belly.}} | ||
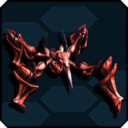
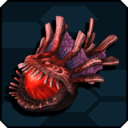
| − | {{EnemyRow|eldagan|UIEnemyElDagan.png|El Dagan|Numerous locations|<!--DropList-->|<!--Breakpoints-->|Element:<br>• {{icons|Fire}}{{icons|Light}}<br>Weakspots: <br> • Red Core|Insectoid Falspawn. Spawns from a Briarda's Dagan Egg. More powerful than a normal Dagan, but shares all of its behavior and attributes.}} | + | {{EnemyRow|eldagan|UIEnemyElDagan.png|[[El Dagan]]|Numerous locations|<!--DropList-->|<!--Breakpoints-->|Element:<br>• {{icons|Fire}}{{icons|Light}}<br>Weakspots: <br> • Red Core|Insectoid Falspawn. Spawns from a Briarda's Dagan Egg. More powerful than a normal Dagan, but shares all of its behavior and attributes.}} |
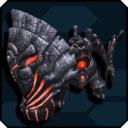
| − | {{EnemyRow|dagannero|UIEnemyDaganNero.png|Dagan Nero|Numerous locations|<!--DropList-->|<!--Breakpoints-->|Element: <br>• {{icons|Fire}}{{icons|Light}}<br>Weakspots: <br> • Red Core|Rare variant of the El Dagan.}} | + | {{EnemyRow|dagannero|UIEnemyDaganNero.png|[[Dagan Nero]]|Numerous locations|<!--DropList-->|<!--Breakpoints-->|Element: <br>• {{icons|Fire}}{{icons|Light}}<br>Weakspots: <br> • Red Core|Rare variant of the El Dagan.}} |
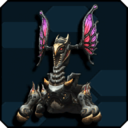
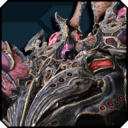
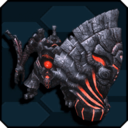
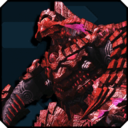
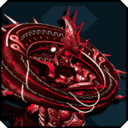
| − | {{EnemyRow|briarda|UIEnemyBriarda.png|Briarda|Numerous locations|<!--DropList-->|<!--Breakpoints-->|Elements: <br>• {{icons|Fire}}{{icons|Light}}<br>Weakspots: <br> • Red Core|Insectoid Falspawn. Spawns Dagan Eggs that hatch into El Dagan when they bury into the floor. Attacks from afar with powerful poison shots. Weak point is on it's back.}} | + | {{EnemyRow|briarda|UIEnemyBriarda.png|[[Briarda]]|Numerous locations|<!--DropList-->|<!--Breakpoints-->|Elements: <br>• {{icons|Fire}}{{icons|Light}}<br>Weakspots: <br> • Red Core|Insectoid Falspawn. Spawns Dagan Eggs that hatch into El Dagan when they bury into the floor. Attacks from afar with powerful poison shots. Weak point is on it's back.}} |
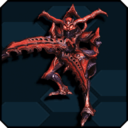
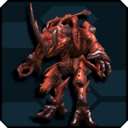
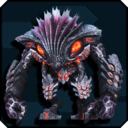
| − | {{EnemyRow|elarda|UIEnemyElArda.png|El Arda|Numerous locations|<!--DropList-->|<!--Breakpoints-->|Elements:<br>• {{icons|Fire}}{{icons|Light}}<br>Weakspots:<br>• Red Core|Strong Insectoid Falspawn. Uses its stinger to attack from close range while boasting powerful rush attacks. Knock it down to disable it, but be wary of its get-up attack.}} | + | {{EnemyRow|elarda|UIEnemyElArda.png|[[El Arda]]|Numerous locations|<!--DropList-->|<!--Breakpoints-->|Elements:<br>• {{icons|Fire}}{{icons|Light}}<br>Weakspots:<br>• Red Core|Strong Insectoid Falspawn. Uses its stinger to attack from close range while boasting powerful rush attacks. Knock it down to disable it, but be wary of its get-up attack.}} |
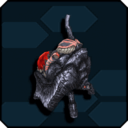
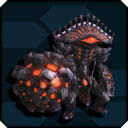
| − | {{EnemyRow|krahda|UIEnemyKrahda.png|Krahda|Planet Lillipa<br>ARKS Ship City area|<!--DropList-->|<!--Breakpoints-->|Elements:<br>• {{icons|Fire}}{{icons|Light}}<br>Weakspots:<br>• Red Core|Insectoid Falspawn. Uses its tiny claws to strike foes. Extremely weak. Core is on the underside.}} | + | {{EnemyRow|krahda|UIEnemyKrahda.png|[[Krahda]]|Planet Lillipa<br>ARKS Ship City area|<!--DropList-->|<!--Breakpoints-->|Elements:<br>• {{icons|Fire}}{{icons|Light}}<br>Weakspots:<br>• Red Core|Insectoid Falspawn. Uses its tiny claws to strike foes. Extremely weak. Core is on the underside.}} |
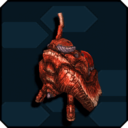
| − | {{EnemyRow|carthago|UIEnemyCarthago.png|Carthago|Planet Amduskia<br>Planet Lillipa<br>ARKS Ship City area|<!--DropList-->|<!--Breakpoints-->|Elements:<br>• {{icons|Fire}}{{icons|Light}}<br>Weakspots:<br>• Red Core|Insectoid Falspawn. Stationary fighter that uses laser beams to attack from a distance. Highly resistant to frontal damage; circle around it to strike its core.}} | + | {{EnemyRow|carthago|UIEnemyCarthago.png|[[Carthago]]|Planet Amduskia<br>Planet Lillipa<br>ARKS Ship City area|<!--DropList-->|<!--Breakpoints-->|Elements:<br>• {{icons|Fire}}{{icons|Light}}<br>Weakspots:<br>• Red Core|Insectoid Falspawn. Stationary fighter that uses laser beams to attack from a distance. Highly resistant to frontal damage; circle around it to strike its core.}} |
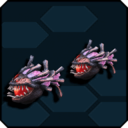
| − | {{EnemyRow|dicahdr|UIEnemyDicahdr.png|Dicahdr|Floating Continent<br>Ruins<br>Dragon Altar|<!--DropList-->|<!--Breakpoints-->|Elements:<br>• {{icons|Fire}}{{icons|Light}}<br>Weakspots:<br>• Red Core|Insectoid Falspawn. Can teleport beside you and behind you. Stagger or knock them down to prevent them from teleporting.}} | + | {{EnemyRow|dicahdr|UIEnemyDicahdr.png|[[Dicahdr]]|Floating Continent<br>Ruins<br>Dragon Altar|<!--DropList-->|<!--Breakpoints-->|Elements:<br>• {{icons|Fire}}{{icons|Light}}<br>Weakspots:<br>• Red Core|Insectoid Falspawn. Can teleport beside you and behind you. Stagger or knock them down to prevent them from teleporting.}} |
| − | {{EnemyRow|predicahdr|UIEnemyPredicahdr.png|Predicahdr|Floating Continent<br>Ruins<br>Dragon Altar|<!--DropList-->|• Arm Blades|Elements:<br>• {{icons|Fire}}{{icons|Light}}<br>Weakspots:<br>• Red Core|Strong Insectoid Falspawn. Uses the same strategy as Dicahdr. Neuter its offense by breaking its claws with Perfect Guards.}} | + | {{EnemyRow|predicahdr|UIEnemyPredicahdr.png|[[Predicahdr]]|Floating Continent<br>Ruins<br>Dragon Altar|<!--DropList-->|• Arm Blades|Elements:<br>• {{icons|Fire}}{{icons|Light}}<br>Weakspots:<br>• Red Core|Strong Insectoid Falspawn. Uses the same strategy as Dicahdr. Neuter its offense by breaking its claws with Perfect Guards.}} |
| − | {{EnemyRow|predicahdrnero|UIEnemyPredicahdrNero.png|Predicahdr Nero|Floating Continent<br>Ruins<br>Dragon Altar|<!--DropList-->|• Arm Blades|Element:<br>• {{icons|Fire}}{{icons|Light}}<br>Weakspots:<br>• Red Core|Rare variant of Predicahdr.}} | + | {{EnemyRow|predicahdrnero|UIEnemyPredicahdrNero.png|[[Predicahdr Nero]]|Floating Continent<br>Ruins<br>Dragon Altar|<!--DropList-->|• Arm Blades|Element:<br>• {{icons|Fire}}{{icons|Light}}<br>Weakspots:<br>• Red Core|Rare variant of Predicahdr.}} |
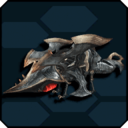
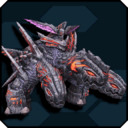
| − | {{EnemyRow|goldrahda|UIEnemyGoldrahda.png|Goldrahda|Mining Base|<!--DropList-->|• Face<br>• Back Core|Elements:<br>• {{icons|Fire}}{{icons|Light}}<br>Weakspots:<br>• Broken Face<br>• Core|Strong Insectoid Falspawn. Defeating a Goldrahda without destroying the core on the back allows it to self-destruct afterwards. Vulnerable to Freeze status, which causes their legs to be encased in ice which causes them to temporarily be immobilized.}} | + | {{EnemyRow|goldrahda|UIEnemyGoldrahda.png|[[Goldrahda]]|Mining Base|<!--DropList-->|• Face<br>• Back Core|Elements:<br>• {{icons|Fire}}{{icons|Light}}<br>Weakspots:<br>• Broken Face<br>• Core|Strong Insectoid Falspawn. Defeating a Goldrahda without destroying the core on the back allows it to self-destruct afterwards. Vulnerable to Freeze status, which causes their legs to be encased in ice which causes them to temporarily be immobilized.}} |
| − | {{EnemyRow|rinzedrahda|UIEnemyRinzeDrahda.png|Rinze Drahda|Mining Base|<!--DropList-->|• Face<br>• Back Core|Elements:<br>• {{icons|Fire}}{{icons|Light}}<br>Weakspots:<br>• Broken Face<br>• Core|Rare variant of Goldrahda.}} | + | {{EnemyRow|rinzedrahda|UIEnemyRinzeDrahda.png|[[Rinze Drahda]]|Mining Base|<!--DropList-->|• Face<br>• Back Core|Elements:<br>• {{icons|Fire}}{{icons|Light}}<br>Weakspots:<br>• Broken Face<br>• Core|Rare variant of Goldrahda.}} |
| − | {{EnemyRow|vidrola|UIEnemyVidrola.png|Vidrola|Mining Base|<!--DropList-->|• Back|Elements:<br>• {{icons|Fire}}{{icons|Light}}<br>Weakspots:<br>• Red Core|Insectoid Falspawn. Several of it's attacks inflict stun, be wary when fighting them alongside other enemies. The core is on the underside.}} | + | {{EnemyRow|vidrola|UIEnemyVidrola.png|[[Vidrola]]|Mining Base|<!--DropList-->|• Back|Elements:<br>• {{icons|Fire}}{{icons|Light}}<br>Weakspots:<br>• Red Core|Insectoid Falspawn. Several of it's attacks inflict stun, be wary when fighting them alongside other enemies. The core is on the underside.}} |
| − | {{EnemyRow|solzabrahda|UIEnemySolzaBrahda.png|Solza Brahda|Mining Base|<!--DropList-->|• Back|Elements:<br>• {{icons|Fire}}{{icons|Light}}<br>Weakspots:<br>• Red Core|Strong Insectoid Falspawn. Powers up Falspawn around it. Good priority target.}} | + | {{EnemyRow|solzabrahda|UIEnemySolzaBrahda.png|[[Solza Brahda]]|Mining Base|<!--DropList-->|• Back|Elements:<br>• {{icons|Fire}}{{icons|Light}}<br>Weakspots:<br>• Red Core|Strong Insectoid Falspawn. Powers up Falspawn around it. Good priority target.}} |
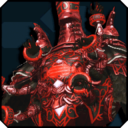
| − | {{EnemyRow|gwanada|UIEnemyGwanada.png|Gwanada|Planet Lillipa<br>ARKS Ship City area|<!--DropList-->|• Gwanada Bit|Elements:<br> • {{icons|Fire}}{{icons|Light}}<br>Weakspots:<br>• RedCore|Boss-type Insectoid Falspawn. Destroying all Gwanada bits will temporarily stun the Gwanada, revealing the red core weakspot on it's belly.}} | + | {{EnemyRow|gwanada|UIEnemyGwanada.png|[[Gwanada]]|Planet Lillipa<br>ARKS Ship City area|<!--DropList-->|• Gwanada Bit|Elements:<br> • {{icons|Fire}}{{icons|Light}}<br>Weakspots:<br>• RedCore|Boss-type Insectoid Falspawn. Destroying all Gwanada bits will temporarily stun the Gwanada, revealing the red core weakspot on it's belly.}} |
| − | {{EnemyRow|gwanadabit|UIEnemyGwanadaBit.png|Gwanada Bit|Planet Lillipa<br>ARKS Ship City area|<!--DropList-->|<!--Breakpoints-->|Element:<br>• {{icons|Fire}}{{icons|Light}}<br>Weakspots:<br>• Red Core|Only present when a Gwanada is around. When there are two Gwanada around, they spawn two sets of Gwanada bits. Destroying one set stuns one of the Gwanadas.}} | + | {{EnemyRow|gwanadabit|UIEnemyGwanadaBit.png|[[Gwanada Bit]]|Planet Lillipa<br>ARKS Ship City area|<!--DropList-->|<!--Breakpoints-->|Element:<br>• {{icons|Fire}}{{icons|Light}}<br>Weakspots:<br>• Red Core|Only present when a Gwanada is around. When there are two Gwanada around, they spawn two sets of Gwanada bits. Destroying one set stuns one of the Gwanadas.}} |
| − | {{EnemyRow|gwanadanero|UIEnemyGwanadaNero.png|Gwanada Nero|Planet Lillipa<br>ARKS Ship City area|<!--DropList-->|• Gwanada Bit Nero|Elements:<br>• {{icons|Fire}}{{icons|Light}}<br>Weakspots:<br>• Red Core|Rare Variant of Gwanada.}} | + | {{EnemyRow|gwanadanero|UIEnemyGwanadaNero.png|[[Gwanada Nero]]|Planet Lillipa<br>ARKS Ship City area|<!--DropList-->|• Gwanada Bit Nero|Elements:<br>• {{icons|Fire}}{{icons|Light}}<br>Weakspots:<br>• Red Core|Rare Variant of Gwanada.}} |
| − | {{EnemyRow|gwanadabitnero|UIEnemyGwanadaBitNero.png|Gwanada Bit Nero|Planet Lillipa<br>ARKS Ship City area|<!--DropList-->|<!--Breakpoints-->|Elements:<br>• {{icons|Fire}}{{icons|Light}}<br>Weakspots:<br>• Red Core|Rare Variant of Gwanada Bit.}} | + | {{EnemyRow|gwanadabitnero|UIEnemyGwanadaBitNero.png|[[Gwanada Bit Nero]]|Planet Lillipa<br>ARKS Ship City area|<!--DropList-->|<!--Breakpoints-->|Elements:<br>• {{icons|Fire}}{{icons|Light}}<br>Weakspots:<br>• Red Core|Rare Variant of Gwanada Bit.}} |
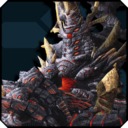
| − | {{EnemyRow|darkragne|UIEnemyDarkRagne.png|Dark Ragne|Anywhere|<!--DropList-->|• Front Left Leg<br>• Front Right Leg<br>• Back Left Leg<br>• Back Right Leg|Elements:<br>• {{icons|Fire}}{{icons|Light}}<br>Weakspots:<br>• Red Core|Boss-type Insectoid Falspawn. Breaking a leg will make it fall over, exposing the weakpoint on the back of it's head. Breaking all four legs will make it fall and stay down for a longer time.<br><br>Some classes can attack the weakpoint directly.}} | + | {{EnemyRow|darkragne|UIEnemyDarkRagne.png|[[Dark Ragne]]|Anywhere|<!--DropList-->|• Front Left Leg<br>• Front Right Leg<br>• Back Left Leg<br>• Back Right Leg|Elements:<br>• {{icons|Fire}}{{icons|Light}}<br>Weakspots:<br>• Red Core|Boss-type Insectoid Falspawn. Breaking a leg will make it fall over, exposing the weakpoint on the back of it's head. Breaking all four legs will make it fall and stay down for a longer time.<br><br>Some classes can attack the weakpoint directly.}} |
| − | {{EnemyRow|darkagrahni|UIEnemyDarkAgrahni.png|Dark Agrahni|Anywhere|<!--DropList-->|• Front Left Leg<br>• Front Right Leg<br>• Back Left Leg<br>• Back Right Leg|Elements:<br>• {{icons|Fire}}{{icons|Light}} <br>Weakpoints:<br>• Red Core|Rare variant of the Dark Ragne.}} | + | {{EnemyRow|darkagrahni|UIEnemyDarkAgrahni.png|[[Dark Agrahni]]|Anywhere|<!--DropList-->|• Front Left Leg<br>• Front Right Leg<br>• Back Left Leg<br>• Back Right Leg|Elements:<br>• {{icons|Fire}}{{icons|Light}} <br>Weakpoints:<br>• Red Core|Rare variant of the Dark Ragne.}} |
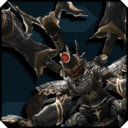
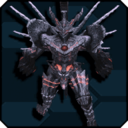
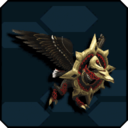
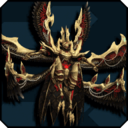
| − | {{EnemyRow|falvibrace|UIEnemyFalVibrace.png|Fal Vibrace|Mining Base Defense Operations|<!--DropList-->|• Horn<br>• Left Arm Claws<br>• Right Arm Claws<br>• Left Wing<br>• Right Wing|Elements:<br>• {{icons|Fire}}{{icons|Light}}<br>Weakspots:<br>• Horn Core<br>• Arm Cores<br>• Abdomen|A strong Boss-type Insectoid Falspawn. Breaking the wings exposes it's abdomen. Damaging the legs will knock it down for a couple of seconds. Vulnerable to Panic status, which causes it to be temporarily unable to attack.<br><br>At low HP, it will launch a bomb at a tower. If it isn't destroyed before the detonation, it will destroy the tower and anyone standing next to it.}} | + | {{EnemyRow|falvibrace|UIEnemyFalVibrace.png|[[Fal Vibrace]]|Mining Base Defense Operations|<!--DropList-->|• Horn<br>• Left Arm Claws<br>• Right Arm Claws<br>• Left Wing<br>• Right Wing|Elements:<br>• {{icons|Fire}}{{icons|Light}}<br>Weakspots:<br>• Horn Core<br>• Arm Cores<br>• Abdomen|A strong Boss-type Insectoid Falspawn. Breaking the wings exposes it's abdomen. Damaging the legs will knock it down for a couple of seconds. Vulnerable to Panic status, which causes it to be temporarily unable to attack.<br><br>At low HP, it will launch a bomb at a tower. If it isn't destroyed before the detonation, it will destroy the tower and anyone standing next to it.}} |
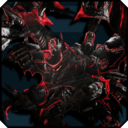
| − | {{EnemyRow|falvibraceyuga|UIEnemyFalVibraceYuga.png|Fal Vibrace Yuga|Mining Base Defense Operations: Despair|<!--DropList-->|• Horn<br>• Left Arm Claws<br>• Right Arm Claws<br>• Left Wing<br>• Right Wing|Elements:<br>• {{icons|Fire}}{{icons|Light}}<br>Weakpoints:<br>• Horn Core<br>• Arm Cores<br>• Abdomen|Stronger variant of Fal Vibrace. '''NOT''' a Tainted Falspawn despite having the visual characteristics of one.<br><br>Same weaknesses as Fal Vibrace.<br><br>Launches two bombs instead of one - one when it spawns, and another one at low Hp.}} | + | {{EnemyRow|falvibraceyuga|UIEnemyFalVibraceYuga.png|[[Fal Vibrace Yuga]]|Mining Base Defense Operations: Despair|<!--DropList-->|• Horn<br>• Left Arm Claws<br>• Right Arm Claws<br>• Left Wing<br>• Right Wing|Elements:<br>• {{icons|Fire}}{{icons|Light}}<br>Weakpoints:<br>• Horn Core<br>• Arm Cores<br>• Abdomen|Stronger variant of Fal Vibrace. '''NOT''' a Tainted Falspawn despite having the visual characteristics of one.<br><br>Same weaknesses as Fal Vibrace.<br><br>Launches two bombs instead of one - one when it spawns, and another one at low Hp.}} |
| − | {{EnemyRow|replicaofapprentice|UIEnemyReplicaOfApprentice.png|Replica of [Apprentice]|Advance Quest|<!--DropList-->|<!--Breakpoints-->|Elements:<br>• {{icons|Fire}}{{icons|Light}}|A facsimile of the second Dark Falz [Apprentice]. Relentlessly assaults foes with her Twin Dagger's rapid strikes.<br><br>When at low HP, enters a rage mode, becoming stronger and faster, and summons Predicahdrs.}} | + | {{EnemyRow|replicaofapprentice|UIEnemyReplicaOfApprentice.png|[[Replica of [Apprentice]]]|Advance Quest|<!--DropList-->|<!--Breakpoints-->|Elements:<br>• {{icons|Fire}}{{icons|Light}}|A facsimile of the second Dark Falz [Apprentice]. Relentlessly assaults foes with her Twin Dagger's rapid strikes.<br><br>When at low HP, enters a rage mode, becoming stronger and faster, and summons Predicahdrs.}} |
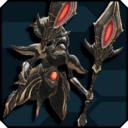
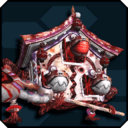
| − | {{EnemyRow|darkfalzapprenticezia|UIEnemyDarkFalzApprenticeZia.png|Dark Falz Apprentice Zia|Mining Base Defense Operations: Demise|<!--DropList-->|<!--Breakpoints-->|Element:<br>• {{icons|Fire}}{{icons|Light}}Weakpoints:<br>• Red Cores<br>• Tongue|The body of Dark Falz Apprentice trapped beneath Lillipa's surface.<br><br>Turns the lower area of the map into acid on spawn.<br><br>At low HP, extends a tongue that, after a couple of seconds, will fire a laser that destroys all towers. Deal enough damage to the tongue to stun her.<br><br>Stunned by the Burn status.}} | + | {{EnemyRow|darkfalzapprenticezia|UIEnemyDarkFalzApprenticeZia.png|[[Dark Falz Apprentice Zia]]|Mining Base Defense Operations: Demise|<!--DropList-->|<!--Breakpoints-->|Element:<br>• {{icons|Fire}}{{icons|Light}}Weakpoints:<br>• Red Cores<br>• Tongue|The body of Dark Falz Apprentice trapped beneath Lillipa's surface.<br><br>Turns the lower area of the map into acid on spawn.<br><br>At low HP, extends a tongue that, after a couple of seconds, will fire a laser that destroys all towers. Deal enough damage to the tongue to stun her.<br><br>Stunned by the Burn status.}} |
</table> | </table> | ||
| Line 59: | Line 59: | ||
==Aquatic Falspawn== | ==Aquatic Falspawn== | ||
{{EnemyHeader}} | {{EnemyHeader}} | ||
| − | {{EnemyRow|mikda|UIEnemyMikda.png|Mikda|Tundra<br>Floating Continent<br>Ruins|<!--DropList-->|<!--Breakpoints-->|Elements:<br>• {{icons|Lightning}}{{icons|Light}}<br>Weakspots:<br>• Red Core|Aquatic Falspawn. This enemy is almost immune to damage unless the weak point is hit.<br>The weakpoint is on the lower back.}} | + | {{EnemyRow|mikda|UIEnemyMikda.png|[[Mikda]]|Tundra<br>Floating Continent<br>Ruins|<!--DropList-->|<!--Breakpoints-->|Elements:<br>• {{icons|Lightning}}{{icons|Light}}<br>Weakspots:<br>• Red Core|Aquatic Falspawn. This enemy is almost immune to damage unless the weak point is hit.<br>The weakpoint is on the lower back.}} |
| − | {{EnemyRow|ahlmikda|UIEnemyAhlMikda.png|Ahl Mikda|Floating Continent<br>Ruins|<!--DropList-->|<!--Breakpoints-->|Element:<br>• {{icons|Lightning}} {{icons|Light}}<br>Weakspots:<br>• Red Core|Aquatic Falspawn. This enemy is almost immune to damage unless the weak point is hit.<br>The weakpoint is on the upper back.}} | + | {{EnemyRow|ahlmikda|UIEnemyAhlMikda.png|[[Ahl Mikda]]|Floating Continent<br>Ruins|<!--DropList-->|<!--Breakpoints-->|Element:<br>• {{icons|Lightning}} {{icons|Light}}<br>Weakspots:<br>• Red Core|Aquatic Falspawn. This enemy is almost immune to damage unless the weak point is hit.<br>The weakpoint is on the upper back.}} |
| − | {{EnemyRow|meemikda|UIEnemyMeeMikda.png|Mee Mikda|Tundra<br>Floating Continent<br>Ruins|<!--DropList-->|<!--Breakpoints-->|Element:<br>• {{icons|Lightning}}{{icons|Light}}<br>Weakpoints:<br>• Red Core|Rare variant of Mikda and Ahl Mikda.}} | + | {{EnemyRow|meemikda|UIEnemyMeeMikda.png|[[Mee Mikda]]|Tundra<br>Floating Continent<br>Ruins|<!--DropList-->|<!--Breakpoints-->|Element:<br>• {{icons|Lightning}}{{icons|Light}}<br>Weakpoints:<br>• Red Core|Rare variant of Mikda and Ahl Mikda.}} |
| − | {{EnemyRow|dhargacha|UIEnemyDhargacha.png|Dhargacha|Floating Continent<br>Ruins|<!--DropList-->|<!--Breakpoints-->|Element:<br>• {{icons|Lightning}}{{icons|Light}}<br>Weakspots:<br>• Red Core|Aquatic Falspawn. Attack the core in its mouth when its open.}} | + | {{EnemyRow|dhargacha|UIEnemyDhargacha.png|[[Dhargacha]]|Floating Continent<br>Ruins|<!--DropList-->|<!--Breakpoints-->|Element:<br>• {{icons|Lightning}}{{icons|Light}}<br>Weakspots:<br>• Red Core|Aquatic Falspawn. Attack the core in its mouth when its open.}} |
| − | {{EnemyRow|dhargash|UIEnemyDhargash.png|Dhargash|Floating Continent<br>Ruins|<!--DropList-->|<!--Breakpoints-->|Elements:<br>• {{icons|Lightning}}{{icons|Light}}<br>Weakspots:<br>•Red Core|Aquatic Falspawn. Attack the core in its mouth when its open. It leads Dhargachas. Killing it stuns all nearby Dhargachas.}} | + | {{EnemyRow|dhargash|UIEnemyDhargash.png|[[Dhargash]]|Floating Continent<br>Ruins|<!--DropList-->|<!--Breakpoints-->|Elements:<br>• {{icons|Lightning}}{{icons|Light}}<br>Weakspots:<br>•Red Core|Aquatic Falspawn. Attack the core in its mouth when its open. It leads Dhargachas. Killing it stuns all nearby Dhargachas.}} |
| − | {{EnemyRow|dhargashnero|UIEnemyDhargashNero.png|Dhargash Nero|Floating Continent<br>Ruins|<!--DropList-->|<!--Breakpoints-->|Elements:<br>• {{icons|Lightning}}{{icons|Light}}<br>Weakspots:<br>• Red Core|Rare Variant of Dhargash.}} | + | {{EnemyRow|dhargashnero|UIEnemyDhargashNero.png|[[Dhargash Nero]]|Floating Continent<br>Ruins|<!--DropList-->|<!--Breakpoints-->|Elements:<br>• {{icons|Lightning}}{{icons|Light}}<br>Weakspots:<br>• Red Core|Rare Variant of Dhargash.}} |
| − | {{EnemyRow|gawonda|UIEnemyGawonda.png|Gawonda|Tundra<br>Floating Continent<br>Ruins|<!--DropList-->|<!--Breakpoints-->|Element:<br>• {{icons|Lightning}}{{icons|Light}}<br>Weakspots:<br>• Red Core|Aquatic Falspawn. The shield is impervious to all damage. Circle around behind it to access the weakpoint.}} | + | {{EnemyRow|gawonda|UIEnemyGawonda.png|[[Gawonda]]|Tundra<br>Floating Continent<br>Ruins|<!--DropList-->|<!--Breakpoints-->|Element:<br>• {{icons|Lightning}}{{icons|Light}}<br>Weakspots:<br>• Red Core|Aquatic Falspawn. The shield is impervious to all damage. Circle around behind it to access the weakpoint.}} |
| − | {{EnemyRow|guwonda|UIEnemyGuwonda.png|Guwonda|Floating Continent<br>Ruins|<!--DropList-->|<!--Breakpoints-->|Element:<br>• {{icons|Lightning}}{{icons|Light}}<br>Weakspots:<br>• Red Core|Aquatic Falspawn. The shield is impervious to all damage. Circle around behind it to access the weakpoint.}} | + | {{EnemyRow|guwonda|UIEnemyGuwonda.png|[[Guwonda]]|Floating Continent<br>Ruins|<!--DropList-->|<!--Breakpoints-->|Element:<br>• {{icons|Lightning}}{{icons|Light}}<br>Weakspots:<br>• Red Core|Aquatic Falspawn. The shield is impervious to all damage. Circle around behind it to access the weakpoint.}} |
| − | {{EnemyRow|krabahda|UIEnemyKrabahda.png|Krabahda|Ruins|<!--DropList-->|<!--Breakpoints-->|Element:<br>• {{icons|Lightning}}{{icons|Light}}<br>Weakspot:<br>• Red Core|Aquatic Falspawn. When its HP gets low, it covers the weakpoint to reduce all damage taken. Inflicting Shock on it while its in this state will knock it over and re-expose the core.}} | + | {{EnemyRow|krabahda|UIEnemyKrabahda.png|[[Krabahda]]|Ruins|<!--DropList-->|<!--Breakpoints-->|Element:<br>• {{icons|Lightning}}{{icons|Light}}<br>Weakspot:<br>• Red Core|Aquatic Falspawn. When its HP gets low, it covers the weakpoint to reduce all damage taken. Inflicting Shock on it while its in this state will knock it over and re-expose the core.}} |
| − | {{EnemyRow|cuchronahda|UIEnemyCuchronahda.png|Cuchronahda|Ruins|<!--DropList-->|• Eye<br>• Crotch|Element:<br>• {{icons|Lightning}}{{icons|Light}}<br>Weakspots:<br>• Eye<br>• Red Core|Strong Aquatic Falspawn. The core only becomes accessible after the crotch guard has been broken.<br>When its eye breaks, it starts flailing its arm around wildly - keep your distance until it stops.}} | + | {{EnemyRow|cuchronahda|UIEnemyCuchronahda.png|[[Cuchronahda]]|Ruins|<!--DropList-->|• Eye<br>• Crotch|Element:<br>• {{icons|Lightning}}{{icons|Light}}<br>Weakspots:<br>• Eye<br>• Red Core|Strong Aquatic Falspawn. The core only becomes accessible after the crotch guard has been broken.<br>When its eye breaks, it starts flailing its arm around wildly - keep your distance until it stops.}} |
| − | {{EnemyRow|Cychronahda|UIEnemyCychronahda.png|Cychronahda|Ruins|<!--DropList-->|• Eye<br>• Crotch|Element:<br>• {{icons|Lightning}}{{icons|Light}}<br>Weakspots:<br>• Eye<br>• Red Core|Strong Aquatic Falspawn. The core only becomes accessible after the crotch guard has been broken.<br>When its eye breaks, it starts flailing its mace around wildly - which, unlike Cuchronahda's arm, actually has a long range. Breaking the eye is not recommended.}} | + | {{EnemyRow|Cychronahda|UIEnemyCychronahda.png|[[Cychronahda]]|Ruins|<!--DropList-->|• Eye<br>• Crotch|Element:<br>• {{icons|Lightning}}{{icons|Light}}<br>Weakspots:<br>• Eye<br>• Red Core|Strong Aquatic Falspawn. The core only becomes accessible after the crotch guard has been broken.<br>When its eye breaks, it starts flailing its mace around wildly - which, unlike Cuchronahda's arm, actually has a long range. Breaking the eye is not recommended.}} |
| − | {{EnemyRow|wolguarda|UIEnemyWolguarda.png|Wolguarda|Ruins|<!--DropList-->|<!--Breakpoints-->|Element:<br>• {{icons|Lightning}}{{icons|Light}}<br>Weakspots:<br>• Red Core|Boss-type Aquatic Falspawn. The weakpoints are located on the shoulders, which means you have to hit the weakpoints manually since you can only target the belly and head.<br><br>When HP is low, its attacks intensify, last longer and it speeds up overall.}} | + | {{EnemyRow|wolguarda|UIEnemyWolguarda.png|[[Wolguarda]]|Ruins|<!--DropList-->|<!--Breakpoints-->|Element:<br>• {{icons|Lightning}}{{icons|Light}}<br>Weakspots:<br>• Red Core|Boss-type Aquatic Falspawn. The weakpoints are located on the shoulders, which means you have to hit the weakpoints manually since you can only target the belly and head.<br><br>When HP is low, its attacks intensify, last longer and it speeds up overall.}} |
| − | {{EnemyRow|alonaguarda|UIEnemyAlonaguarda.png|Alonaguarda|Ruins|<!--DropList-->|<!--Breakpoints-->|Element:<br>• {{icons|Lightning}}{{icons|Light}}<br>Weakspots:<br>• Red Core|Rare Variant of Wolguarda.}} | + | {{EnemyRow|alonaguarda|UIEnemyAlonaguarda.png|[[Alonaguarda]]|Ruins|<!--DropList-->|<!--Breakpoints-->|Element:<br>• {{icons|Lightning}}{{icons|Light}}<br>Weakspots:<br>• Red Core|Rare Variant of Wolguarda.}} |
| − | {{EnemyRow|zeshraider|UIEnemyZeshraider.png|Zeshraider|Ruins|<!--DropList-->|• Cannons<br>• Arms<br>• Legs|Element:<br>• {{icons|Lightning}}{{icons|Light}}<br>Weakspots:<br>• Red Cores|Boss-type Aquatic Falspawn. Zeshraider has 6 cores - one on its head, one on its chest, and 4 that are revealed by breaking each of the 4 turrets. The chest core is only vulnerable when it's knocked down. Can be knocked down by either breaking a leg and dealing additional damage, or waiting for it to pop its head out after it retreats into its shell.}} | + | {{EnemyRow|zeshraider|UIEnemyZeshraider.png|[[Zeshraider]]|Ruins|<!--DropList-->|• Cannons<br>• Arms<br>• Legs|Element:<br>• {{icons|Lightning}}{{icons|Light}}<br>Weakspots:<br>• Red Cores|Boss-type Aquatic Falspawn. Zeshraider has 6 cores - one on its head, one on its chest, and 4 that are revealed by breaking each of the 4 turrets. The chest core is only vulnerable when it's knocked down. Can be knocked down by either breaking a leg and dealing additional damage, or waiting for it to pop its head out after it retreats into its shell.}} |
| − | {{EnemyRow|rigshraider|UIEnemyRigshraider.png|Rigshraider|Ruins|<!--DropList-->|• Cannons<br>• Arms<br>• Legs|Element:<br>• {{icons|Lightning}}{{icons|Light}}<br>Weakspots<br>• Red Cores|Rare variant of Zeshraider.}} | + | {{EnemyRow|rigshraider|UIEnemyRigshraider.png|[[Rigshraider]]|Ruins|<!--DropList-->|• Cannons<br>• Arms<br>• Legs|Element:<br>• {{icons|Lightning}}{{icons|Light}}<br>Weakspots<br>• Red Cores|Rare variant of Zeshraider.}} |
| − | {{EnemyRow|falzhyunal|UIEnemyFalzHyunal.png|Falz Hyunal|Anywhere<br>Falspawn Den|<!--DropList-->|• Elder Pain|Element:<br>• {{icons|Lightning}}{{icons|Light}}<br>Weakspots:<br>• Red Core|The armored form of Elder. Fights up close and personal with an array of immensely strong melee attacks.<br><br>Breaking Hyunal's sword lowers the damage of his sword-based attacks. The core is on Hyunal's chest and it easy to hit.<br><br>At low HP, all of his attacks get an HP Debuff effect.}} | + | {{EnemyRow|falzhyunal|UIEnemyFalzHyunal.png|[[Falz Hyunal]]|Anywhere<br>Falspawn Den|<!--DropList-->|• Elder Pain|Element:<br>• {{icons|Lightning}}{{icons|Light}}<br>Weakspots:<br>• Red Core|The armored form of Elder. Fights up close and personal with an array of immensely strong melee attacks.<br><br>Breaking Hyunal's sword lowers the damage of his sword-based attacks. The core is on Hyunal's chest and it easy to hit.<br><br>At low HP, all of his attacks get an HP Debuff effect.}} |
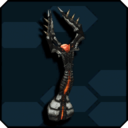
| − | {{EnemyRow|falzarm|UIEnemyFalzArm.png|Falz Arm|Exploration (Super Hard)<br>[[The Raging Obsidian Arm]]|<!--DropList-->|• Fingers|Element:<br>• {{icons|Lightning}}{{icons|Light}}<br>Weakspots:<br>• Red Core<br>• Broken Fingers|A powerful Falspawn created from the body of Elder. Smashes foes with fast, heavy-hitting attacks.<br>Inflict damage to the fingers to destroy them and reveal the cores underneath.<br>Immobilized by the Shock status.}} | + | {{EnemyRow|falzarm|UIEnemyFalzArm.png|[[Falz Arm]]|Exploration (Super Hard)<br>[[The Raging Obsidian Arm]]|<!--DropList-->|• Fingers|Element:<br>• {{icons|Lightning}}{{icons|Light}}<br>Weakspots:<br>• Red Core<br>• Broken Fingers|A powerful Falspawn created from the body of Elder. Smashes foes with fast, heavy-hitting attacks.<br>Inflict damage to the fingers to destroy them and reveal the cores underneath.<br>Immobilized by the Shock status.}} |
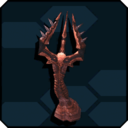
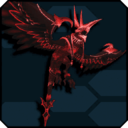
| − | {{EnemyRow|darkfalzelder|UIEnemyDarkFalzElder.png|Dark Falz Elder|[[Elder of the Unfathomable Abyss]]|<!--DropList-->|• Wrists|Element:<br>• {{icons|Lightning}}{{icons|Light}}<br>Weakspots:<br>• Forehead Core<br>• Chest Core<br>• Wrists|A Dark Falz that threatened ARKS in times past.<br><br>While there are cores on Elder, it is not recommended to attack them. Instead, target the red parts on his arms when he stretches them to attack. Attacking that area enough will break off the arm. The lowest arms can be ignored since they cannot be destroyed.<br><br>For the first phase, ignore the upper arms and destroy all 4 middle arms, then wait for them to regrow in the next phase.<br><br>Destroy the same 4 arms again, then Shock him to knock him down. When he is knocked down, destroy the 4 upper arms.}} | + | {{EnemyRow|darkfalzelder|UIEnemyDarkFalzElder.png|[[Dark Falz Elder]]|[[Elder of the Unfathomable Abyss]]|<!--DropList-->|• Wrists|Element:<br>• {{icons|Lightning}}{{icons|Light}}<br>Weakspots:<br>• Forehead Core<br>• Chest Core<br>• Wrists|A Dark Falz that threatened ARKS in times past.<br><br>While there are cores on Elder, it is not recommended to attack them. Instead, target the red parts on his arms when he stretches them to attack. Attacking that area enough will break off the arm. The lowest arms can be ignored since they cannot be destroyed.<br><br>For the first phase, ignore the upper arms and destroy all 4 middle arms, then wait for them to regrow in the next phase.<br><br>Destroy the same 4 arms again, then Shock him to knock him down. When he is knocked down, destroy the 4 upper arms.}} |
</table> | </table> | ||
| Line 99: | Line 99: | ||
==Winged Falspawn== | ==Winged Falspawn== | ||
{{EnemyHeader}} | {{EnemyHeader}} | ||
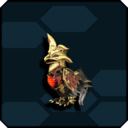
| − | {{EnemyRow|shutrahda|UIEnemyShutrahda.png|Shutrahda|Coast<br>Abandoned Mine|<!--DropList-->|<!--Breakpoints-->|Element:<br>• {{icons|Wind}}{{icons|Light}}<br>Weakspots:<br>• Red Core|Winged Falspawn. Doesn't do much other than flying around and occasionally pecking at you. The weakpoint is on top of its head.}} | + | {{EnemyRow|shutrahda|UIEnemyShutrahda.png|[[Shutrahda]]|Coast<br>Abandoned Mine|<!--DropList-->|<!--Breakpoints-->|Element:<br>• {{icons|Wind}}{{icons|Light}}<br>Weakspots:<br>• Red Core|Winged Falspawn. Doesn't do much other than flying around and occasionally pecking at you. The weakpoint is on top of its head.}} |
| − | {{EnemyRow|tyraluda|UIEnemyTyraluda.png|Tyraluda|Coast<br>Abandoned Mine|<!--DropList-->|<!--Breakpoints-->|Element:• <br>{{icons|Wind}}{{icons|Light}}<br>Weakspots:<br>• Red Core|Winged Falspawn. Doesn't do much other than flying around and occasionally pecking at you. The weakpoint is on top of its head.}} | + | {{EnemyRow|tyraluda|UIEnemyTyraluda.png|[[Tyraluda]]|Coast<br>Abandoned Mine|<!--DropList-->|<!--Breakpoints-->|Element:• <br>{{icons|Wind}}{{icons|Light}}<br>Weakspots:<br>• Red Core|Winged Falspawn. Doesn't do much other than flying around and occasionally pecking at you. The weakpoint is on top of its head.}} |
| − | {{EnemyRow|balshutrahda|UIEnemyBalShutrahda.png|Bal Shutrahda|Coast<br>Abandoned Mine|<!--DropList-->|<!--Breakpoints-->|Element:<br>• {{icons|Wind}}{{icons|Light}}<br>Weakspots:<br>• Red Core|Rare variant of Shutrahda}} | + | {{EnemyRow|balshutrahda|UIEnemyBalShutrahda.png|[[Bal Shutrahda]]|Coast<br>Abandoned Mine|<!--DropList-->|<!--Breakpoints-->|Element:<br>• {{icons|Wind}}{{icons|Light}}<br>Weakspots:<br>• Red Core|Rare variant of Shutrahda}} |
| − | {{EnemyRow|druahda|UIEnemyDruahda.png|Druahda|Seabed|<!--DropList-->|<!--Breakpoints-->|Element:<br>• {{icons|Wind}}{{icons|Light}}<br>Weakspots:<br>• Red Core|Winged Falspawn. Capable of boosting the attack power of nearby Falspawn. Be careful of the ring it throws as it returns like a boomerang.}} | + | {{EnemyRow|druahda|UIEnemyDruahda.png|[[Druahda]]|Seabed|<!--DropList-->|<!--Breakpoints-->|Element:<br>• {{icons|Wind}}{{icons|Light}}<br>Weakspots:<br>• Red Core|Winged Falspawn. Capable of boosting the attack power of nearby Falspawn. Be careful of the ring it throws as it returns like a boomerang.}} |
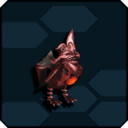
| − | {{EnemyRow|davrune|UIEnemyDavrune.png|Davrune|Floating Facility|<!--DropList-->|<!--Breakpoints-->|Element:<br>• {{icons|Wind}}{{icons|Light}}<br>Weakspots:<br>• Red Core|Winged Falspawn. Despite having wings, it doesn't fly. It instead runs around on the ground, laying egg-shaped bombs. The weakpoint is on the front of its chest.}} | + | {{EnemyRow|davrune|UIEnemyDavrune.png|[[Davrune]]|Floating Facility|<!--DropList-->|<!--Breakpoints-->|Element:<br>• {{icons|Wind}}{{icons|Light}}<br>Weakspots:<br>• Red Core|Winged Falspawn. Despite having wings, it doesn't fly. It instead runs around on the ground, laying egg-shaped bombs. The weakpoint is on the front of its chest.}} |
| − | {{EnemyRow|baldavrune|UIEnemyBalDavrune.png|Bal Davrune|Floating Facility|<!--DropList-->|<!--Breakpoints-->|Element:<br>• {{icons|Wind}}{{icons|Light}}<br>Weakspots:<br>• Red Core|Rare variant of the Davrune.}} | + | {{EnemyRow|baldavrune|UIEnemyBalDavrune.png|[[Bal Davrune]]|Floating Facility|<!--DropList-->|<!--Breakpoints-->|Element:<br>• {{icons|Wind}}{{icons|Light}}<br>Weakspots:<br>• Red Core|Rare variant of the Davrune.}} |
| − | {{EnemyRow|davrunda|UIEnemyDavrunda.png|Davrunda|Floating Facility|<!--DropList-->|<!--Breakpoints-->|Element:<br>• {{icons|Wind}}{{icons|Light}}<br>Weakspots:<br>• Red Core|Winged Falspawn. Works like the Davrune, but looks different.}} | + | {{EnemyRow|davrunda|UIEnemyDavrunda.png|[[Davrunda]]|Floating Facility|<!--DropList-->|<!--Breakpoints-->|Element:<br>• {{icons|Wind}}{{icons|Light}}<br>Weakspots:<br>• Red Core|Winged Falspawn. Works like the Davrune, but looks different.}} |
| − | {{EnemyRow|broondarl|UIEnemyBroondarl.png|Broondarl|Coast<br>Abandoned Mine<br>Floating Facility|<!--DropList-->|<!--Breakpoints-->|Element:<br>• {{icons|Wind}}{{icons|Light}}<br>Weakspots:<br>• Red Core|Winged Falspawn. If you launch them into the air, they fall to the ground and get immobilized. Once they're down on the ground, it will use a special attack to get up, so be wary. The weakpoint is in the middle of the body.}} | + | {{EnemyRow|broondarl|UIEnemyBroondarl.png|[[Broondarl]]|Coast<br>Abandoned Mine<br>Floating Facility|<!--DropList-->|<!--Breakpoints-->|Element:<br>• {{icons|Wind}}{{icons|Light}}<br>Weakspots:<br>• Red Core|Winged Falspawn. If you launch them into the air, they fall to the ground and get immobilized. Once they're down on the ground, it will use a special attack to get up, so be wary. The weakpoint is in the middle of the body.}} |
| − | {{EnemyRow|balbroondarl|UIEnemyBalBroondarl.png|BalBroondarl|Coast<br>Abandoned Mine<br>Floating Facility|<!--DropList-->|<!--Breakpoints-->|Element:<br>• {{icons|Wind}}{{icons|Light}}<br>Weakspots:<br>• Red Core|Rare variant of Broondarl.}} | + | {{EnemyRow|balbroondarl|UIEnemyBalBroondarl.png|[[BalBroondarl]]|Coast<br>Abandoned Mine<br>Floating Facility|<!--DropList-->|<!--Breakpoints-->|Element:<br>• {{icons|Wind}}{{icons|Light}}<br>Weakspots:<br>• Red Core|Rare variant of Broondarl.}} |
| − | {{EnemyRow|soldacapita|UIEnemySoldaCapita.png|Solda Capita|Seabed<br>Floating Facility|<!--DropList-->|<!--Breakpoints-->|Element:<br>• {{icons|Wind}}{{icons|Light}}<br>Weakspots:<br>• Red Core|Winged Falspawn. Wields a Partisan and uses dark Photon Arts similar to Assault Buster. Accompanied by Guru Solda and Dwe Solda. Weakpoint is on its chest.}} | + | {{EnemyRow|soldacapita|UIEnemySoldaCapita.png|[[Solda Capita]]|Seabed<br>Floating Facility|<!--DropList-->|<!--Breakpoints-->|Element:<br>• {{icons|Wind}}{{icons|Light}}<br>Weakspots:<br>• Red Core|Winged Falspawn. Wields a Partisan and uses dark Photon Arts similar to Assault Buster. Accompanied by Guru Solda and Dwe Solda. Weakpoint is on its chest.}} |
| − | {{EnemyRow|gurusolda|UIEnemyGuruSolda.png|Guru Solda|Seabed<br>Floating Facility|<!--DropList-->|<!--Breakpoints-->|Element<br>• {{icons|Wind}}{{icons|Light}}<br>Weakspots:<br>• Red Core|Winged Falspawn. Wields a Sword and uses dark Photon Arts similar to Twister Drop. Weakpoint is on its chest.}} | + | {{EnemyRow|gurusolda|UIEnemyGuruSolda.png|[[Guru Solda]]|Seabed<br>Floating Facility|<!--DropList-->|<!--Breakpoints-->|Element<br>• {{icons|Wind}}{{icons|Light}}<br>Weakspots:<br>• Red Core|Winged Falspawn. Wields a Sword and uses dark Photon Arts similar to Twister Drop. Weakpoint is on its chest.}} |
| − | {{EnemyRow|dwesolda|UIEnemyDweSolda.png|Dwe Solda|Seabed<br>Floating Facility|<!--DropList-->|<!--Breakpoints-->|Element:<br>• {{icons|Wind}}{{icons|Light}}<br>Weakspots:<br>• Red Core|Wields Twin Daggers and uses dark Photon Arts similar to Raging Waltz. Weakpoint is on its chest.}} | + | {{EnemyRow|dwesolda|UIEnemyDweSolda.png|[[Dwe Solda]]|Seabed<br>Floating Facility|<!--DropList-->|<!--Breakpoints-->|Element:<br>• {{icons|Wind}}{{icons|Light}}<br>Weakspots:<br>• Red Core|Wields Twin Daggers and uses dark Photon Arts similar to Raging Waltz. Weakpoint is on its chest.}} |
| − | {{EnemyRow|lanzvalehda|UIEnemyLanzValehda.png|Lanz Valehda|Floating Facility|<!--DropList-->|<!--Breakpoints-->|Element:<br>• {{icons|Wind}}{{icons|Light}}<br>Weakspots:<br>• Red Core|Winged Falspawn. They have the ability to teleport like the Luda Sorcerer. Uses soundwaves to stun. Weakpoint is on the chest.}} | + | {{EnemyRow|lanzvalehda|UIEnemyLanzValehda.png|[[Lanz Valehda]]|Floating Facility|<!--DropList-->|<!--Breakpoints-->|Element:<br>• {{icons|Wind}}{{icons|Light}}<br>Weakspots:<br>• Red Core|Winged Falspawn. They have the ability to teleport like the Luda Sorcerer. Uses soundwaves to stun. Weakpoint is on the chest.}} |
| − | {{EnemyRow|vadaransune|UIEnemyVadaRansune.png|Vada Ransune|Floating Facility|<!--DropList-->|<!--Breakpoints-->|Element:<br>• {{icons|Wind}}{{icons|Light}}<br>Weakspots:<br>• Red Core|Rare variant of Lanz Valehda.}} | + | {{EnemyRow|vadaransune|UIEnemyVadaRansune.png|[[Vada Ransune]]|Floating Facility|<!--DropList-->|<!--Breakpoints-->|Element:<br>• {{icons|Wind}}{{icons|Light}}<br>Weakspots:<br>• Red Core|Rare variant of Lanz Valehda.}} |
| − | {{EnemyRow|ludasorcerer|UIEnemyLudaSorcerer.png|Luda Sorcerer|Coast<br>Abandoned Mine<br>Floating Facility|<!--DropList-->|• Left Wing<br>• Right Wing<br>• |Element:<br>• {{icons|Wind}}{{icons|Light}}<br>Weakspots:<br>• Red Core|Strong Winged Falspawn. Break its tail to prevent it from using its barrier attack. Breaking a wing temporarily knocks it down to the ground. Breaking both wings permanently prevents it from teleporting. The weakpoint is on the chest.}} | + | {{EnemyRow|ludasorcerer|UIEnemyLudaSorcerer.png|[[Luda Sorcerer]]|Coast<br>Abandoned Mine<br>Floating Facility|<!--DropList-->|• Left Wing<br>• Right Wing<br>• |Element:<br>• {{icons|Wind}}{{icons|Light}}<br>Weakspots:<br>• Red Core|Strong Winged Falspawn. Break its tail to prevent it from using its barrier attack. Breaking a wing temporarily knocks it down to the ground. Breaking both wings permanently prevents it from teleporting. The weakpoint is on the chest.}} |
| − | {{EnemyRow|dekormaryuda|UIEnemyDekorMaryuda.png|Dekor Maryuda|Coast<br>Abandoned Mine<br>Seabed<br>Floating Facility|<!--DropList-->|• Left Claw<br>• Right Claw<br>• Upper Segment<br>• Middle Segment<br>• Lower Segment|Element:<br>• {{icons|Wind}}{{icons|Light}}<br>Weakspots:<br>• Red Core<br>• Head<br>• Broken Claws<br>• Body Segments|Boss-Type Winged Falspawn. Destroying the segmented body parts makes it collapse and fall down, revealing the core on top of its head. Vulnerable to Blind status which will temporarily immobilize it.}} | + | {{EnemyRow|dekormaryuda|UIEnemyDekorMaryuda.png|[[Dekor Maryuda]]|Coast<br>Abandoned Mine<br>Seabed<br>Floating Facility|<!--DropList-->|• Left Claw<br>• Right Claw<br>• Upper Segment<br>• Middle Segment<br>• Lower Segment|Element:<br>• {{icons|Wind}}{{icons|Light}}<br>Weakspots:<br>• Red Core<br>• Head<br>• Broken Claws<br>• Body Segments|Boss-Type Winged Falspawn. Destroying the segmented body parts makes it collapse and fall down, revealing the core on top of its head. Vulnerable to Blind status which will temporarily immobilize it.}} |
| − | {{EnemyRow|novemaryudahl|UIEnemyNoveMaryudahl.png|Nove Maryudahl|Coast<br>Abandoned Mine<br>Seabed<br>Floating Facility|<!--DropList-->|<!--Breakpoints-->|Element:<br>• {{icons|Wind}}{{icons|Light}}<br>Weakspots:<br>• Red Core<br>• Head<br>• Broken Claws<br>• Body Segments|Rare variant of Dekor Maryuda.}} | + | {{EnemyRow|novemaryudahl|UIEnemyNoveMaryudahl.png|[[Nove Maryudahl]]|Coast<br>Abandoned Mine<br>Seabed<br>Floating Facility|<!--DropList-->|<!--Breakpoints-->|Element:<br>• {{icons|Wind}}{{icons|Light}}<br>Weakspots:<br>• Red Core<br>• Head<br>• Broken Claws<br>• Body Segments|Rare variant of Dekor Maryuda.}} |
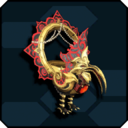
| − | {{EnemyRow|bryuringahda|UIEnemyBryuRingahda.png|Bryu Ringahda|Coast<br>Abandoned Mine<br>Seabed<br>Floating Facility|<!--DropList-->|• Left Wing<br>• Right Wing<br>• Left Spear<br>• Right Spear<br>• Rings|Element:<br>• {{icons|Wind}}{{icons|Light}}<br>Weakspots:<br>• Red Core|Boss-type Winged Falspawn. Breaking both rings temporarily knocks it down, exposing its core on the chest. The rings respawn some time after they are both broken. When the rings respawn, the core gets hidden again.}} | + | {{EnemyRow|bryuringahda|UIEnemyBryuRingahda.png|[[Bryu Ringahda]]|Coast<br>Abandoned Mine<br>Seabed<br>Floating Facility|<!--DropList-->|• Left Wing<br>• Right Wing<br>• Left Spear<br>• Right Spear<br>• Rings|Element:<br>• {{icons|Wind}}{{icons|Light}}<br>Weakspots:<br>• Red Core|Boss-type Winged Falspawn. Breaking both rings temporarily knocks it down, exposing its core on the chest. The rings respawn some time after they are both broken. When the rings respawn, the core gets hidden again.}} |
| − | {{EnemyRow|noveringahdarl|UIEnemyNoveRingahdarl.png|Nove Ringahdarl|Coast<br>Abandoned Mine<br>Seabed<br>Floating Facility|<!--DropList-->|• Left Wing<br>• Right Wing<br>• Left Spear<br>• Right Spear<br>• Rings|Element:<br>• {{icons|Wind}}{{icons|Light}}<br>Weakspots:<br>• Red Core|Rare variant of Bryu Ringahda.}} | + | {{EnemyRow|noveringahdarl|UIEnemyNoveRingahdarl.png|[[Nove Ringahdarl]]|Coast<br>Abandoned Mine<br>Seabed<br>Floating Facility|<!--DropList-->|• Left Wing<br>• Right Wing<br>• Left Spear<br>• Right Spear<br>• Rings|Element:<br>• {{icons|Wind}}{{icons|Light}}<br>Weakspots:<br>• Red Core|Rare variant of Bryu Ringahda.}} |
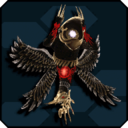
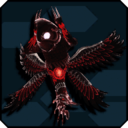
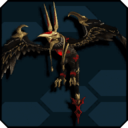
| − | {{EnemyRow|falzangel|UIEnemyFalzAngel.png|Falz Angel|Anywhere|<!--DropList-->|• Wings|Element:<br>• {{icons|Wind}}{{icons|Light}}<br>Weakspots:<br>• Red Core|The armored form of Luther. Assails his foes with an array of ranged attacks.<br><br>Breaking the wings will briefly stun him. This exposes the core, but the hitbox for the core is very small. When at low HP, he will draw you in and drain all of your PP. Afterwards, his attacks will more dangerous.}} | + | {{EnemyRow|falzangel|UIEnemyFalzAngel.png|[[Falz Angel]]|Anywhere|<!--DropList-->|• Wings|Element:<br>• {{icons|Wind}}{{icons|Light}}<br>Weakspots:<br>• Red Core|The armored form of Luther. Assails his foes with an array of ranged attacks.<br><br>Breaking the wings will briefly stun him. This exposes the core, but the hitbox for the core is very small. When at low HP, he will draw you in and drain all of your PP. Afterwards, his attacks will more dangerous.}} |
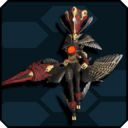
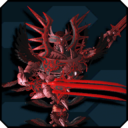
| − | {{EnemyRow|aposdorios|UIEnemyAposDorios.png|Apos Dorios|[[The Cunning Black Winged Vanguard]]|<!--DropList-->|• Pauldrons<br>• Bracelets<br>• Abdomen<br>• Tail|Element:<br>• {{icons|Wind}}{{icons|Light}}<br>Weakspots:<br>• Red Core|On spawn, it picks either Fire, Ice or Lighting as its element. This determines what its attack pattern will be.<br><br>Breaking its tail will make some of its attacks have lower range.<br><br>At low HP, it will create four pillars in the corners of the arena. They have a fair amount of HP so its recommended to get to them as soon as possible. If they are not destroyed in time, the entire party will be wiped. If they do get destroyed in time, Apos Dorios will be stunned in the middle of the arena, leaving its abdomen exposed, able to be broken.<br><br>Gets stunned by the Panic status.}} | + | {{EnemyRow|aposdorios|UIEnemyAposDorios.png|[[Apos Dorios]]|[[The Cunning Black Winged Vanguard]]|<!--DropList-->|• Pauldrons<br>• Bracelets<br>• Abdomen<br>• Tail|Element:<br>• {{icons|Wind}}{{icons|Light}}<br>Weakspots:<br>• Red Core|On spawn, it picks either Fire, Ice or Lighting as its element. This determines what its attack pattern will be.<br><br>Breaking its tail will make some of its attacks have lower range.<br><br>At low HP, it will create four pillars in the corners of the arena. They have a fair amount of HP so its recommended to get to them as soon as possible. If they are not destroyed in time, the entire party will be wiped. If they do get destroyed in time, Apos Dorios will be stunned in the middle of the arena, leaving its abdomen exposed, able to be broken.<br><br>Gets stunned by the Panic status.}} |
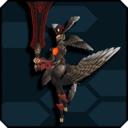
| − | {{EnemyRow|apostoltorissha|UIEnemyApostolTorissha.png|Apostol Torissha|[[The Cunning Black Winged Vanguard]]|<!--DropList-->|• Pauldrons<br>• Bracelets<br>• Abdomen<br>• Tail|Element:<br>• {{icons|Wind}}{{icons|Light}}<br>Weakspots:<br>• Red Core|Rare Variant of Apos Dorios.}} | + | {{EnemyRow|apostoltorissha|UIEnemyApostolTorissha.png|[[Apostol Torissha]]|[[The Cunning Black Winged Vanguard]]|<!--DropList-->|• Pauldrons<br>• Bracelets<br>• Abdomen<br>• Tail|Element:<br>• {{icons|Wind}}{{icons|Light}}<br>Weakspots:<br>• Red Core|Rare Variant of Apos Dorios.}} |
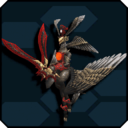
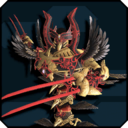
| − | {{EnemyRow|darkfalzluther|UIEnemyDarkFalzLuther.png|Dark Falz Luther|[[The False Champion: Luther the Fallen]]|<!--DropList-->|• Bracers<br>• Shoulders<br>• Clock<br>• Beak<br>• Headdress<br>• Gems|Element:<br>• {{icons|Wind}}{{icons|Light}}<br>Weakspots:<br>• Broken Clock<br>• Red Core|A Dark Falz who fell from grace and seeks vengeance. Wields the power to control time.<br><br>If the ship you are on fails to kill enough Apos Dorios to reach 100% during the Urgent Quest: [[The Cunning Black Winged Vanguard]], you will fight a fake version of Dark Falz Luther. He works the same as the real version, only difference is that he has worse drops.<br><br>Has 3 different modes he shifts between, being Normal, Fast and Slow.<br><br>Will only be in his normal mode in phase 1.<br><br>Will shift between all modes in Phase 2.<br><br>In the third phase, Luther will teleport out into the background and summon four swords. These swords will stun the entire arena. You have a couple of seconds to break the swords or they wipe the arena. You can break out of the stun by rapidly mashing your movement keys. You can also dodge getting stunned with good enough timing. The jewels on the headdress can now be broken.<br><br>In the final phase, he will spawn 2 sets of swords.<br><br>Inflicting blind on his clock will cause him to stop teleporting around and he will open the clock. Breaking the clock will leave it open for the rest of the fight. If you don't manage to break the clock in 3 tries, it will be near impossible to inflict Blind again.}} | + | {{EnemyRow|darkfalzluther|UIEnemyDarkFalzLuther.png|[[Dark Falz Luther]]|[[The False Champion: Luther the Fallen]]|<!--DropList-->|• Bracers<br>• Shoulders<br>• Clock<br>• Beak<br>• Headdress<br>• Gems|Element:<br>• {{icons|Wind}}{{icons|Light}}<br>Weakspots:<br>• Broken Clock<br>• Red Core|A Dark Falz who fell from grace and seeks vengeance. Wields the power to control time.<br><br>If the ship you are on fails to kill enough Apos Dorios to reach 100% during the Urgent Quest: [[The Cunning Black Winged Vanguard]], you will fight a fake version of Dark Falz Luther. He works the same as the real version, only difference is that he has worse drops.<br><br>Has 3 different modes he shifts between, being Normal, Fast and Slow.<br><br>Will only be in his normal mode in phase 1.<br><br>Will shift between all modes in Phase 2.<br><br>In the third phase, Luther will teleport out into the background and summon four swords. These swords will stun the entire arena. You have a couple of seconds to break the swords or they wipe the arena. You can break out of the stun by rapidly mashing your movement keys. You can also dodge getting stunned with good enough timing. The jewels on the headdress can now be broken.<br><br>In the final phase, he will spawn 2 sets of swords.<br><br>Inflicting blind on his clock will cause him to stop teleporting around and he will open the clock. Breaking the clock will leave it open for the rest of the fight. If you don't manage to break the clock in 3 tries, it will be near impossible to inflict Blind again.}} |
</table> | </table> | ||
| Line 150: | Line 150: | ||
{{EnemyHeader}} | {{EnemyHeader}} | ||
| − | {{EnemyRow|pittawadda|UIEnemyPittaWadda.png|Pitta Wadda|Daybreak Province|||{{icons|Ice}}{{icons|Light}}<br>Core<br>|}} | + | {{EnemyRow|pittawadda|UIEnemyPittaWadda.png|[[Pitta Wadda]]|Daybreak Province|||{{icons|Ice}}{{icons|Light}}<br>Core<br>|}} |
| − | {{EnemyRow|pratapicohda|UIEnemyPrataPicohda.png|Prata Picohda|Nightfall Province|||{{icons|Ice}}{{icons|Light}}<br>Core<br>|}} | + | {{EnemyRow|pratapicohda|UIEnemyPrataPicohda.png|[[Prata Picohda]]|Nightfall Province|||{{icons|Ice}}{{icons|Light}}<br>Core<br>|}} |
| − | {{EnemyRow|bomtabakuta|UIEnemyBomtaBakuta.png|Bomta Bakuta|Nightfall Province|||{{icons|Ice}}{{icons|Light}}<br>Core<br>|}} | + | {{EnemyRow|bomtabakuta|UIEnemyBomtaBakuta.png|[[Bomta Bakuta]]|Nightfall Province|||{{icons|Ice}}{{icons|Light}}<br>Core<br>|}} |
| − | {{EnemyRow|bontabeadda|UIEnemyBontaBeadda.png|Bonta Beadda|Daybreak Province|||{{icons|Ice}}{{icons|Light}}<br>Core<br>|}} | + | {{EnemyRow|bontabeadda|UIEnemyBontaBeadda.png|[[Bonta Beadda]]|Daybreak Province|||{{icons|Ice}}{{icons|Light}}<br>Core<br>|}} |
| − | {{EnemyRow|bichdarabitta|UIEnemyBichdaRabitta.png|Bichda Rabitta|Nightfall Province|||{{icons|Ice}}{{icons|Light}}<br>Core<br>|}} | + | {{EnemyRow|bichdarabitta|UIEnemyBichdaRabitta.png|[[Bichda Rabitta]]|Nightfall Province|||{{icons|Ice}}{{icons|Light}}<br>Core<br>|}} |
| − | {{EnemyRow|mudrtoykatta|UIEnemyMudrToykatta.png|Mudr Toykatta|Nightfall Province||Nose|{{icons|Ice}}{{icons|Light}}<br>Core<br>|}} | + | {{EnemyRow|mudrtoykatta|UIEnemyMudrToykatta.png|[[Mudr Toykatta]]|Nightfall Province||Nose|{{icons|Ice}}{{icons|Light}}<br>Core<br>|}} |
| − | {{EnemyRow|orotabikehta|UIEnemyOrotaBikeh_ta.png|Orota Bikehta|Nightfall Province|||{{icons|Ice}}{{icons|Light}}<br>Core<br>|}} | + | {{EnemyRow|orotabikehta|UIEnemyOrotaBikeh_ta.png|[[Orota Bikehta]]|Nightfall Province|||{{icons|Ice}}{{icons|Light}}<br>Core<br>|}} |
| − | {{EnemyRow|rotabirokehta|UIEnemyRotaBirokeh_ta.png|Rota Birokehta|Nightfall Province|||{{icons|Ice}}{{icons|Light}}<br>Core<br>|}} | + | {{EnemyRow|rotabirokehta|UIEnemyRotaBirokeh_ta.png|[[Rota Birokehta]]|Nightfall Province|||{{icons|Ice}}{{icons|Light}}<br>Core<br>|}} |
| − | {{EnemyRow|kodottaidihta|UIEnemyKodottaIdih_ta.png|Kodotta Idihta|Nightfall Province||Arm Cores<br>Leg Cores|{{icons|Ice}}{{icons|Light}}<br>Core<br>|}} | + | {{EnemyRow|kodottaidihta|UIEnemyKodottaIdih_ta.png|[[Kodotta Idihta]]|Nightfall Province||Arm Cores<br>Leg Cores|{{icons|Ice}}{{icons|Light}}<br>Core<br>|}} |
| − | {{EnemyRow|barettaidihta|UIEnemyBarettaIdih_ta.png|Baretta Idihta|Nightfall Province||Arm Cores<br>Leg Cores|{{icons|Ice}}{{icons|Light}}<br>Core<br>|}} | + | {{EnemyRow|barettaidihta|UIEnemyBarettaIdih_ta.png|[[Baretta Idihta]]|Nightfall Province||Arm Cores<br>Leg Cores|{{icons|Ice}}{{icons|Light}}<br>Core<br>|}} |
| − | {{EnemyRow|falzdranble|UIEnemyFalzDranble.png|Falz Dranble|Anywhere||Arms|{{icons|Ice}}{{icons|Light}}<br>Broken Arms|}} | + | {{EnemyRow|falzdranble|UIEnemyFalzDranble.png|[[Falz Dranble]]|Anywhere||Arms|{{icons|Ice}}{{icons|Light}}<br>Broken Arms|}} |
| − | {{EnemyRow|darkfalzgemini|UIEnemyDarkFalzGemini.png|Dark Falz Gemini|Urgent Quest||Leg Cores|{{icons|Ice}}{{icons|Light}}<br>Tongue Core<br>Leg Cores|A copy of Gemini's true form produced by the Profound Darkness.<br>Destroy the cores on its legs to stun Gemini, rendering it vulnerable.}} | + | {{EnemyRow|darkfalzgemini|UIEnemyDarkFalzGemini.png|[[Dark Falz Gemini]]|Urgent Quest||Leg Cores|{{icons|Ice}}{{icons|Light}}<br>Tongue Core<br>Leg Cores|A copy of Gemini's true form produced by the Profound Darkness.<br>Destroy the cores on its legs to stun Gemini, rendering it vulnerable.}} |
</table> | </table> | ||
| Line 178: | Line 178: | ||
==Persona== | ==Persona== | ||
{{EnemyHeader}} | {{EnemyHeader}} | ||
| − | {{EnemyRow|personathemasked|UIEnemyPersonaTheMasked.png|Persona the Masked|Anywhere|<!--DropList-->|<!--Breakpoints-->|Element:<br>• {{icons|Light}}|A mysterious Dark Falz of unknown origin. Fights using either the [[Coat Edge D]] or [[Coat Doublis D]]<br><br>Susceptible to the Panic status effect.}} | + | {{EnemyRow|personathemasked|UIEnemyPersonaTheMasked.png|[[Persona the Masked]]|Anywhere|<!--DropList-->|<!--Breakpoints-->|Element:<br>• {{icons|Light}}|A mysterious Dark Falz of unknown origin. Fights using either the [[Coat Edge D]] or [[Coat Doublis D]]<br><br>Susceptible to the Panic status effect.}} |
</table> | </table> | ||
| Line 184: | Line 184: | ||
==Infected Weapon== | ==Infected Weapon== | ||
{{EnemyHeader}} | {{EnemyHeader}} | ||
| − | {{EnemyRow|aisexoda|UIEnemyAISExoda.png|AIS Exoda|Mining Base Defense Operations: Demise|<!--DropList-->|• Leg Cores<br>• Photon Blaster|Elements:<br>• {{icons|Light}}<br>Weakpoints:<br>• Red Core|An AIS corrupted by F-Factor.<br><br>Highly resistant to AIS attacks, and becomes stronger in the presence of an AIS.<br><br>The Photon Blaster only appears when it starts to charge its laser. Destroy the gun or break both legs to stop the laser. Breaking the gun is faster, but will cause the | + | {{EnemyRow|aisexoda|UIEnemyAISExoda.png|[[AIS Exoda]]|Mining Base Defense Operations: Demise|<!--DropList-->|• Leg Cores<br>• Photon Blaster|Elements:<br>• {{icons|Light}}<br>Weakpoints:<br>• Red Core|An AIS corrupted by F-Factor.<br><br>Highly resistant to AIS attacks, and becomes stronger in the presence of an AIS.<br><br>The Photon Blaster only appears when it starts to charge its laser. Destroy the gun or break both legs to stop the laser. Breaking the gun is faster, but will cause the AIS to regain mobility and attack capabilities.<br><br>Breaking the legs causes it to kneel over, revealing the red core.<br><br>Takes 400% more damage from non-AIS sources. This applies twice for Photon Arts/Techs that do damage based on damage dealt by other sources: [[Zanverse]], [[Volkraptor]], [[Banishing Arrow]], which makes them very effective.}} |
</table> | </table> | ||
Revision as of 17:38, 25 May 2020
| Tainted Enemies | Falspawn | Draconians | Automata | Sylvants | Oceanids | Nightfallers | Special Enemies |
Contents
Insectoid Falspawn
| Enemy | Area | Drop List | Breakpoints | Weakness | Notes |
|---|---|---|---|---|---|
 |
Numerous locations | Element:
• Weakspots: • Red Core |
Insectoid Falspawn. Weak on its own, but strong in numbers. Target the core under its belly. | ||
 |
Numerous locations | Element: • Weakspots: • Red Core |
Insectoid Falspawn. Spawns from a Briarda's Dagan Egg. More powerful than a normal Dagan, but shares all of its behavior and attributes. | ||
 |
Numerous locations | Element: • Weakspots: • Red Core |
Rare variant of the El Dagan. | ||
 |
Numerous locations | Elements: • Weakspots: • Red Core |
Insectoid Falspawn. Spawns Dagan Eggs that hatch into El Dagan when they bury into the floor. Attacks from afar with powerful poison shots. Weak point is on it's back. | ||
 |
Numerous locations | Elements: • Weakspots: • Red Core |
Strong Insectoid Falspawn. Uses its stinger to attack from close range while boasting powerful rush attacks. Knock it down to disable it, but be wary of its get-up attack. | ||
 |
Planet Lillipa ARKS Ship City area |
Elements: • Weakspots: • Red Core |
Insectoid Falspawn. Uses its tiny claws to strike foes. Extremely weak. Core is on the underside. | ||
 |
Planet Amduskia Planet Lillipa ARKS Ship City area |
Elements: • Weakspots: • Red Core |
Insectoid Falspawn. Stationary fighter that uses laser beams to attack from a distance. Highly resistant to frontal damage; circle around it to strike its core. | ||
 |
Floating Continent Ruins Dragon Altar |
Elements: • Weakspots: • Red Core |
Insectoid Falspawn. Can teleport beside you and behind you. Stagger or knock them down to prevent them from teleporting. | ||
 |
Floating Continent Ruins Dragon Altar |
• Arm Blades | Elements: • Weakspots: • Red Core |
Strong Insectoid Falspawn. Uses the same strategy as Dicahdr. Neuter its offense by breaking its claws with Perfect Guards. | |
 |
Floating Continent Ruins Dragon Altar |
• Arm Blades | Element: • Weakspots: • Red Core |
Rare variant of Predicahdr. | |
 |
Mining Base | • Face • Back Core |
Elements: • Weakspots: • Broken Face • Core |
Strong Insectoid Falspawn. Defeating a Goldrahda without destroying the core on the back allows it to self-destruct afterwards. Vulnerable to Freeze status, which causes their legs to be encased in ice which causes them to temporarily be immobilized. | |
 |
Mining Base | • Face • Back Core |
Elements: • Weakspots: • Broken Face • Core |
Rare variant of Goldrahda. | |
 |
Mining Base | • Back | Elements: • Weakspots: • Red Core |
Insectoid Falspawn. Several of it's attacks inflict stun, be wary when fighting them alongside other enemies. The core is on the underside. | |
 |
Mining Base | • Back | Elements: • Weakspots: • Red Core |
Strong Insectoid Falspawn. Powers up Falspawn around it. Good priority target. | |
 |
Planet Lillipa ARKS Ship City area |
• Gwanada Bit | Elements: • Weakspots: • RedCore |
Boss-type Insectoid Falspawn. Destroying all Gwanada bits will temporarily stun the Gwanada, revealing the red core weakspot on it's belly. | |
 |
Planet Lillipa ARKS Ship City area |
Element: • Weakspots: • Red Core |
Only present when a Gwanada is around. When there are two Gwanada around, they spawn two sets of Gwanada bits. Destroying one set stuns one of the Gwanadas. | ||
 |
Planet Lillipa ARKS Ship City area |
• Gwanada Bit Nero | Elements: • Weakspots: • Red Core |
Rare Variant of Gwanada. | |
 |
Planet Lillipa ARKS Ship City area |
Elements: • Weakspots: • Red Core |
Rare Variant of Gwanada Bit. | ||
 |
Anywhere | • Front Left Leg • Front Right Leg • Back Left Leg • Back Right Leg |
Elements: • Weakspots: • Red Core |
Boss-type Insectoid Falspawn. Breaking a leg will make it fall over, exposing the weakpoint on the back of it's head. Breaking all four legs will make it fall and stay down for a longer time. Some classes can attack the weakpoint directly. |
|
 |
Anywhere | • Front Left Leg • Front Right Leg • Back Left Leg • Back Right Leg |
Elements: • Weakpoints: • Red Core |
Rare variant of the Dark Ragne. | |
 |
Mining Base Defense Operations | • Horn • Left Arm Claws • Right Arm Claws • Left Wing • Right Wing |
Elements: • Weakspots: • Horn Core • Arm Cores • Abdomen |
A strong Boss-type Insectoid Falspawn. Breaking the wings exposes it's abdomen. Damaging the legs will knock it down for a couple of seconds. Vulnerable to Panic status, which causes it to be temporarily unable to attack. At low HP, it will launch a bomb at a tower. If it isn't destroyed before the detonation, it will destroy the tower and anyone standing next to it. |
|
 |
Mining Base Defense Operations: Despair | • Horn • Left Arm Claws • Right Arm Claws • Left Wing • Right Wing |
Elements: • Weakpoints: • Horn Core • Arm Cores • Abdomen |
Stronger variant of Fal Vibrace. NOT a Tainted Falspawn despite having the visual characteristics of one. Same weaknesses as Fal Vibrace. Launches two bombs instead of one - one when it spawns, and another one at low Hp. |
|
[[Replica of [Apprentice]]] |
Advance Quest | Elements: • |
A facsimile of the second Dark Falz [Apprentice]. Relentlessly assaults foes with her Twin Dagger's rapid strikes. When at low HP, enters a rage mode, becoming stronger and faster, and summons Predicahdrs. |
||
 |
Mining Base Defense Operations: Demise | Element: • • Red Cores • Tongue |
The body of Dark Falz Apprentice trapped beneath Lillipa's surface. Turns the lower area of the map into acid on spawn. At low HP, extends a tongue that, after a couple of seconds, will fire a laser that destroys all towers. Deal enough damage to the tongue to stun her. Stunned by the Burn status. |
Aquatic Falspawn
| Enemy | Area | Drop List | Breakpoints | Weakness | Notes |
|---|---|---|---|---|---|
 |
Tundra Floating Continent Ruins |
Elements: • Weakspots: • Red Core |
Aquatic Falspawn. This enemy is almost immune to damage unless the weak point is hit. The weakpoint is on the lower back. |
||
 |
Floating Continent Ruins |
Element: • Weakspots: • Red Core |
Aquatic Falspawn. This enemy is almost immune to damage unless the weak point is hit. The weakpoint is on the upper back. |
||
 |
Tundra Floating Continent Ruins |
Element: • Weakpoints: • Red Core |
Rare variant of Mikda and Ahl Mikda. | ||
 |
Floating Continent Ruins |
Element: • Weakspots: • Red Core |
Aquatic Falspawn. Attack the core in its mouth when its open. | ||
 |
Floating Continent Ruins |
Elements: • Weakspots: •Red Core |
Aquatic Falspawn. Attack the core in its mouth when its open. It leads Dhargachas. Killing it stuns all nearby Dhargachas. | ||
 |
Floating Continent Ruins |
Elements: • Weakspots: • Red Core |
Rare Variant of Dhargash. | ||
 |
Tundra Floating Continent Ruins |
Element: • Weakspots: • Red Core |
Aquatic Falspawn. The shield is impervious to all damage. Circle around behind it to access the weakpoint. | ||
 |
Floating Continent Ruins |
Element: • Weakspots: • Red Core |
Aquatic Falspawn. The shield is impervious to all damage. Circle around behind it to access the weakpoint. | ||
 |
Ruins | Element: • Weakspot: • Red Core |
Aquatic Falspawn. When its HP gets low, it covers the weakpoint to reduce all damage taken. Inflicting Shock on it while its in this state will knock it over and re-expose the core. | ||
 |
Ruins | • Eye • Crotch |
Element: • Weakspots: • Eye • Red Core |
Strong Aquatic Falspawn. The core only becomes accessible after the crotch guard has been broken. When its eye breaks, it starts flailing its arm around wildly - keep your distance until it stops. |
|
 |
Ruins | • Eye • Crotch |
Element: • Weakspots: • Eye • Red Core |
Strong Aquatic Falspawn. The core only becomes accessible after the crotch guard has been broken. When its eye breaks, it starts flailing its mace around wildly - which, unlike Cuchronahda's arm, actually has a long range. Breaking the eye is not recommended. |
|
 |
Ruins | Element: • Weakspots: • Red Core |
Boss-type Aquatic Falspawn. The weakpoints are located on the shoulders, which means you have to hit the weakpoints manually since you can only target the belly and head. When HP is low, its attacks intensify, last longer and it speeds up overall. |
||
 |
Ruins | Element: • Weakspots: • Red Core |
Rare Variant of Wolguarda. | ||
 |
Ruins | • Cannons • Arms • Legs |
Element: • Weakspots: • Red Cores |
Boss-type Aquatic Falspawn. Zeshraider has 6 cores - one on its head, one on its chest, and 4 that are revealed by breaking each of the 4 turrets. The chest core is only vulnerable when it's knocked down. Can be knocked down by either breaking a leg and dealing additional damage, or waiting for it to pop its head out after it retreats into its shell. | |
 |
Ruins | • Cannons • Arms • Legs |
Element: • Weakspots • Red Cores |
Rare variant of Zeshraider. | |
 |
Anywhere Falspawn Den |
• Elder Pain | Element: • Weakspots: • Red Core |
The armored form of Elder. Fights up close and personal with an array of immensely strong melee attacks. Breaking Hyunal's sword lowers the damage of his sword-based attacks. The core is on Hyunal's chest and it easy to hit. At low HP, all of his attacks get an HP Debuff effect. |
|
 |
Exploration (Super Hard) The Raging Obsidian Arm |
• Fingers | Element: • Weakspots: • Red Core • Broken Fingers |
A powerful Falspawn created from the body of Elder. Smashes foes with fast, heavy-hitting attacks. Inflict damage to the fingers to destroy them and reveal the cores underneath. Immobilized by the Shock status. |
|
 |
Elder of the Unfathomable Abyss | • Wrists | Element: • Weakspots: • Forehead Core • Chest Core • Wrists |
A Dark Falz that threatened ARKS in times past. While there are cores on Elder, it is not recommended to attack them. Instead, target the red parts on his arms when he stretches them to attack. Attacking that area enough will break off the arm. The lowest arms can be ignored since they cannot be destroyed. For the first phase, ignore the upper arms and destroy all 4 middle arms, then wait for them to regrow in the next phase. Destroy the same 4 arms again, then Shock him to knock him down. When he is knocked down, destroy the 4 upper arms. |
Winged Falspawn
| Enemy | Area | Drop List | Breakpoints | Weakness | Notes |
|---|---|---|---|---|---|
 |
Coast Abandoned Mine |
Element: • Weakspots: • Red Core |
Winged Falspawn. Doesn't do much other than flying around and occasionally pecking at you. The weakpoint is on top of its head. | ||
 |
Coast Abandoned Mine |
Element:• Weakspots: • Red Core |
Winged Falspawn. Doesn't do much other than flying around and occasionally pecking at you. The weakpoint is on top of its head. | ||
 |
Coast Abandoned Mine |
Element: • Weakspots: • Red Core |
Rare variant of Shutrahda | ||
 |
Seabed | Element: • Weakspots: • Red Core |
Winged Falspawn. Capable of boosting the attack power of nearby Falspawn. Be careful of the ring it throws as it returns like a boomerang. | ||
 |
Floating Facility | Element: • Weakspots: • Red Core |
Winged Falspawn. Despite having wings, it doesn't fly. It instead runs around on the ground, laying egg-shaped bombs. The weakpoint is on the front of its chest. | ||
 |
Floating Facility | Element: • Weakspots: • Red Core |
Rare variant of the Davrune. | ||
 |
Floating Facility | Element: • Weakspots: • Red Core |
Winged Falspawn. Works like the Davrune, but looks different. | ||
 |
Coast Abandoned Mine Floating Facility |
Element: • Weakspots: • Red Core |
Winged Falspawn. If you launch them into the air, they fall to the ground and get immobilized. Once they're down on the ground, it will use a special attack to get up, so be wary. The weakpoint is in the middle of the body. | ||
 |
Coast Abandoned Mine Floating Facility |
Element: • Weakspots: • Red Core |
Rare variant of Broondarl. | ||
 |
Seabed Floating Facility |
Element: • Weakspots: • Red Core |
Winged Falspawn. Wields a Partisan and uses dark Photon Arts similar to Assault Buster. Accompanied by Guru Solda and Dwe Solda. Weakpoint is on its chest. | ||
 |
Seabed Floating Facility |
Element • Weakspots: • Red Core |
Winged Falspawn. Wields a Sword and uses dark Photon Arts similar to Twister Drop. Weakpoint is on its chest. | ||
 |
Seabed Floating Facility |
Element: • Weakspots: • Red Core |
Wields Twin Daggers and uses dark Photon Arts similar to Raging Waltz. Weakpoint is on its chest. | ||
 |
Floating Facility | Element: • Weakspots: • Red Core |
Winged Falspawn. They have the ability to teleport like the Luda Sorcerer. Uses soundwaves to stun. Weakpoint is on the chest. | ||
 |
Floating Facility | Element: • Weakspots: • Red Core |
Rare variant of Lanz Valehda. | ||
 |
Coast Abandoned Mine Floating Facility |
• Left Wing • Right Wing • |
Element: • Weakspots: • Red Core |
Strong Winged Falspawn. Break its tail to prevent it from using its barrier attack. Breaking a wing temporarily knocks it down to the ground. Breaking both wings permanently prevents it from teleporting. The weakpoint is on the chest. | |
 |
Coast Abandoned Mine Seabed Floating Facility |
• Left Claw • Right Claw • Upper Segment • Middle Segment • Lower Segment |
Element: • Weakspots: • Red Core • Head • Broken Claws • Body Segments |
Boss-Type Winged Falspawn. Destroying the segmented body parts makes it collapse and fall down, revealing the core on top of its head. Vulnerable to Blind status which will temporarily immobilize it. | |
 |
Coast Abandoned Mine Seabed Floating Facility |
Element: • Weakspots: • Red Core • Head • Broken Claws • Body Segments |
Rare variant of Dekor Maryuda. | ||
 |
Coast Abandoned Mine Seabed Floating Facility |
• Left Wing • Right Wing • Left Spear • Right Spear • Rings |
Element: • Weakspots: • Red Core |
Boss-type Winged Falspawn. Breaking both rings temporarily knocks it down, exposing its core on the chest. The rings respawn some time after they are both broken. When the rings respawn, the core gets hidden again. | |
 |
Coast Abandoned Mine Seabed Floating Facility |
• Left Wing • Right Wing • Left Spear • Right Spear • Rings |
Element: • Weakspots: • Red Core |
Rare variant of Bryu Ringahda. | |
 |
Anywhere | • Wings | Element: • Weakspots: • Red Core |
The armored form of Luther. Assails his foes with an array of ranged attacks. Breaking the wings will briefly stun him. This exposes the core, but the hitbox for the core is very small. When at low HP, he will draw you in and drain all of your PP. Afterwards, his attacks will more dangerous. |
|
 |
The Cunning Black Winged Vanguard | • Pauldrons • Bracelets • Abdomen • Tail |
Element: • Weakspots: • Red Core |
On spawn, it picks either Fire, Ice or Lighting as its element. This determines what its attack pattern will be. Breaking its tail will make some of its attacks have lower range. At low HP, it will create four pillars in the corners of the arena. They have a fair amount of HP so its recommended to get to them as soon as possible. If they are not destroyed in time, the entire party will be wiped. If they do get destroyed in time, Apos Dorios will be stunned in the middle of the arena, leaving its abdomen exposed, able to be broken. Gets stunned by the Panic status. |
|
 |
The Cunning Black Winged Vanguard | • Pauldrons • Bracelets • Abdomen • Tail |
Element: • Weakspots: • Red Core |
Rare Variant of Apos Dorios. | |
 |
The False Champion: Luther the Fallen | • Bracers • Shoulders • Clock • Beak • Headdress • Gems |
Element: • Weakspots: • Broken Clock • Red Core |
A Dark Falz who fell from grace and seeks vengeance. Wields the power to control time. If the ship you are on fails to kill enough Apos Dorios to reach 100% during the Urgent Quest: The Cunning Black Winged Vanguard, you will fight a fake version of Dark Falz Luther. He works the same as the real version, only difference is that he has worse drops. Has 3 different modes he shifts between, being Normal, Fast and Slow. Will only be in his normal mode in phase 1. Will shift between all modes in Phase 2. In the third phase, Luther will teleport out into the background and summon four swords. These swords will stun the entire arena. You have a couple of seconds to break the swords or they wipe the arena. You can break out of the stun by rapidly mashing your movement keys. You can also dodge getting stunned with good enough timing. The jewels on the headdress can now be broken. In the final phase, he will spawn 2 sets of swords. Inflicting blind on his clock will cause him to stop teleporting around and he will open the clock. Breaking the clock will leave it open for the rest of the fight. If you don't manage to break the clock in 3 tries, it will be near impossible to inflict Blind again. |
Toy Falspawn
| Enemy | Area | Drop List | Breakpoints | Weakness | Notes |
|---|---|---|---|---|---|
 |
Daybreak Province | Core |
|||
 |
Nightfall Province | Core |
|||
 |
Nightfall Province | Core |
|||
 |
Daybreak Province | Core |
|||
 |
Nightfall Province | Core |
|||
 |
Nightfall Province | Nose | Core |
||
 |
Nightfall Province | Core |
|||
 |
Nightfall Province | Core |
|||
 |
Nightfall Province | Arm Cores Leg Cores |
Core |
||
 |
Nightfall Province | Arm Cores Leg Cores |
Core |
||
 |
Anywhere | Arms | Broken Arms |
||
 |
Urgent Quest | Leg Cores | Tongue Core Leg Cores |
A copy of Gemini's true form produced by the Profound Darkness. Destroy the cores on its legs to stun Gemini, rendering it vulnerable. |
Persona
| Enemy | Area | Drop List | Breakpoints | Weakness | Notes |
|---|---|---|---|---|---|
 |
Anywhere | Element: • |
A mysterious Dark Falz of unknown origin. Fights using either the Coat Edge D or Coat Doublis D Susceptible to the Panic status effect. |
Infected Weapon
| Enemy | Area | Drop List | Breakpoints | Weakness | Notes |
|---|---|---|---|---|---|
 |
Mining Base Defense Operations: Demise | • Leg Cores • Photon Blaster |
Elements: • Weakpoints: • Red Core |
An AIS corrupted by F-Factor. Highly resistant to AIS attacks, and becomes stronger in the presence of an AIS. The Photon Blaster only appears when it starts to charge its laser. Destroy the gun or break both legs to stop the laser. Breaking the gun is faster, but will cause the AIS to regain mobility and attack capabilities. Breaking the legs causes it to kneel over, revealing the red core. Takes 400% more damage from non-AIS sources. This applies twice for Photon Arts/Techs that do damage based on damage dealt by other sources: Zanverse, Volkraptor, Banishing Arrow, which makes them very effective. |
