Difference between revisions of "Nightfall Province Exploration"
Jump to navigation
Jump to search
m (→Additional Info: Basic info about 500points/1000points quest completion methods.) |
SleepyMiru (talk | contribs) (Added most of the enemies that can appear in Nightfall, including from Nightfall-specific Emergency Trials.) |
||
| Line 74: | Line 74: | ||
==Enemies== | ==Enemies== | ||
| + | <table class="wikitable table-responsive-md" style="text-align:left"> | ||
| + | <tr> | ||
| + | <th colspan="4">Regular Enemies</th> | ||
| + | </tr> | ||
| + | <tr> | ||
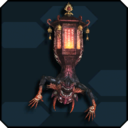
| + | <td style='border-style: none none none solid;'><div class="text-center">[[File:UIEnemyPajigwan.png|center|128px|link="Pajigwan"]]</div><div class="text-center"><span style="position: absolute; top: 79px"></span><strong>[[Pajigwan]]</strong></div></td> | ||
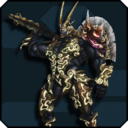
| + | <td style='border-style: none none none none;'><div class="text-center">[[File:UIEnemyKodoniagari.png|center|128px|link="Kodoniagari"]]</div><div class="text-center"><span style="position: absolute; top: 79px"></span><strong>[[Kodoniagari]]</strong></div></td> | ||
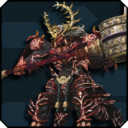
| + | <td style='border-style: none none none none;'><div class="text-center">[[File:UIEnemyItagizakri.png|center|128px|link="Itagizakri"]]</div><div class="text-center"><span style="position: absolute; top: 79px"></span><strong>[[Itagizakri]]</strong></div></td> | ||
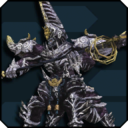
| + | <td style='border-style: none solid none none;'><div class="text-center">[[File:UIEnemyOrogrel.png|center|128px|link="Orogrel"]]</div><div class="text-center"><span style="position: absolute; top: 79px"></span><strong>[[Orogrel]]</strong></div></td> | ||
| + | </tr> | ||
| + | <tr> | ||
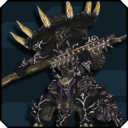
| + | <td style='border-style: none none none solid;'><div class="text-center">[[File:UIEnemyBanOgakibar.png|center|128px|link="Ban Ogakibar"]]</div><div class="text-center"><span style="position: absolute; top: 79px"></span><strong>[[Ban Ogakibar]]</strong></div></td> | ||
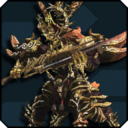
| + | <td style='border-style: none none none none;'><div class="text-center">[[File:UIEnemyBorOgakibar.png|center|128px|link="Bor Ogakibar"]]</div><div class="text-center"><span style="position: absolute; top: 79px"></span><strong>[[Bor Ogakibar]]</strong></div></td> | ||
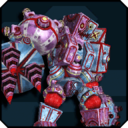
| + | <td style='border-style: none none none none;'><div class="text-center">[[File:UIEnemyGauOgakibar.png|center|128px|link="Gau Ogakibar"]]</div><div class="text-center"><span style="position: absolute; top: 79px"></span><strong>[[Gau Ogakibar]]</strong></div></td> | ||
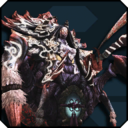
| + | <td style='border-style: none solid none none;'><div class="text-center">[[File:UIEnemyGolOgabar.png|center|128px|link="Gol Ogabar"]]</div><div class="text-center"><span style="position: absolute; top: 79px"></span><strong>[[Gol Ogabar]]</strong></div></td> | ||
| + | </tr> | ||
| + | <tr> | ||
| + | <td style='border-style: none none none solid;'><div class="text-center">[[File:UIEnemyPittaWadda.png|center|128px|link="Pitta Wadda"]]</div><div class="text-center"><span style="position: absolute; top: 79px"></span><strong>[[Pitta Wadda]]</strong></div></td> | ||
| + | <td style='border-style: none none none none;'><div class="text-center">[[File:UIEnemyPrataPicohda.png|center|128px|link="Prata Picohda"]]</div><div class="text-center"><span style="position: absolute; top: 79px"></span><strong>[[Prata Picohda]]</strong></div></td> | ||
| + | <td style='border-style: none none none none;'><div class="text-center">[[File:UIEnemyBomtaBakuta.png|center|128px|link="Bomta Bakuta"]]</div><div class="text-center"><span style="position: absolute; top: 79px"></span><strong>[[Bomta Bakuta]]</strong></div></td> | ||
| + | <td style='border-style: none solid none none;'><div class="text-center">[[File:UIEnemyBichdaRabitta.png|center|128px|link="Bichda Rabitta"]]</div><div class="text-center"><span style="position: absolute; top: 79px"></span><strong>[[Bichda Rabitta]]</strong></div></td> | ||
| + | </tr> | ||
| + | <tr> | ||
| + | <td style='border-style: none none solid solid;'><div class="text-center">[[File:UIEnemyMudrToykatta.png|center|128px|link="Mudr Toykatta"]]</div><div class="text-center"><span style="position: absolute; top: 79px"></span><strong>[[Mudr Toykatta]]</strong></div></td> | ||
| + | <td style='border-style: none none solid none;'><div class="text-center">[[File:UIEnemyOrotaBikeh_ta.png|center|128px|link="Orota Bikehta"]]</div><div class="text-center"><span style="position: absolute; top: 79px"></span><strong>[[Orota Bikehta]]</strong></div></td> | ||
| + | <td style='border-style: none none solid none;'></td> | ||
| + | <td style='border-style: none solid solid none;'></td> | ||
| + | </tr> | ||
| + | </table> | ||
| + | <table class="wikitable table-responsive-md" style="text-align:left"> | ||
| + | <tr> | ||
| + | <th colspan="4">Emergency Trial Enemies</th> | ||
| + | </tr> | ||
| + | <tr> | ||
| + | <td style='border-style: none none solid solid;'><div class="text-center">[[File:UIEnemyBontaBeadda.png|center|128px|link="Bonta Beadda"]]</div><div class="text-center"><span style="position: absolute; top: 79px"></span><strong>[[Bonta Beadda]]</strong></div></td> | ||
| + | <td style='border-style: none none solid none;'><div class="text-center">[[File:UIEnemyKodottaIdih_ta.png|center|128px|link="Kodotta Idihta"]]</div><div class="text-center"><span style="position: absolute; top: 79px"></span><strong>[[Kodotta Idihta]]</strong></div></td> | ||
| + | <td style='border-style: none solid solid none;'><div class="text-center">[[File:UIEnemyGwahlJigmolde.png|center|128px|link="Gwahl Jigmolde"]]</div><div class="text-center"><span style="position: absolute; top: 79px"></span><strong>[[Gwahl Jigmolde]]</strong></div></td> | ||
| + | </tr> | ||
| + | </table> | ||
| + | <small>* Other than Gol Okabar, does not include rare enemies and enemies from universal E-Trials.</small> | ||
==Additional Info== | ==Additional Info== | ||
* Upon collecting 500 Quest Points, a Telepipe will appear to lead the party to Area 2, which houses the boss. Should the party not take the Telepipe and cumulate 1000 Quest Points, the quest will be completed and the Telepipe can lead to the Gateway Ship. | * Upon collecting 500 Quest Points, a Telepipe will appear to lead the party to Area 2, which houses the boss. Should the party not take the Telepipe and cumulate 1000 Quest Points, the quest will be completed and the Telepipe can lead to the Gateway Ship. | ||
* If the party attempts to visit the boss with 1000 Quest Points in hand, the boss will not appear. | * If the party attempts to visit the boss with 1000 Quest Points in hand, the boss will not appear. | ||
Revision as of 06:59, 3 November 2020
| Nightfall Province Exploration | |
|---|---|

| |
| Quest Type | Expeditions |
| -Difficulty- | |
| Normal | Level 20 and up |
| Hard | Level 40 and up |
| Very Hard | Level 55 and up |
| Super Hard | Level 70 and up |
| -Quest Details- | |
| Location | Harukotan |
| Single/Multi-Party | |
| Party Invitation | Allowed |
| Ally Assistance | Allowed |
| -Conditions For Acceptance- | |
| Normal | No Level Restrictions |
| Hard | Level 20 and up Complete a special Client Order |
| Very Hard | Level 40 and up Complete a special Client Order |
| Super Hard | Level 50 and up Possess a Super Hard Difficulty Permit |
| Restrictions | |
| Time Limit | None |
| Damage Limit | None |
| Ability Adjust | None |
Quest Objective
Collect Quest Points!
Quest Description
Your objective is to explore Nightfall Province that exists in opposition to Daybreak Province on planet Harukotan
All personnel are authorized to search Daybreak Province at will.
Complete this quest by obtaining 1,000 Quest Points.
Enemies
| Regular Enemies | |||
|---|---|---|---|
 |
 |
 |
 |
 |
 |
 |
 |
 |
 |
 |
 |
 |
 |
||
| Emergency Trial Enemies | |||
|---|---|---|---|
 |
 |
 |
|
* Other than Gol Okabar, does not include rare enemies and enemies from universal E-Trials.
Additional Info
- Upon collecting 500 Quest Points, a Telepipe will appear to lead the party to Area 2, which houses the boss. Should the party not take the Telepipe and cumulate 1000 Quest Points, the quest will be completed and the Telepipe can lead to the Gateway Ship.
- If the party attempts to visit the boss with 1000 Quest Points in hand, the boss will not appear.