Difference between revisions of "Desert Exploration"
Jump to navigation
Jump to search
(Created Quest) |
SleepyMiru (talk | contribs) (Added most of the enemies that can appear in Desert, as well as added info about the rare version of Area 2.) |
||
| Line 74: | Line 74: | ||
==Enemies== | ==Enemies== | ||
| + | <table class="wikitable table-responsive-md" style="text-align:left"> | ||
| + | <tr> | ||
| + | <th colspan="4">Regular Enemies</th> | ||
| + | </tr> | ||
| + | <tr> | ||
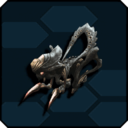
| + | <td style='border-style: none none none solid;'><div class="text-center">[[File:UIEnemyKrahda.png|center|128px|link="Krahda"]]</div><div class="text-center"><span style="position: absolute; top: 79px"></span><strong>[[Krahda]]</strong></div></td> | ||
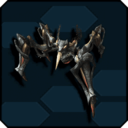
| + | <td style='border-style: none none none none;'><div class="text-center">[[File:UIEnemyDagan.png|center|128px|link="Dagan"]]</div><div class="text-center"><span style="position: absolute; top: 79px"></span><strong>[[Dagan]]</strong></div></td> | ||
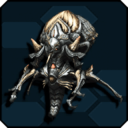
| + | <td style='border-style: none none none none;'><div class="text-center">[[File:UIEnemyBriarda.png|center|128px|link="Briarda"]]</div><div class="text-center"><span style="position: absolute; top: 79px"></span><strong>[[Briarda]]</strong></div></td> | ||
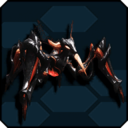
| + | <td style='border-style: none solid none none;'><div class="text-center">[[File:UIEnemyElDagan.png|center|128px|link="El Dagan"]]</div><div class="text-center"><span style="position: absolute; top: 79px"></span><strong>[[El Dagan]]</strong></div></td> | ||
| + | </tr> | ||
| + | <tr> | ||
| + | <td style='border-style: none none solid solid;'><div class="text-center">[[File:UIEnemyElArda.png|center|128px|link="El Arda"]]</div><div class="text-center"><span style="position: absolute; top: 79px"></span><strong>[[El Arda]]</strong></div></td> | ||
| + | <td style='border-style: none none solid none;'><div class="text-center">[[File:UIEnemyCarthago.png|center|128px|link="Carthago"]]</div><div class="text-center"><span style="position: absolute; top: 79px"></span><strong>[[Carthago]]</strong></div></td> | ||
| + | <td style='border-style: none none solid none;'><div class="text-center">[[File:UIEnemySpardunA.png|center|128px|link="Spardun A"]]</div><div class="text-center"><span style="position: absolute; top: 79px"></span><strong>[[Spardun A]]</strong></div></td> | ||
| + | <td style='border-style: none solid solid none;'></td> | ||
| + | </tr> | ||
| + | </table> | ||
| + | <table class="wikitable table-responsive-md" style="text-align:left"> | ||
| + | <tr> | ||
| + | <th colspan="4">Emergency Trial Enemies</th> | ||
| + | </tr> | ||
| + | <tr> | ||
| + | <td style='border-style: none none none solid;'><div class="text-center">[[File:UIEnemySpargun.png|center|128px|link="Spargun"]]</div><div class="text-center"><span style="position: absolute; top: 79px"></span><strong>[[Spargun]]</strong></div></td> | ||
| + | <td style='border-style: none none none none;'><div class="text-center">[[File:UIEnemySignogun.png|center|128px|link="Signogun"]]</div><div class="text-center"><span style="position: absolute; top: 79px"></span><strong>[[Signogun]]</strong></div></td> | ||
| + | <td style='border-style: none none none none;'><div class="text-center">[[File:UIEnemyGillnas.png|center|128px|link="Gillnas"]]</div><div class="text-center"><span style="position: absolute; top: 79px"></span><strong>[[Gillnas]]</strong></div></td> | ||
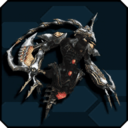
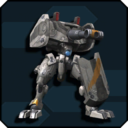
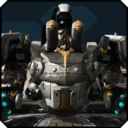
| + | <td style='border-style: none solid none none;'><div class="text-center">[[File:UIEnemyTranmizer.png|center|128px|link="Tranmizer"]]</div><div class="text-center"><span style="position: absolute; top: 79px"></span><strong>[[Tranmizer]]</strong></div></td> | ||
| + | </tr> | ||
| + | <tr> | ||
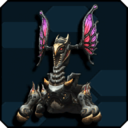
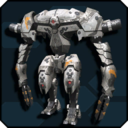
| + | <td style='border-style: none none solid solid;'><div class="text-center">[[File:UIEnemyGwanada.png|center|128px|link="Gwanada"]]</div><div class="text-center"><span style="position: absolute; top: 79px"></span><strong>[[Gwanada]]</strong></div></td> | ||
| + | <td style='border-style: none none solid none;'></td> | ||
| + | <td style='border-style: none none solid none;'></td> | ||
| + | <td style='border-style: none solid solid none;'></td> | ||
| + | </table> | ||
| + | <small>* Not including rare enemies and enemies from universal E-Trials.</small> | ||
| + | ==Additional Info== | ||
| + | Rarely upon entering Area 2, a special version of the area with only the entrance, a single large area and the exit to Area 3 will appear in place of the normal area generation. The only thing that players will encounter in this area is a single Emergency Code: Duel that will feature either of the following enemies. | ||
| − | == | + | <table class="wikitable table-responsive-md" style="text-align:left"> |
| + | <tr> | ||
| + | <th colspan="4">Special Area 2</th> | ||
| + | </tr> | ||
| + | <tr> | ||
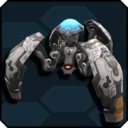
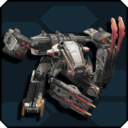
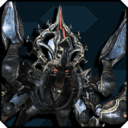
| + | <td style='border-style: none solid solid solid;'><div class="text-center">[[File:UIEnemyBigVarder.png|center|128px|link="Big Varder"]]</div><div class="text-center"><span style="position: absolute; top: 79px"></span><strong>[[Big Varder]]</strong></div></td> | ||
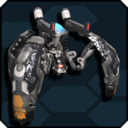
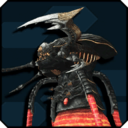
| + | <td style='border-style: none solid solid none;'><div class="text-center">[[File:UIEnemyDarkRagne.png|center|128px|link="Dark Ragne"]]</div><div class="text-center"><span style="position: absolute; top: 79px"></span><strong>[[Dark Ragne]]</strong> x2</div></td> | ||
| + | </tr> | ||
| + | </table> | ||
Revision as of 22:56, 30 October 2020
| Desert Exploration | |
|---|---|

| |
| Quest Type | Expeditions |
| -Difficulty- | |
| Normal | Level 14 and up |
| Hard | Level 33 and up |
| Very Hard | Level 43 and up |
| Super Hard | Level 63 and up |
| -Quest Details- | |
| Location | Lillipa |
| Single/Multi-Party | |
| Party Invitation | Allowed |
| Ally Assistance | Allowed |
| -Conditions For Acceptance- | |
| Normal | No Level Restrictions |
| Hard | Level 20 and up Complete a special Client Order |
| Very Hard | Level 40 and up Complete a special Client Order |
| Super Hard | Level 50 and up Possess a Super Hard Difficulty Permit |
| Restrictions | |
| Time Limit | None |
| Damage Limit | None |
| Ability Adjust | None |
Quest Objective
Get to the final area!
Quest Description
You have been tasked with exploring the Desert region which completely covers the surface of the planet Lillipa.
All operatives are free to search the Desert at will.
Complete this quest by defeating the enemies in the final area.
Enemies
| Regular Enemies | |||
|---|---|---|---|
 |
 |
 |
 |
 |
 |
 |
|
| Emergency Trial Enemies | |||
|---|---|---|---|
 |
 |
 |
 |
 |
|||
* Not including rare enemies and enemies from universal E-Trials.
Additional Info
Rarely upon entering Area 2, a special version of the area with only the entrance, a single large area and the exit to Area 3 will appear in place of the normal area generation. The only thing that players will encounter in this area is a single Emergency Code: Duel that will feature either of the following enemies.
| Special Area 2 | |||
|---|---|---|---|
 |
 Dark Ragne x2 |
||